User:PigeonGuru/Archive
Defense tactics/structures
Weapons (melee charge)
- High-DPS single-target weapons are optimal in this situation. Focus fire to break down shields and quickly down the exposed enemy.
- EMP weapons can be used to devastating effect by knocking out their shields with 1 hit. A lucky hit with an EMP shell can take out most of the shields in a melee raid.
- Explosive weapons may be used to break their shields, though they block the entire explosion so a single explosion won't hurt them much. They should be used in conjunction with EMP weapons if you're looking for #damage.
- Incendiary weapons penetrate the shield and set the raider on fire, distracting them. While their shields continue to block gunfire, the distraction makes it easier for them to be broken, as well as scatters enemies apart.
- Sniper rifles are capable of breaking a weaker shield with a single shot. Combined with their long range, this makes them a good supporting weapon to weaken an incoming charge.
- The Firefoam popper is a surprisingly effective option in this situation. In addition to spreading a wide field of foam over the ground that slows down anyone walking over it, the popper will deplete shields, stripping melee attackers of their crucial protection.
Weapons (manhunters)
High DPS weapons are good at taking down packs at close to medium range.
Long-ranged weapons work to provide long-distance firepower when paired with other high damage weapons, but are inadequate on their own.
The sniper rifle works well against larger animals, but is poor against hard-to-hit small animals, as a missed shot is punishing due to its long reload, and its high damage is grossly overkill.
Longswords, or any other high-damage melee weapon, are a must-have to fight off animals at melee range, which often happens with fast animals.
Crowd control
The Minigun is an excellent weapon against manhunter packs of any size. At a distance, it can destroy the tightly packed groups of incoming animals, while at point-blank, it can rip large animals to shreds, often with just a single barrage of bullets. Aim for an animal in the middle of the pack, and the bullets will hit others around it as well.
Chain shotguns are also a good choice at defeating manhunter packs at close to point-blank range, though its short range makes it risky to use against faster enemies.
Explosives are excellent at clearing out manhunter packs, when used carefully. They can hit a lot of animals at once, and don't miss easily, especially against small animals which can evade bullets.
- Rocket launchers are an effective yet easy-to-use one-use solution. Be careful when using them near your base or colonists though, and disengage if animals come dangerously close to allies.
- The Doomsday rocket launcher can obliterate a swarm of smaller animals using its giant incendiary blast.
- The Triple rocket launcher excels against larger animals with its high damage 3-round salvo.
- Mortars aren't very useful as animals generally run faster than the mortars can hit, but if you have a kiting colonist or trained animals distracting them and you aim ahead, you can still achieve great results.
- Grenades are good for groups, but are too short-ranged to be safe to use against raging animals.
Distraction structures
Once you have lots of bulk materials, but don't have enough industry to build proper defenses, you can build an distractions to temporarily delay raids.
Doing this can delay raids in early-mid game if you have the effort and materials, but as you enter mid-late game it's better that you replace the suppressor with something else, such as a killbox, which can actually bring the hurt.
Attention suppressor
Start like you're making a 29-wide room, but instead of doors, just leave one-tile openings at opposite ends. That way it doesn't get a roof. If needed, use a no roof area. Down the middle of the attention suppressor leave an open path, which will actually be traveled by your colonists. Pack the sides with alternating walls, leaving numerous blind alleys branching off the open path. The attention suppressor should look like two giant combs facing each other across the path.
A raider entering through an attention suppressor is presented with numerous blind alleys, each one of which could hold something important (in their perspective). Raiders will typically only resist the lure of a dozen or so blind alleys, before turning off into one to look for something to attack. In many cases they'll attack the walls, but the general effect is that a raiding force will spend a long time milling around in the attention suppressor, deeply distracted, and slowly trickle out of it toward your base alone, or (for a large raid) in twos and threes. This slow trickle of raiders is easily handled by a few colonists with basic weapons, or later a few turrets and a repairman.
Colonists and visitors with specific business on one side or the other of the attention suppressor will go quickly down the middle without being distracted. However, colonists pursuing joy activities like going for a walk will usually be diverted to do so in the blind alleys of the attention suppressor. As a result, it's not safe to fill with deathtraps.
Pros
- Effectively distracts and delays raiders
Cons
- Does not deal damage
- Takes up large amounts of space
- Expensive and time-consuming to build a lot of walls
- Makes it harder to eliminate all raiders at once
Dummy power grid
Place many wires randomly around the area. This causes enemies to stop and ignite or fight the wires, delaying them.
Note that they will charge immediately upon seeing colonists so this is a measure to buy time at best.
Weapon stuff
revolver Unarmored
For the unarmored testing, all pawns were completely naked.
| Other Weapon | 3 | 7 | 12 | 18 | 25 | 32 | 40 |
|---|---|---|---|---|---|---|---|
| Autopistol | 34.35% | 36.35% | 42.38% | 43.55% | 42.35% | - | - |
| Pump Shotgun | 33.28% | 32.65% | 29.64% | - | - | - | - |
| Bolt-Action Rifle | 72.00% | 64.80% | 56.60% | 41.95% | 24.50% | - | - |
| Greatbow | 83.71% | 74.36% | 65.70% | 54.72% | 39.98% | - | - |
autopistol Unarmored
For the unarmored testing, all pawns were completely naked.
| Other Weapon | 3 | 7 | 12 | 18 | 25 | 32 | 40 |
|---|---|---|---|---|---|---|---|
| Machine Pistol | 9.95% | 20.95% | 27.52% | 28.44% | - | - | - |
| Revolver | 65.65% | 63.65% | 57.62% | 56.45% | 57.65% | - | - |
| Pump Shotgun | 48.85% | 41.51% | 37.68% | - | - | - | - |
| Bolt-Action Rifle | 83.81% | 75.01% | 66.47% | 51.25% | 27.52% | - | - |
| Greatbow | 90.40% | 80.90% | 74.45% | 60.70% | 45.25% | - | - |
Ice sheet guide (new)
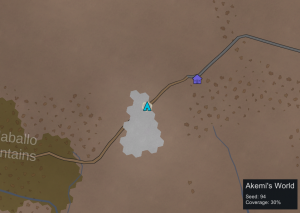
This guide details how to survive in one of the most hostile environments in Rimworld - an ice sheet. We focus on the Lost Tribe start because it is the hardest one to thrive in hostile environments since you got more people to feed and less technology to help you.
Introduction
Ice sheets are the coldest option of cold maps. They have very little animal life and no plants. In fact, you should not expect to find anything more than five snowhares in your start. You should also not expect to see more than one new snowhare every five days and one new polar bear per month.
In addition to that, they do not have any soil available, if you wanna grow something you would be doing it in stony patches around hills and mountains. But you can not, because it is too cold outside. You will struggle a lot until you get a heater and a sun lamp, then you can plant something indoors.
Even the warmest ice sheet it really cold. Their average varies from -20 °C (-4 °F) to -40 °C (-40 °F) and they never have growing periods due to the temperature. You still need to eventually make a freezer though, because the summer temperature is hot enough to spoil your food. You should expect to have problems with hypothermia during fall, winter, spring and during cold snaps in summers.
Landing site
In all maps you should to choose carefully your landing site to increases your chances of survival. You want to build a colony in an area with some of the following characteristics:
- Near to tundra (faster moving around)
- Near to a friendly faction base (faster trading)
- Near to a road (faster moving around)
- Without many mountains around (faster moving around)
- With coast (to turn into large growing areas later)
- With caves (early food source)
Ice sheets do not have roads or rivers, but that does not mean you can not settle close to a road. While you should not be surrounded by mountains, the landing site itself can be mountainous.
Of course you do not need to land in an area in all those characteristics, but try to get as many of them as you can.
Starting colonists
Ice sheet is so harsh that you will have to resort to cannibalism, so you wanna have a crew that can tolerate that. That means having one butcher that does not mind butchering people and everyone resistant to mental breaks.
Your butcher should be either Cannibal, Bloodlust or Psychopath.
And all your crew should ideally be either Cannibal, Sanguine, Optimist, Iron-Willed, Steadfast or Masochist with scars. Couples also enjoy extra happiness so try to bring couples instead of bachelors, likewise Beautiful and Pretty colonists are also good since they are more likely to became in love with someone.
Surely you do not need to have all five starting colonists with those characteristics, but the more resistant colonists you have the better.
Base area
Once you choose your landing site and colonists you should also choose your base area. It is important to notice that this area does not need to be final, it is just the area where you are more likely to survive the early game.
You want to find an area with the characteristics: near steam geysers, near steel, more growing areas and more easily defendable.
More growing areas means more stony patches and more easily defendable area is an area with few entrances where you gonna lay down your traps. Your priority is steam geysers. You have to make the base on top of a steam geyser, otherwise you will die of hypothermia very fast.
Since you do not have trees, you can not build a big base yet. You can then either take a ruin, make a cave or make a small steel base. It all comes down to what you have near the steam geysers. If you have a ruin, take it. If you have a hill, make a cave. If you have none of these, make a small steel base.
First agenda
- Get some easily accessible steel and use it to build your stuff, so you do not have to use wood.
- Make your starter base on top of a steam geyser. Give people a place to sleep, eat and play.
- Hunt those snowhares before they leave the map.
- Kill your starting animals.
- Only use wood to make campfires, either for cooking or heating up. Make sure your wood is forbidden so they do not refuel it unnecessarily.
- Get rid of some colonists.
Notes
Now you gonna be struggling for food for a long time. If you have caves in your map, it will help a lot. You wanna keep the insects alive, so make sure to seal off the caves so that they do not freeze during winter and the hive does not dies due to lack of maintenance. Enjoy while it is warm and go visit your nearby friendly base to trade whatever you can for food. For that, you gotta get something you can trade:
- You can mine expensive things like components, plasteel, uranium, jade, silver or gold.
- You can open the ancient shrine and sell whatever you find there.
Regardless, you still will not have enough food for five people for so long, you simply have to get rid of some of them. The best way is to put some of them inside the ancient cryptosleep caskets.
You can also send some people out while it is warm to raid the closest base outside the ice sheet, try to not raid your closest friendly neighbor. Hunt the animals and harvest the plants around the base and run back to your base. You can make peace with them later. You have to bring the colonists back in the beginning of next season before it gets too cold.
Another more undesirable option is to sell some colonists. They are usually worth a lot, but do not expect to see them again.
Likewise, another even worse option is to kill some colonists, but they are not worth many meals.
But you gotta do something, feeding five people will not happen. Three people is about what you can you feed.
Second agenda
- Make a killbox.
- Make steel deadfall traps.
- Eat any raider that shows up.
- Eat any wanderers that decides to join.
- Eat anyone who arrive in a escape pod.
- Offer help to any refugee being chased. Then eat him. Also eat the raiders following him.
- Wear their tainted parkas and tuques.
- Buy cloth from your neighbors.
- Make your research bench and start researching complex clothing. Once you done, make parkas and tuques with your cloth.
- Make human leather bedrolls.
- Make lots of dusters with all the human leather and sell it.
Notes
Now the cannibalism starts, you will eat anyone that is not one of your starting colonists or from a friendly faction. That includes anyone who tries to join your colony, that also means offering help to refugees just so you can eat them later. You also better be sure you got clothes before fall starts.
You will not have time to make your own clothes, you will have to use the raiders tainted clothes. Try to get some of them alive, drop them near your base, strip them and kill them. That way, their clothes will not be tainted. But you should also buy cloth to ensure everyone has a parka and a tuque.
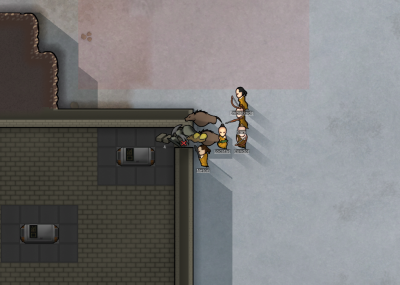
Since you gonna often offer help to refugees, you better make a proper killbox with lots of deadfall traps. The fighting starts outside though, with all the ice and snow the raiders gonna be really slow. Shot them while they are approaching because it takes a while for them to move to cover. Then once they are in cover, go back to your killbox.
Remember that human leather is worth a lot and it is better to make something with it first, then sell it. First give your colonists bedrolls to sleep, then make dusters since they are more profitable then anything else. Cannibal and Bloodlust colonists will want to wear human leather clothes, give them human leather button-down shirts and human leather pants, but do not give them human leather parkas. The material is just too bad at insulating.
Third agenda
- Research complex furniture. Once you done, make steel beds.
- Go get item stashes so you can hunt and harvest in the area.
- Go help incapacitated refugees so you can hunt and harvest in the area. Then eat him.
- Go rescue prisoners in outposts so you can hunt and harvest in the area. Then eat them all.
- Go destroy enemy outposts so you can hunt and harvest in the area. Then eat them all.
- Replace the less insulating parkas for cloth parkas.
- Research stone cutting so you can start using stone instead of steel.
Notes
Once you have your colonists with parkas and tuques you should take every opportunity available to go to another map. If you placed your colony near tundra, then it is likely that the quests will appear in tundra maps and that they will have much more resources than your frozen home.
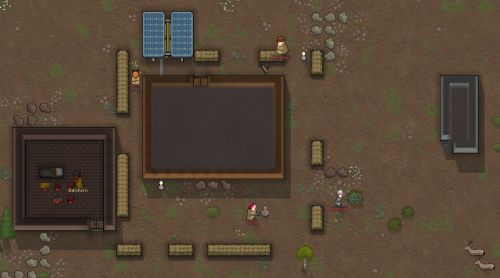
Whenever you reach a quest location, you wanna look for berries, healroot, animals and wood. Animals should be butchered before leaving, if the meat is too heavy and you still have time you can use the local wood to make lots of campfires and turn all into meals to reduce weight.
Winter is coming, it is gonna so cold that not any parka will do. Anything with worse insulation than cloth should be replaced by cloth. Cloth is average in insulation but really cheap to buy.
Fourth agenda
- Replace the cloth parkas for better insulating parkas.
- Use stone to reinforce your walls with a second layer for better insulation.
- Research electricity.
- Research battery.
Notes
Now it is cold, so cold that even cloth parkas are not enough.
Try to replace your cloth(cold insulation 18) for bearskin(cold insulation 20), bluefur(cold insulation 20), foxfur(cold insulation 20), devilstrand(cold insulation 20), alpaca wool(cold insulation 22), synthread(cold insulation 22), wolfskin(cold insulation 24), muffalo wool(cold insulation 24), megasloth wool(cold insulation 26), hyperweave(cold insulation 26),chinchilla fur(cold insulation 30), heavy fur(cold insulation 30), thrumbofur(cold insulation 34).
Likewise, now you should only send people out on quests if you got a strong insulating parka for them.
Raiders are now more numerous and if you keep doing quests you should have enough food to feed five people.
Fifth agenda
- Make your first greenhouse with a sun lamp and heaters.
- Plant potatoes.
- Research air conditioning.
Notes
Winter is gone and summer is coming, you should get ready to make a freezer so your food will not spoil.
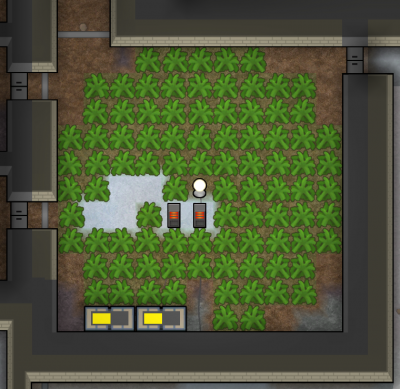
Finally you are ready to make a greenhouse and plant potatoes. Ideally, try to connect your greenhouse to your steam geyser.
Since you got a reliable food source, you can now accept more people. You are not free of cannibalism yet, but you can stop offering help to refugees and stop going to quests just to get more food.
Sixth agenda
- Research hydroponics.
- Research nutrient paste dispenser.
Notes
With hydroponics basins you may make greenhouses without having to stick to stony patches. Getting anything planted here is expensive, so you should make a nutrient paste dispenser to save on food, once you got one you may stop doing cannibalism.
Since the worse is gone, you can now move to a proper area, a more central location where you can build that huge colony you always dreamed of.
Finding a large pound is much easier than finding a large stony patch. If happen to have a large pound in a central location or your map has coast you should focus on moisture pumps, with them you can create larger crops fields so you do not need to stick to stony patches around mountains.
Extreme desert guide (new)
This guide details how to survive in one of the most hostile environments in Rimworld - an extreme desert. We focus on the Lost Tribe start because it is the hardest one to thrive in hostile environments since you got more people to feed and less technology to help you.
Introduction
Extreme deserts are the most arid option of hot maps. They have the least amount of animal and plants. In fact, you should not expect to find anything more than three iguanas and a single cactus in your start. You should also not expect to see more than one new iguana per week and not a single plant ever growing in the wild.
In addition to that, they do not have any soil available, if you wanna grow something you will be doing it in stony patches around hills and mountains.
They are not necessary hot though, their average varies from 30 °C (86 °F) to 10 °C (50 °F) and growing periods varies from all year to half year days due to the temperature. You should expect to only have problems with heatstroke during summer and during heat waves.
Landing site
In all maps you should to choose carefully your landing site to increases your chances of survival. You want to build a colony in an area with some of the following characteristics:
- Near to a friendly faction base (faster trading)
- Near to a road (faster moving around)
- Without many mountains around (faster moving around)
- With a river (enable watermills)
- With coast (to turn into large growing areas later)
- With caves (early food source)
While you should not be surrounded by mountains, the landing site itself can be mountainous.
Of course you do not need to land in an area in all those characteristics, but try to get as many of them as you can.
Base area
Once you choose your landing site you should also choose your base area. It is important to notice that this area does not need to be final, it is just the area where you are more likely to survive the early game.
You want to find an area with the characteristics: more growing areas and more easily defendable.
More growing areas means more stony patches and more easily defendable area is an area with few entrances where you gonna lay down your traps.
Since you do not have trees, you can not build a big base yet. You can then either take a ruin, make a cave or make a small steel base. Ruins might look like good starting locations but are often on undesirable areas. It is easier to make a cave in a good location, since choke points are always surrounded by hills and mountains. But if you happen to get a ruin in the right place, then go for it. If you can not find a hill or a ruin in a good area then just make a small steel base.
First agenda
- Get some easily accessible steel and use it to build your stuff, so you do not have to use wood.
- Make your starter base. Give people a place to sleep, eat and play.
- Hunt those iguanas before they leave the map.
- Kill your starting animals.
- Only use wood to make campfires and passive coolers, for cooking and cooling down respectively. Make sure your wood is forbidden so they do not refuel them unnecessarily.
- Plant rice. You can not survive long enough to wait grow anything else yet.
- Plant strawberries, if you do not have much growing area then plant potatoes.
- Make your research bench and start researching stone cutting so you can start using stone instead of steel.
Notes
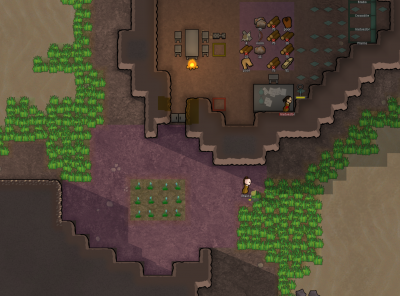
Surviving until your first rice harvest is the hardest part. Your pemmican plus your hunting plus your starting animals is not enough. If you have caves in your map, you can go insect hunting and that might be enough, but if you do not... You gotta go visit your nearby friendly base to trade whatever you can for food. For that, you gotta get something you can trade:
- You can mine expensive things like components, plasteel, uranium, jade, silver or gold.
- You can open the ancient shrine and sell whatever you find there.
One smart way to reduce your food consumption is to put some colonists inside the ancient cryptosleep caskets until your first harvest.
You can also go to the closest base outside the extreme desert and attack them. Hunt the animals and harvest the plants around the base and run back to your base. You can make peace with them later.
Another more undesirable option is to sell some colonists. They are usually worth a lot and it results on a lower food consumption which makes things much easier, but do not expect to see them again.
Likewise, another even worse option is to kill some colonists, but they are not worth many meals.
If you do survive though... Now life will be much easier.
Second agenda
- Plant cotton. Later you will use it to make dusters and cowboy hats.
- Plant healroot.
- Make stone deadfall traps.
- Plant cactus. Your future wood source.
- Plant smokeleaf. This will help your guys relax later.
- Research complex furniture. Once you done, make steel or stone beds.
- Research complex clothing. Once you done, make dusters and cowboy hats with your cloth.
Notes
Hopefully, now you grow strawberries, so you will not need to worry about wood. If you decided to stick with potatoes, you gonna have to make some extra visits to your nearby friendly base and buy wood for cooking because your cactus plantation gonna take a while to kick in.
Summer is coming, focus on getting cloth to give your colonists dusters and cowboy hats. After that you can replace their tribalwears for button-down shirts and pants.
You can also make some smokeleaf joints to help with the moods.
Always keep a stock of wood with you because if a heat wave happens you will need those passive coolers.
If you want, now you can accept more people in your colony.
Now the usual threats start, time to make some deadfall traps to defend your base. Since you do not have wood and probably not enough steel, you will have to go for stone deadfall traps.
Third agenda
- Research eletricity.
- Research battery.
- Research air conditioning.
Notes
Your colony is looking better, you have food, wood, clothing, drugs and defenses. You should focus on making a freezer for all that food you got.
Since the worse is gone, you can now move to a proper area, a more central location where you can build that huge colony you always dreamed of.
If your map has coast you should focus on moisture pumps, with them you can create larger crops fields so you do not need to stick to stony patches around mountains. They also remove the patches of soft sand preventing you from building.
Colony building guide (old)
This guide is the ultimate go-to guide to building your base, for all stages of the game.
Base Types
There are different ways to build your base.
Superstructure base
To build a superstructure base, put everything in 1 large building rather than separate it into multiple small parts.
This is a common method to build bases, and is generally the recommended way to do so.
Pros
- Convenient
- Saves building materials and some space
- More resistant against toxic fallout
- Improved temperature control
Cons
- Fires can spread all over the base if flammable materials are used
- Requires a large, continuous area of buildable land, making it not viable for swamp biomes
- Not flexible
- Less able to satisfy outdoors need, so risk of cabin fever thoughts
Town-like settlement
Build everything in separated buildings, just like building a small town.
This is great for starting off, as well as building in swamps where the land is not suited for building superstructure bases.
Pros
- Flexible
- Does not require large patches of land
Cons
- Requires more space and building materials overall
Mountain base
For mountainous maps where you have less space to build, you can opt to dig inside the mountains instead.
Pros
- Good temperature control
- Easy to defend
- Immune to mortar strikes
- Leaves more soil available for farming
Cons
- Infestations can happen within base
- Not flexible
- Colonists who never go outdoors will suffer the progressively debilitating Cabin Fever thought.
Modular base
Bases consisting of 'modules' that you progressively build to expand your base.
The properties depend on the modules that are used, but in general, they provide easier and more ordered expansion than other base types.
Base Structures
Different structures suit the different needs of your colony.
Dining room
Dining rooms, at its simplest, are simply rooms where you put tables and chairs for colonists to dine in.
A dining room should be built as close as possible near the freezer/ food storage so your colonists will actually use the dining room, instead of eating on the floor of the storage, giving them a -3 mood debuff. This is especially true for larger freezers, in which colonists retrieving food from the far end may simply give up searching for a table and eat on the floor.
For increased mood buffs, decorate your dining room using sculptures, plant pots or quality furniture.
Rec room
You should have a wide variety of joy sources so your colonists don't get bored repeatedly throwing horseshoes at a pin, or wandering around aimlessly. Putting all of them in a room also provides a mood bonus after a colonist uses the facilities inside, depending on the impressiveness of the room.
In the early game all you'll need is a horseshoes pin somewhere in the colony, and colonists will proceed to use it when they are bored.
Once you reach midgame, you can afford more joy facilities such as chess tables or billiards tables, or Tube televisions, which provide different kinds of joy for additional variety. In addition, you can also obtain additional joy sources from exotic goods traders, such as telescopes or flatscreen and megascreen televisions, which are more joyful than the craftable tube television.
Similarly to the dining room, decorating it can improve the mood bonus from using the room.
Combined common room
Combining a dining room with a rec room is quite a good idea, as the room will have increased impressiveness as the wealth and space of both rooms are combined, and colonists' mood gains are based on the activity they did in the room, rather than the function of the room.
Should you choose to do so, remember to leave enough space for both joy furniture and dining tables. You can choose to toggle the 'Gather spot' on for these tables, or set them to 'Off' and have an additional table for social purposes.
Barracks
You will need somewhere indoors for your colonists to sleep early-game. It should be one of your starting projects.
Build beds for your colonists to sleep in as colonists dislike sleeping on the ground.
Bedrooms
Only colonists in love like to share a bedroom, and all sleeping colonists will get disturbed by non-lovers walking about in the same room while they sleep, so once you have the manpower and materials you should upgrade to individual bedrooms for each colonist or couple. If you have couples they will need a double bed so that they can sleep together and avoid a mood debuff.
For better comfort and rest effectiveness, make sure the beds are of Normal quality or above, otherwise deconstruct and try again until you get it.
You should also have tables and chairs in the bedrooms, as colonists often carry a meal with them. Without a table, colonists will resort to eating their breakfast on the floor and gain a mood debuff. Turn off the 'Gather Spot' option on these tables, as colonists seeking joy may sit at these tables, possibly entering someone else's bedroom and disturb their sleep (though they don't seem to care beyond that). Another option is to set aside one room near the bedrooms as a dining room or even build a table and chairs outdoors nearby.
As you progress in the game, you should upgrade your bedrooms to allow colonists to live and sleep better.
- At the very beginning, you only need it to be 2x2, just enough to fit a bed and possibly an end table.
- In early-midgame, bedrooms should ideally be at least be 3x5; this gives you enough space to squeeze in a bed, a table and some other things, without feeling too cramped.
- In mid-game or later, a 4x6 bedroom allows you to fit in a double bed, a 1x2 table with chairs, an end table and a dresser, with some room for decorations.
Storage
You will obviously need to store your stuff somewhere in your base.
Warehouse
A simple structure with nothing but an expansive stockpile zone to store items in. You can have multiple smaller stockpile zones which are set to allow different items so that colonists can sort them.
Dangerous items
It may be worth it to store items that can explode, such as mortar shells or chemfuel independently in a walled room away from the exterior of the base. You can partition the room to stop explosions from affecting your entire stock of materials. You may want to build this room out of stronger walls and doors to contain an accidental explosion inside or prevent an explosion outside from setting off the materials inside.
Putting it away from the exterior prevents doomsday rocket launchers fired at your base from hitting the items.
Freezer
Freezers are vital to food preservation if you aren't living in a really cold place.
Consider making a dedicated stockpile with a very high priority at the front of your freezer which only allows meals. This way, your meals will always be right at the front of your possibly very large freezer. Also, if you make two more stockpiles at the front of your freezer for meat and veggies, your cook won't have to run as far for ingredients, allowing him to make meals faster (colonists assigned to hauling and trained animals will move ingredients from the back of the freezer to the front).
Expect your dining room to be pretty crowded during meal times, especially after a party or marriage ceremony, so have enough chairs for at least half your colony. Colonists will also hang out in the dining room if you set the table for it, occupying seats.
To save power, if you are living somewhere with sub-zero temperatures during the day (possibly in winter), put vents that lead outwards and turn off your freezer so you can use the outside cold to chill your meals. Close the vents once temperatures get warmer.
Armory
You can choose to have a dedicated area to store your weapons. If so, put it far away from your prison so that prisoners do not have ready access to dangerous weapons.
Hospital
Dedicated hospitals are more of a mid-game thing when you have enough resources to build the specialized equipment used in them.
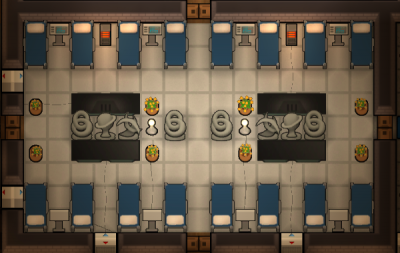
Hospitals should be built somewhere where colonists can quickly bring their downed comrades to treat them. Keep doors open, or use autodoors so they don't obstruct colonists' access. If you need to you can build more elsewhere in the base.
Hospital beds provide a boost to treatment quality, immunity gain speed, and healing speed, meaning colonists will recover faster from illnesses and injuries, making them the choice for hospitals. The vitals monitor brings even better boosts to treatment and immunity gain, so when available it's recommended that you put them down near your hospital beds.
Store your medicine in or near your hospital using shelves so your doctors can quickly grab them to patch up colonists before they bleed to death. Sometimes just that little distance can already make a difference between life and death.
Hospitals should have sterile tiles as flooring as they provide a slight cleanliness buff that can increase surgery success chance and reduce wound infection chance.
Decorating hospitals to make them beautiful can give colonists inside a great mood boost (max +15, plus impressive room stats). This is good, especially considering that some colonists will stay in the hospital for some time , such as the severely injured, incapacitated or sick.
To provide joy, you may also install televisions into your hospitals. Patients lying in hospital beds within the viewing area will watch TV to entertain themselves when they are bored, and you won't need colonists coming to cheer them up as their only joy source.
Patient rooms
If you have even more resources you can build a separate room for each colonist. While they don't mind sleeping with others in a hospital, they do get disturbed by them walking around, and dirt can more easily affect cleanliness as well.
Operating theater
You can build a separate room to accommodate colonists who will undergo surgery, to make sure that colonists undergo medical operations in the cleanest of places.
Your operating theater should be forbidden at all cases except when someone is about to have surgery. This prevents colonists from tracking dirt or blood into it, staining it.
Vet area
Also consider building animal sleeping spots with their own animal area near your medicine stockpile that you can restrict wounded animals to. That way, they can be treated as fast as possible.
Laboratory
You may want to have a room dedicated to research, with hi-tech research benches, multi-analyzers to increase research speed and unlock new research, as well as sterile tiles to keep the room clean, increasing research speed. For even better cleanliness, restrict the lab to your researchers and janitors only, reducing traffic and hence the amount of dirt in the room.
Prison
Prison barracks
In the early game you can simply convert any existing ruins into a makeshift prison barracks, or build a simple prison hut which holds all the prisoners you capture. Try not to build it too far away from your main structures, otherwise it becomes harder to catch escaping prisoners.
You should include tables and chairs for prisoners to use.
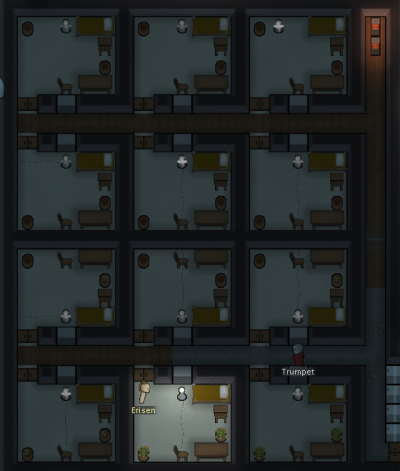
Prison cells
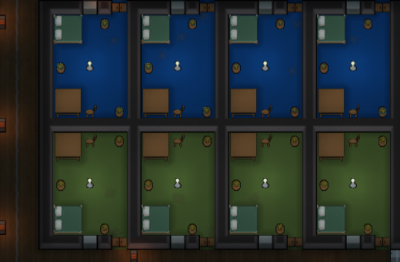
Like colonists, prisoners will also suffer from the mood penalties associated with being kept together in a prison barracks. In addition, prison breaks are more serious should they happen, for every prisoner locked up in the same room will simultaneously break out, while prisoners in different cells may choose not to join. Thus, you should keep them separated.
Each cell should have a table with a chair, a bed, and a light source. This is the bare minimum you need for a prisoner to be decently kept. Decorating the cell and making them bigger also increase mood bonuses for easier recruitment. They can't use any joy items put in the cell, nor do they have a joy need, so don't bother with joy items other than for aesthetic purposes.
Prisons should have doors facing towards your base, so escaping prisoners will go towards your base instead of away, giving your wardens more time to deal with the break.
Holding cell
A larger cell with more beds. It should be only be used when your prison cells are overflowing. Put your less important prisoners inside them while assigning your more valuable prisoners into the cells.
Multipurpose rooms
These are more of an early to early-midgame thing that you can use before you get dedicated structures erected, such as hospitals or bigger prisons. Yet, these can still prove useful sometimes, like when your freezers or warehouses overflow, or you need somewhere to house an influx of injured or sick colonists.
This is rather simple; just make an empty room, along with suitable temperature control. You can add beds if you intend on someone living in it (be it colonists or prisoners), which you can uninstall and tuck away in a corner when unused
Backup
There are many types of ways you can set up buildings on your map to possibly save your colonists' lives in dire situations:
- Shelters: Building small rooms with an emergency food and wood supply can save your colonists from enraged animals. Thick enough walls (at least 4 layers) can stop raiders from killing your colonists hiding inside.
- Nutrient paste dispensers: When food is running low or you forecast that it will, a paste dispenser can significantly slow down food consumption by efficiently converting raw foods into nutrient paste.
Production
You will also need various buildings to produce or manufacture the stuff that your colonists need.
Crops
See also: Food production
Crop fields
Crop fields are rather simple; just set up a growing zone, designate the desired plant type and growers will automatically go and grow the plants.
You need to check carefully the soil fertility before marking out your areas.
- Gravel looks quite similar to dirt at first glance, but has a greatly reduced fertility meaning plants will grow slower.
- Rich soil, on the other hand, is visibly darker and has improved fertility, making it suitable for long growing time plants such as devilstrand.
You will need to keep animals out, whether or not they are tamed. Exclude these areas out of the allowed areas of animals, and build walls to keep out wild animals.
Greenhouses
Enclosed areas that grow crops with the aid of temperature control, sun lamps and possibly hydroponics basins. They allow you to continue growing crops regardless of soil or weather conditions. Note that greenhouses are subject to power draining events like solar flares, knocking out lamps, heaters and hydroponics.
Mining
In early-midgame you just need to select mineral outcrops and designate them, and miners will proceed to dig out the minerals.
Later on, you can choose to continue mining through several means.
Strip mining
If you have more mountains or rocks which you can mine, you can strip mine them by mining out long tunnels with 2 tiles between each other. This allows you to cover everything in the mines.
Covering up your mine to prevent infestations is a good idea, using cheap materials such as wood it is possible to completely seal up the mines at a low cost. Alternatively, set up defenses at the mine entrance and just farm the insects.
Deep drills
After research you will unlock the deep drill and the ground-penetrating scanner for use.
It is not recommended to start deep drilling without an active scanner as you cannot see the locations of mineral locations this way and deep drills cannot be relocated.
Some deposits will be directly underneath your base. You can deconstruct or relocate buildings to give access to your drills. Be careful when you mine in colonists' bedrooms as they can easily disturb sleep.
Animals
Animals are an extremely useful asset to the colony if you can handle them (both in-game and performance-wise). They provide a variety of products, from raw food materials (meat, eggs or milk) for producing quality foods, to wool, which is an excellent insulator against both heat and cold. Moreover, they can be used in combat, as haulers, or as pack animals in a caravan.
Barn
Barns are necessary only if you're keeping some animals in places where temperatures can exceed their comfort, as animals don't mind sleeping in the open. In this case, a temperature-controlled barn is necessary to keep the animals comfy.
Building animal sleeping boxes or animal beds can help animals rest faster, though this doesn't really do much and is not cost efficient.
Chemfuel farming
Boomalopes are unique in the fact that they can produce chemfuel. This can be used to power generators, used as transport pod fuel or made into mortar shells.
Due to their explosive nature, they won't be attacked by predators, so you can let them roam freely without much danger. Keeping them confined is dangerous as the death of one boomalope can injure others, and if you don't intervene the other boomalopes will die, exploding and causing a chain reaction.
Workshop
Workshops are places where you put all your crafting stations and benches, probably including your cooking stoves as well. You should put them near your warehouse so your colonists can spend less time hauling the needed resources to the workshop for crafting. Also remember to put chairs of any sort at the interaction spot so your colonists won't have to keep standing while crafting.
The tool cabinet is handy for increasing productivity of your craftsmen, but you will need to allocate the positions of these carefully so as not to block colonists or future plans.
Putting all the crafting stations inside the warehouse isn't recommended despite the convenience, as colonists do not enjoy the sight of random objects laying around. This lowers their beauty opinion of their surroundings, in turn giving mood penalties. You should however put crafting materials near the workshop for quicker retrieval.
It is an excellent idea to put decorations such as sculptures inside the workshop, as a beautiful environment gives up to +15 mood, improving colonists' productivity and even allowing for the occasional mental inspiration.
Kitchen
You should build your kitchen near your cold storage and your dining room, just as you build the workshop near your warehouse.
Kitchens should only have cooking stoves, and sterile tiles for flooring to reduce the chance of food poisoning. The butcher table is best put elsewhere due to the heavy cleanliness debuff.
Shelves or small stockpiles can really improve cooking efficiency when placed right next to your stoves. Set one to accept berries and vegetables only, and the other to accept meals only the as these do not spoil in a matter of days, unlike meat which should always be in the freezer. Hauling colonists will do the transport work for your cooks instead.
Power
Solar power
Solar generators provide power only during the day. It provides 1700W, quite a decent figure, but still not to be fully relied on.
Wind power
Wind turbines provide unstable power throughout the day. It can provide up to 3000W, but it usually gives less than that.
It requires plenty of open space for maximum efficiency, and any obstacles can easily reduce efficiency. To prevent trees from growing and obstructing the turbines, put down floors, grow crops underneath the turbines or fill in the gaps with solar generators.
Fueled generation
You can get the wood-fired generator which runs on wood, or the chemfuel powered generator which runs on chemfuel, constantly providing 1000W of power. It is a good idea to have some of these as a backup power source, or even as your main source in biomes that are loaded with forests that will replenish themselves, such as in the tropics.
Chemfuel is significantly more efficient than wood, so once you research the refinery it's a better idea to refine wood into chemfuel before usage as fuel.
Boomalope setup
Boomalopes generate enough chemfuel to run 2 generators.
2 boomalopes give enough fuel to continuously power 5 generators for a total of 5000W. This is not taking into account any energy costs from growing food for use by the boomalopes.
Infinite chemreactor setup
Infinite chemreactors generate enough chemfuel to run a generator, which in turn generates more than enough power to run the chemreactor.
8 infinite chemreactors can generate enough fuel to power 15 generators, for a total surplus power of 12600W.
Geothermal power
Geothermal generators constantly gives 3600W of power after being built on a steam geyser without requiring fuel. It is an important source of power from mid-game onward, as it is constant and high-powered.
Research is required to unlock it, and the generator itself is quite costly so it's best left to midgame. However, once researched and built you can have a constant power supply, and with 5 generators on the map you can sustain a basic mid-sized colony.
Make sure your geothermal generators and their connecting conduits are well-protected as they often have to be placed far from base. Walling the generators helps protect them against raiders, but walling the conduits isn't recommended due to the cost and its hindrance on colonist field work. Be aware of the heat that the geysers release. If you closely wall and roof in a geothermal generator, the temperature inside will be quite high, high enough in fact to catch combustible building materials on fire. Consider removing the roofs on such buildings. However, if the vent is close to your base in a cold biome, consider attaching its building to your own base to help heat it.
It is possible to rush the research for geothermal power, though you should be careful not to neglect other more important research projects.
Power storage
You will need batteries to store power if you're using unstable power supplies such as wind or solar power. Batteries need to be kept under a roof to prevent short-circuits, and they should be protected from external threats, too. Connect them to the grid via switches, so you can shut off unneeded batteries to reduce the impact of short circuits.
Leave a 1-tile gap between adjacent groups of batteries so power does not flow between them and you can independently control connectivity.
Power network
It's not a good idea to have just 1 conduit spanning the entirety of your base. While it saves materials, short circuits or other events can cripple your power supply. Instead, build a network with redundant pathways so that the grid will continue to function even if there is a break somewhere in the network.
It is best to connect geothermal generators to other geothermal generators, so events such as wildfires and raider attacks won't easily disconnect them from your power network, causing severe power shortages.
Emergency power
Some events will cause you to lose power if you are unprepared. Some colonies rely on wind or solar power to power everything, and eventually every colony with electricity will suffer from a fault conduit explosion, also show as 'Zzzt...' Both cases will cause you to lose power, whether it's not enough wind or sun, or an explosion. Raider attacking and destroying power conduits connected to power generators can sever power from the colony, reducing the power available.
- Backup batteries: Always have spare power stores, such as multiple battery systems with switches. Only connect extra when they are about to run out, or are charging.
- Backup generators: Have some fueled generators that you bring online only if there's not enough power in the colony. This can allow your backup batteries to discharge slower, or even recharge. If they are turned off they will not consume fuel.
Vanometric power cell
A vanometric power cell constantly provides 1200W of power regardless of any condition, and can be placed anywhere. Obtaining it can be quite hard due to its rarity, even in the mid-late game, yet a constant, uninterrupted source of power is always valuable to any colony.
It can be used as a good starting power source when you are branching off to start a new colony.
Defenses
Unless you're playing on Peaceful difficulty, you will eventually encounter major threats, so you will need to prepare defenses for that.
The greatest advantage on your side is cover. While enemies are hiding behind rock chunks, you have sandbags and walls on your side, giving you a significant upper hand. You can even clear the rock chunks to force enemies behind trees which are less optimal a cover choice, widening the advantage.
You can also choose to build turrets if you have unlocked them. They are essential if you don't have enough colonists to defend against raids, most typically the start of the Rich Explorer scenario.
Temperature control
Room should have its temperature regulated by some method or another, so as to keep a comfortable temperature for colonists to live in, and protect them from extreme temperature conditions such as heat waves, cold snaps or simply the outdoors ambient temperature.
Large rooms such as your dining room or rec room should have their own heaters and coolers. If they are interconnected you may want to open doors for faster colonist access and temperature exchange. If you choose to do so, remember to close doors if a fire breaks out in the room.
Smaller rooms such as your bedrooms should be thermally connected to a larger central space through vents. Your heaters and coolers should be all placed outside the bedrooms. This reduces the number of heaters and coolers you need to build while keeping your bedrooms at a comfy temperature at the same time.
Keep in mind that you will also need to be prepared in case of a freak temperature event such as heat waves or cold snaps. Without enough temperature devices rooms can get uncomfortably cold or hot, and in severe cases begin to cause hypothermia or heatstroke.
Cooler gap prevention
As coolers need to be built as part of a wall, the process of building a cooler involves tearing down the original wall, then putting the cooler in place. This short interval allows temperature to go freely through the gap, which isn't something you want.
To fix this, you can plug the gap by building cheap wooden wall in front of or behind the cooler blueprint, then starting work on the cooler. The wooden wall will prevent temperatures from equalizing easily.
Remember to deconstruct the wall after the cooler is done.
Protected coolers
Coolers are very fragile, and a single explosion or dedicated effort from melee attackers can easily break them down. Protecting the coolers helps fortify your base against enemy raids by eliminating the weak points in your walls. This is done by walling the coolers off while giving it unroofed space in front of the hot end to vent away heat.
If your colony is in a cold but not quite freezing biome, consider venting the heat from the coolers for your freezer into your living spaces instead.
Cooler column
Have the hot end facing an unroofed area where the heat vents out into the open. That unroofed area can be placed within an existing structure, such as inside the freezer. For maximum spatial efficiency the strips of unroofed area should be 1 tile wide, surrounded by coolers.
Best used for freezers to keep cool as most cases don't call for that many coolers.
Temporary temperature control
If your regular heaters or coolers aren't doing the trick, there's a temporary power outage or you're a tribe without the ability to harness electricity yet, you can use campfires or passive coolers to heat or cool down your base respectively. Both have the same effect as their powered variants, except they are rather limited in their available temperature range: campfires can't heat above 30°C while passive coolers can't cool below 15°C. Also, their temperature effect is full and cannot be throttled. Depending on what gear your colonists are wearing, it's possible for them in a room being heated with campfires to complain about it being too hot.
These are best used to keep colonists comfortable during heat waves or cold snaps. If you always encounter uncomfortable temperatures during summer or winter then it's time to upgrade your heaters or cooler system.
Miscellaneous
Dirt floors
Until you have enough manpower to spare for cleaning jobs, instead of building any floors, use the terrain as the floors. Dirt trailed on constructed floors makes for a much worse beauty penalty than using dirt floors, so this can actually make your rooms look better.
However for places like hospitals it's better to use sterile tiles and manually clean them instead.
Flooring outside
To reduce the amount of dirt inside your colony buildings, put any kind of flooring covering places where colonists and animals frequently walk. This reduces the amount of dirt formed as well as causes dirt to be left outside where it does not look as bad.
This should obviously be done only if you have enough janitors, otherwise it's better to just not build any floors (see above).
Moisture pumps
Moisture pumps clear out moisture from the ground around them, making dry land suitable for construction and agriculture. They are excellent in swamp biomes for clearing out shallow water, marshy soil and mud in order to build structures. Their effect is permanent, so they can safely be deconstructed once the land you want to use is dry. Note that shallow water will be converted to gravel, which only has 70% fertility. Still, this can be the only way to farm in ground outdoors in biomes like Ice Sheet and Sea Ice.
Ice sheeet guide (neo)
This guide details how to survive in one of the most hostile environments in Rimworld - an ice sheet. We focus on the Lost Tribe start because it is the hardest one to thrive in hostile environments since you got more people to feed and less technology to help you.
Introduction
Ice sheets are the coldest option of cold maps. They have very little animal life and no plants. In fact, you should not expect to find anything more than five snowhares in your start. You should also not expect to see more than one new snowhare every five days and one new polar bear per month.
In addition to that, they do not have any soil available, so anything that you want to grow must be grown on the stony soil patches- that is if you can even grow anything due to the cold. You will struggle a lot until you get a heater and a sun lamp, then you can plant something indoors.
Even the warmest ice sheet it really cold. Their average varies from -20 °C (-4 °F) to -40 °C (-40 °F) and they never have growing periods due to the temperature. You still need to eventually make a freezer though, because the summer temperature is hot enough to spoil your food. Expect to have problems with hypothermia during fall, winter, spring and during cold snaps in summers.
Before the start
You can opt to sweeten your survival experience with a combination of well-picked colonists and landing spot, or choose to go hard and randomise everything. The below assumes you are going for the former.
Landing site
In all maps you should choose your landing site carefully to increases your chances of survival. You want to build a colony in an area with some of the following characteristics:
- Near a tundra (faster moving around)
- Near a friendly faction base (faster trading)
- Near a road (faster moving around)
- Without many mountains around (faster moving)
- With coast (to turn into large growing areas later)
- With caves (early food source)
Ice sheets do not have roads or rivers, but that does not mean you can not settle close to a road. While you should not be surrounded by mountains, the landing site itself can be mountainous.
You do not need to land in an area in all those characteristics, but try to get as many of them as you can.
Starting colonists
Ice sheet is so harsh that you will have to resort to cannibalism, so you may want to have a crew that can tolerate that. That means having one butcher that does not mind butchering people and everyone resistant to mental breaks.
Your butcher should be either Cannibal, Bloodlust or Psychopath.
All your crew should ideally be either Cannibal, Sanguine, Optimist, Iron-Willed, Steadfast or Masochist with scars. Couples also enjoy extra happiness so try to bring couples instead of bachelors, likewise Beautiful and Pretty colonists are also good since they are more likely to fall in love with someone.
Surely you do not need to have all five starting colonists with those characteristics, but the more resistant colonists you have the better.
The first step
Once you choose your landing site and colonists you should immediately pause the game. This gives you time to make decisions.
Base area
You need to choose your base area wisely. It is important to notice that this area does not need to be final, it is just the area where you are more likely to survive the early game.
You want to find an area with the characteristics: near steam geysers, near steel, more growing areas and easily defendable.
More growing areas means more stony patches and an easily defendable area is an area with few entrances where you can lay down traps. Your priority is steam geysers. You have to make the base on top of a steam geyser, or else you will die of hypothermia very fast.
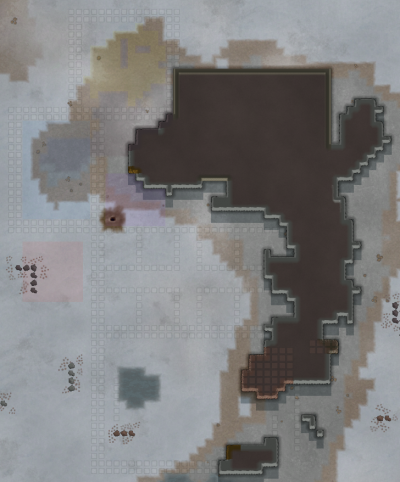
Since you do not have trees, you can not build a big base yet. You can either take a ruin, make a cave or make a small steel base. It all comes down to what you have near the steam geysers. If you have a ruin, take it. If you have a hill, make a cave. If you have none of these, make a small steel base.
Work
Analyze your team, set their priorities. Haul everything towards your chosen ruin and don't use wood at all except for the campfire.
Start mining steel as your main construction material or begin caving in. Play as minimalistic as possible. Gather enough steel to build walls by setting everyone to mine. Use terrain features to get the smallest home you can make besides any nearby structures.
If you have researchers, rush electricity research. You don't need to build a fortress yet, and electricity can be extremely helpful in survival.
Animals & Hunting
Set an animal zone away from your food, you don't want them eating your food as you can't win the game with pets alone. Let them all die of starvation, sorry. Starving pets are excellent lures for predators and while wild animals attack your pets, they won't turn their hunger rage towards you and you can attack them without danger, so long as their target is mid to big size (terriers die in a bear hit or two).
Hunt every time you see meat, as animals have the tendency to leave the map and won't remain roaming around for long. When you find one snowhare, you find the others. Double click on zoomed out view to reduce the time spent on searching.
Always keep an eye on the polar bear food bar- you will need to know when it will strike.
Steam geysers
Now that you've selected somewhere to settle, the next step is to build a decent base.
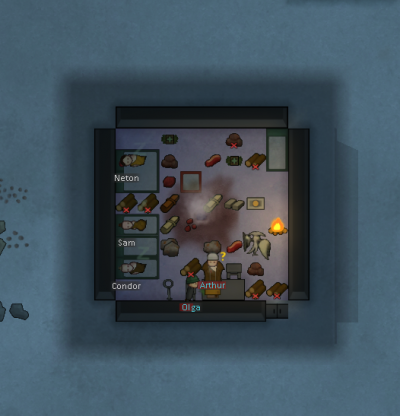
You should settle on the steam geyser due to the heat source. Living on top of a geyser provides warmth enough up to 10 degree Celsius, just to escape hypothermia. If your colonists complain about "sleeping in the cold", you tell them to man up. The only two reasons to build a campfire are to cook and an emergency extra source of heat when hard snow hits during Winter or a cold snap. Build a wall around it(10x10, the geothermal power plant is 6x6 so between the wall and the steam, the 8x8 line will become a one tile surrounding corridor just enough to place beds around), either by emulating a heater in the center of your room or by pulling a one tile corridor towards your home, even possibly digging a tunnel depending on the terrain altitude map of choice.
Eventually, you should ideally repeat the same geyser-room procedure with other steams in proximity, this is because cold and starvation will not kill you, but mental breaks will. For example, having more than two characters on berserk. Sometimes, two geysers may be close to each other, allowing you to use them at both ends while you build everything else in between. This lucky situation can allow to start building individual rooms for your people and get rid of the barrack penalties.
Cannibalism
It's inevitable. Just be very selective when butchering other humans as the character performing the action will receive mood penalties that can easily set it to mental breaks. It is okay if your characters complain of hunger. Again, keep your food supply on check and only feed your people when starvation kicks in, unless of course, their mental break is too dangerous to risk keeping them unhappy. When butchering human corpses it's best to set one same character to chomp many at once so that all the penalty goes to just that one guy, and performing the action on same day will keep the penalty length shorter instead of extending after each consecutive day. Best if the penalty wears off all at once.
Remember that human leather is worth a lot and it is better to make something with it first, then sell it. First, give your colonists bedrolls to sleep, then make dusters since they are more profitable than anything else. Cannibal and Bloodlust colonists will want to wear human leather clothes, give them human leather button-down shirts and pants, but not parkas as the material is just too bad at insulating.
The second step
Research
After electricity, go for Batteries, Solar panels and then Stonecutting so that you can start building plantation-rooms. Sun lamps consume large amounts of electricity and you should by then have enough power and stored energy so that your crops grown steady. Solar generators will not perform to their maximum capacity due to the short solar cycles common in polar regions as oppose to equatorial regions.
If you are not in a hurry, you can include complex furniture research, so you can make beds, as well as stonecutting so you can use the more abundant stone.
Opening ancient shrines
You can open the ancient shrine. They contain people which can be either killed for food or recruited into your ranks, as well as some items that can be sold.
Ancient shrines are dangerous; make sure you are suitably armed.
After you clear the shrine, you can build furniture in it to live in; you can also send your people to cryptosleep to extend your food stocks.
Bartering
You will need to barter for some resources that are hard to get.
Aim for wood and cloth. To gather money to buy them, you can mine expensive things like components, plasteel, uranium, jade, silver or gold.
Greenhouse
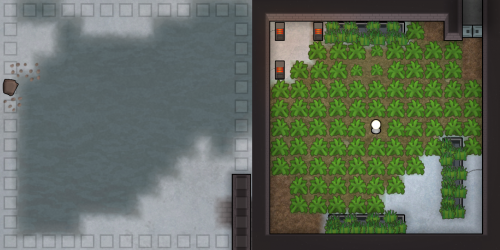
After you have researched Electricity, Batteries, Solar Panels and Stonecutting AND crafted lots of stone blocks is when you can start building your first plantation room. Since the biome has scarce fertile tiles, you can easily select to mark a Grow zone and just drag your cursor on a 50x50 tiles area so that the game automatically marks where there is a "large" concentration of farmable area. Then just select the Sun lamp so that you can have the radius on your cursor ready to match such area. If you happen to lack said farmable tiles anywhere close to your base, you can fill in the blanks with hydroponic basins later on.
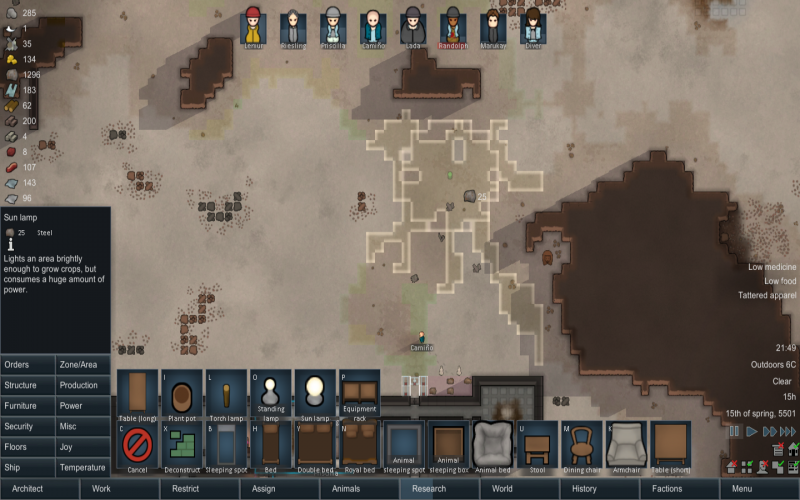
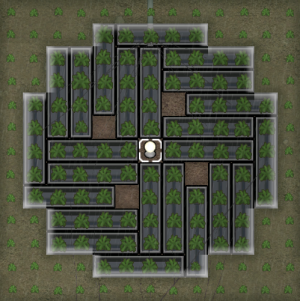
Then use "Delete zones" to remove all growing zones that were created during the scan for farmable tiles, and use the "order" to "plan" to draw a cross of 11 tiles with tile number six (the crossing), being the location where the Sun lamp will be located. This will give you the radius of the lamp so that you can start setting the structure plans. Do use double walls for better insulation and with an airlock system as well.
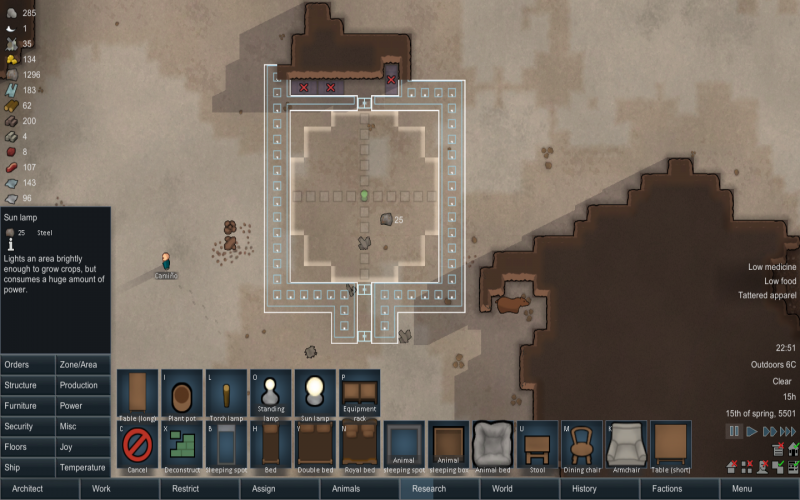
Once everything within the plantation room has been built, click the sun lamp and press "H" for the sun lamp itself to create a growing zone for you (instead of the conventional manual way). Start with rice, and harvest enough so that you can bring everybody else who has been in cryptosleep all this time for your colony to start running in full strength. Remind yourself that once temperature starts to drop again in Winter, you will need to install several heaters or plants will die.
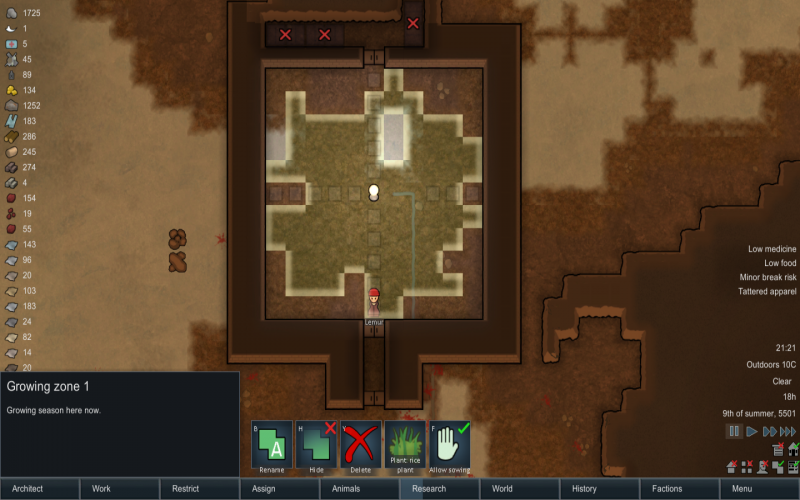
In the meantime, there's no need to rush directly your research towards hydroponics. You can go through Complex clothing, Drug production, Penoxycyline and then Hydroponics. Of course each player will play different stories, so adjust to circumstances as needed.
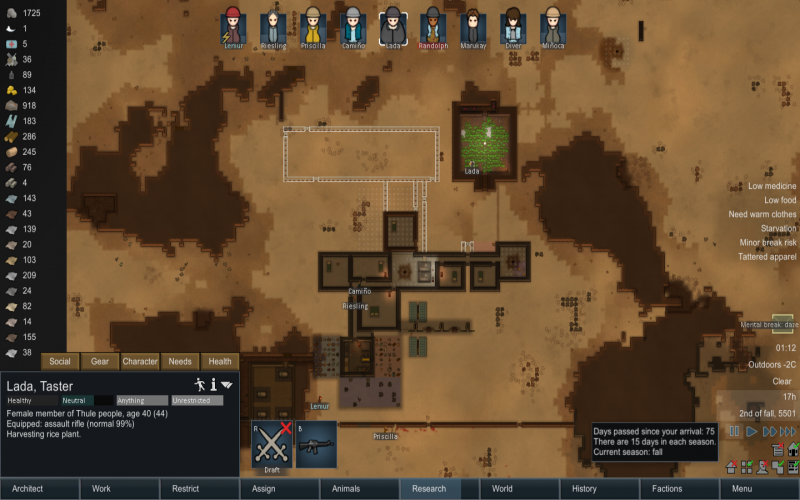
In this demonstration, the first harvest takes place 75 days after start. Now you have both shelter and food. From here on, it's all up to you. Good luck!
The third step
Expanding to the world
You can start to do world quests for factions, once you stabilised your food supplies.
- Go get item stashes.
- Go help incapacitated refugees.
- Go rescue prisoners.
- Go destroy enemy outposts.
You can also choose to raid enemy faction outposts. They can contain food stocks that you can loot.
Whenever you reach a quest location, you wanna look for berries, healroot, animals and wood. Animals and marginally other humans should be butchered before leaving, if the meat is too heavy and you still have time you can use the local wood to make lots of campfires and turn all into meals to reduce weight.
Slighly more advanced technology
Once you research nutrient paste, you can make food efficiently for your people. This also frees a cook to do other things.
If you have enough power, hydroponics basins can also be helpful in feeding your people. This allows you to build greenhouses freely instead of being restricted to growing food in the stony soil patches.
Emergency measures
If the game is bearing down on you, you can use these measures to prolong your colonists' lives. These can ruin the true experience of an ice sheet survival though, so make these a last-ditch measure.
Cryptosleep
If you come across an ancient shrine, you can put your colonists to sleep inside. This helps to extend your food stocks when you fall on hard times.
Caravaning
Another alternative is to escape while you still can- the ice sheet just isn't for you. Gather whatever food you can, along with some supplies, then break for it.

