Difference between revisions of "Raider"
XeoNovaDan (talk | contribs) (→Points: Info regarding raid strategies) |
m (Typo: then -> them) |
||
| (42 intermediate revisions by 5 users not shown) | |||
| Line 22: | Line 22: | ||
</gallery> | </gallery> | ||
| + | |||
| + | [[File:Prisoner return as raider.png|400px|thumb|right|Abandoned prisoner returns to ambush a caravan.]] | ||
Once you have downed or killed half of their crew, the remaining will flee in panic, running as fast as they can towards the map edges. | Once you have downed or killed half of their crew, the remaining will flee in panic, running as fast as they can towards the map edges. | ||
| − | == | + | Raiders who survive may return to attack again in future raids or ambushes. This includes prisoners abandoned from caravans who are in restraint, making them unable to attack properly. |
| − | All of the following information is | + | |
| + | {{clear}} | ||
| + | |||
| + | == Raid strength == | ||
| + | |||
| + | A raid's size and strength is determined by the amount of colonists you have, your wealth, how many big threats you've had (for the early-game), how long your faction's been around for, how long it's been since one of your colonists were downed or killed, and your difficulty. | ||
| + | |||
| + | The actual raid strength is determined by points, which is calculated by taking into account the above factors that affect raid strength. | ||
| + | |||
| + | The below is technical information on the strength of raids, through the determination of points a raid has. All of the following information is from Alpha 17b, or 0.17.1557. | ||
| − | + | === Points === | |
Your first raid will always be 35 points, regardless of the above conditions. Additionally, the first raider won't randomly die upon being downed, and they will never flee. | Your first raid will always be 35 points, regardless of the above conditions. Additionally, the first raider won't randomly die upon being downed, and they will never flee. | ||
| Line 34: | Line 45: | ||
The base formula for raid points could be expressed as follows: | The base formula for raid points could be expressed as follows: | ||
| − | + | {{math|big=0|P {{=}} (( C × 42 ) + ( iW ÷ 100 ) + ( bW ÷ 200 )) × ( sR × lR ) × D × T × R}} | |
| − | Where '''C''' is the | + | Where '''C''' is the number of colonists that your base has; '''iW''' is the base's item wealth; '''bW''' is the base's building wealth; '''sR''' is the short-term ramp-up factor; '''lR''' is the long-term ramp-up factor; '''D''' is the difficulty's threat scale factor (i.e. points multiplier); '''T''' is based on the number of big threats (i.e. raids, manhunter packs, mechanoid ship parts, and psychic waves) that your faction has experienced; and '''R''' is based on the strategy that the raiders are using. |
| − | '''C''', '''iW''', and '''bW''' can be checked under the 'History' tab. | + | '''C''', '''iW''', and '''bW''' can be checked under the 'History' tab. Colonists are always worth 42 points, regardless of if they're a peg-legged, pacifistic grandma; or a level 20 trigger-happy, bionic, CED (combat enhancing drug) junkie. |
'''D''''s value is 0.05 on peaceful; 0.1 on base builder; 0.35 on some challenge; 0.65 on rough; 1 on intense; and 1.3 on extreme. | '''D''''s value is 0.05 on peaceful; 0.1 on base builder; 0.35 on some challenge; 0.65 on rough; 1 on intense; and 1.3 on extreme. | ||
| Line 44: | Line 55: | ||
'''T''''s value is 0.5 for 1; 0.7 for 2; 0.8 for 3; 0.9 for 4; and 1 for 5 and greater. Simplified, '''T''''s value will be 0.5 for your faction's second ever big threat, and so on. | '''T''''s value is 0.5 for 1; 0.7 for 2; 0.8 for 3; 0.9 for 4; and 1 for 5 and greater. Simplified, '''T''''s value will be 0.5 for your faction's second ever big threat, and so on. | ||
| − | '''R''''s value is 1 for waiting and then attacking; 0.9 for immediate attacks; 0.85 for 'smart' attacks; 0.8 for sapper attacks; and 0.6 for sieges. | + | '''R''''s value is 1 for waiting and then attacking; 0.9 for immediate attacks; 0.85 for 'smart' attacks; 0.8 for sapper attacks; and 0.6 for sieges. For raids involving chased refugees it is 1.35. |
====Ramp-Up Factors==== | ====Ramp-Up Factors==== | ||
| Line 124: | Line 135: | ||
In layman's terms: if P is above 1000, then P is the average of itself and 1,000. However, if P is above 2,000, then P will first be the average of itself and 2,000, before averaging with 1,000. | In layman's terms: if P is above 1000, then P is the average of itself and 1,000. However, if P is above 2,000, then P will first be the average of itself and 2,000, before averaging with 1,000. | ||
| + | |||
| + | Finally, with [[Randy Random]], a raid's points gets multiplied by anywhere from 0.5x to 1.5x, meaning that you could face more or less powerful raids than usual with this storyteller. | ||
====Example==== | ====Example==== | ||
| − | So now lets plug in some real-world numbers: your colony has 4 people, it's been 17 days, and this is the colony's third raid. Your item wealth is 11,000, your building wealth is 4,000, and you're playing on rough difficulty. | + | So now lets plug in some real-world numbers: your colony has 4 people, it's been 17 days, and this is the colony's third raid. Your item wealth is 11,000, your building wealth is 4,000, and you're playing on rough difficulty. The raiders are attacking immediately. |
| + | |||
| + | The values in the formula will be as follows: | ||
'''C''' = 4<br> | '''C''' = 4<br> | ||
| Line 135: | Line 150: | ||
'''lR''' = 1<br> | '''lR''' = 1<br> | ||
'''D''' = 0.65<br> | '''D''' = 0.65<br> | ||
| − | '''T''' = 0.7 | + | '''T''' = 0.7<br> |
| + | '''R''' = 0.9 | ||
Plugging these values into the formula: | Plugging these values into the formula: | ||
| − | '''P = ((4 * 42) + (11000 / 100) + (4000 / 200)) * (1 * 1) * 0.65 * 0.7''' or<br> | + | '''P = ((4 * 42) + (11000 / 100) + (4000 / 200)) * (1 * 1) * 0.65 * 0.7 * 0.9''' or<br> |
| − | '''P = (168 + 110 + 20) * 1 * 0.65 * 0.7''' or<br> | + | '''P = (168 + 110 + 20) * 1 * 0.65 * 0.7 * 0.9''' or<br> |
| − | '''P = 298 * 0. | + | '''P = 298 * 0.4095''' thus<br> |
| − | '''P = | + | '''P = 122.031''' or<br> |
| − | '''P = | + | '''P = 122''' |
| − | Therefore, the raid will be | + | Therefore, the raid will be 122 points. |
== Equipment == | == Equipment == | ||
| + | |||
| + | === Weapons === | ||
Raiders have limited equipment possibilities; dependent on their weapon and apparel budgets, and what equipment 'tags' they are allowed to equip. Usually on [[Cassandra Classic]] and [[Phoebe Chillax]] they come equipped early on with mostly [[pistol]]s and crude melee weapons, some [[bolt-action rifle]]s and [[pump shotgun]]s later down the line. In the late game they can come equipped with things such as [[frag grenades]], [[sniper rifle]]s, [[incendiary launcher]]s and [[machine pistol]]s. Rarely some will have [[assault rifle]]s or even [[charge rifle]]s. | Raiders have limited equipment possibilities; dependent on their weapon and apparel budgets, and what equipment 'tags' they are allowed to equip. Usually on [[Cassandra Classic]] and [[Phoebe Chillax]] they come equipped early on with mostly [[pistol]]s and crude melee weapons, some [[bolt-action rifle]]s and [[pump shotgun]]s later down the line. In the late game they can come equipped with things such as [[frag grenades]], [[sniper rifle]]s, [[incendiary launcher]]s and [[machine pistol]]s. Rarely some will have [[assault rifle]]s or even [[charge rifle]]s. | ||
| − | |||
| − | |||
A raiding party may include members equipped with melee weapons and [[shield belt]]s. When a raiding party includes grenade throwers, the AI is intelligent enough to run way from grenades thrown by their own faction (though this does not apply to other explosives). Raiders wielding rocket launchers will attempt to avoid friendly fire. | A raiding party may include members equipped with melee weapons and [[shield belt]]s. When a raiding party includes grenade throwers, the AI is intelligent enough to run way from grenades thrown by their own faction (though this does not apply to other explosives). Raiders wielding rocket launchers will attempt to avoid friendly fire. | ||
| Line 159: | Line 175: | ||
Also, raiders will not use the best weapon for their skills, instead randomly picking weapons. They are often seen equipped with ranged weapons when they are better at melee (completely disregarding the Brawler trait), and vice versa. | Also, raiders will not use the best weapon for their skills, instead randomly picking weapons. They are often seen equipped with ranged weapons when they are better at melee (completely disregarding the Brawler trait), and vice versa. | ||
| − | + | === Armor === | |
| + | |||
| + | They come in different clothing depending on their type and the outside conditions. If it's cold at your colony, they will come wearing [[parka]]s and [[tuque]]s, but they don't usually wear [[duster]]s and [[cowboy hat]]s in the heat. | ||
== Humanlike == | == Humanlike == | ||
There are multiple types of raiders in RimWorld, each with their own sets of equipment and budgets which the game uses to 'buy' their equipment. Similarly, the game 'buys' raiders by deducting the raiders' Combat Power rating from the amount of raid points. | There are multiple types of raiders in RimWorld, each with their own sets of equipment and budgets which the game uses to 'buy' their equipment. Similarly, the game 'buys' raiders by deducting the raiders' Combat Power rating from the amount of raid points. | ||
| + | |||
| + | Weapons that are in '''bold''' are weapons that a raider kind is particularly likely to equip; weapons that are in ''italics'' are weapons that a raider kind is particularly unlikely to equip. | ||
Raider types are exclusive to their faction - mercenaries being exempt. | Raider types are exclusive to their faction - mercenaries being exempt. | ||
=== Tribals === | === Tribals === | ||
| + | |||
| + | Tribal fighters, weak but expendable. They never carry [[silver]] or [[medicine]]. | ||
{| {{STDT| c_01 text-center}} | {| {{STDT| c_01 text-center}} | ||
! Pawn Type !! Image !! Combat Power !! Gear Health (%) !! Avg. Gear Quality !! Clothing Budget !! Weapon Budget !! Available Weapons !! Age Range !! Additional Info | ! Pawn Type !! Image !! Combat Power !! Gear Health (%) !! Avg. Gear Quality !! Clothing Budget !! Weapon Budget !! Available Weapons !! Age Range !! Additional Info | ||
| + | |- | ||
| + | ! Penitent | ||
| + | | <!-- placeholder --> || | 35 || | 20-110 || | Poor || | 50-100 || | 90-150 || | [[Club]], [[Knife]] || | ? || | | ||
|- | |- | ||
! Warrior | ! Warrior | ||
| − | |[[File:Warrior1557.png]] || | | + | |[[File:Warrior1557.png]] || | 60 || | 50-180 || | Poor || | 180-350 || | 60-400 || | [[Club]], [[Ikwa]], [[Knife]] || | Up to 40 || | Tribal traders are based off of this pawn. |
|- | |- | ||
! Archer | ! Archer | ||
| − | |[[File:Archer1557.png]] || | 48 || | 50-180 || | Normal || | 180- | + | |[[File:Archer1557.png]] || | 48 || | 50-180 || | Poor || | 180-350 || | 80 || | '''[[Short bow]]''' || | Up to 40 || | |
| + | |- | ||
| + | ! Hunter | ||
| + | |[[File:Hunter1722.png]] || | 65 || | 50-180 || | Normal || | 180-450 || | 400-700 || | '''[[Recurve bow]]''' || | Up to 40 || | Always has [[war veil]]. | ||
| + | |- | ||
| + | ! Heavy Archer | ||
| + | |[[File:HeavyArcher1722.png]] || | 90 || | 50-220 || | Normal || | 200-550 || | 600-750 || | [[Greatbow]], [[Pila]] || | Up to 40 || | Always has [[war mask]]. | ||
|- | |- | ||
| − | ! | + | ! Berserker |
| − | |[[File:Chief1557.png]] || | 70 || | 70-300 || | | + | |[[File:Berserker1722.png]] || | 90 || | 50-220 || | Normal || | 200-550 || | 600-750 || | [[Longsword]], [[Spear]] || | Up to 40 || | Always has war mask. |
| + | |- | ||
| + | ! Archer chief | ||
| + | |[[File:Chief1557.png]] || | 130 || | 70-300 || | Superior || | 450-750 || | 500-1000 || | '''Greatbow''' || | At least 30 || | Always has [[tribal headdress]] and wooden [[plate armor]]. Difficult to recruit. Can be faction leader. | ||
| + | |- | ||
| + | ! Berserker chief | ||
| + | |[[File:Chief1557.png]] || | 130 || | 70-300 || | Normal || | 450-750 || | 500-1000 || | [[Longsword]], [[Spear]] || | At least 30 || | Always has [[tribal headdress]] and wooden [[plate armor]]. Difficult to recruit. Can be faction leader. | ||
|- | |- | ||
|} | |} | ||
=== Pirates === | === Pirates === | ||
| + | |||
| + | These units are encountered most frequently in the early game, but you'll see these units throughout the game. All easily-dispatched once you get armor and high-grade weapons. | ||
{| {{STDT| c_01 text-center}} | {| {{STDT| c_01 text-center}} | ||
| Line 189: | Line 228: | ||
|- | |- | ||
! Drifter | ! Drifter | ||
| − | |[[File:Drifter1557.png]] || | | + | |[[File:Drifter1557.png]] || | 30 || | 20-60 || | Shoddy || | 90-280 || | 60-200 || | ''[[Autopistol]]'', '''Club''', Knife, ''[[Revolver]]''|| | Any || | Never carries food. May have a peg leg. |
|- | |- | ||
! Scavenger | ! Scavenger | ||
| − | |[[File:Scavenger1557.png]] || | | + | |[[File:Scavenger1557.png]] || | 45|| | 20-90 || | Poor || | 300-500 || | 250-312 || | Autopistol, '''[[Bolt-action rifle]]''', ''[[Incendiary launcher]]'', '''[[Machine pistol]]''', [[Pump shotgun]], Revolver || | Any || | Comes in large numbers early-game. May have a peg leg. |
|- | |- | ||
! Thrasher | ! Thrasher | ||
| − | |[[File:Thrasher1557.png]] || | | + | |[[File:Thrasher1557.png]] || | 45 || | 40-110 || | Poor || | 300-800 || | 60-150 || | '''Club''', ''[[Gladius]]'', Knife, ''[[Mace]]''|| | Up to 48 || | May have a peg leg. Can be faction leader. |
|- | |- | ||
! Pirate | ! Pirate | ||
| − | |[[File:Pirate1557.png]] || | | + | |[[File:Pirate1557.png]] || | 65 || | 40-150 || | Normal || | 500-1100 || | 450-600 || | [[Assault rifle]], ''Autopistol'', Bolt-action rifle, ''[[Chain shotgun]]'', [[Heavy SMG]], ''Incendiary launcher'', [[LMG]], Machine pistol, Pump shotgun, ''Revolver'', [[Sniper rifle]] || | Up to 50 || | May have a peg leg. Can be faction leader. |
|- | |- | ||
|} | |} | ||
=== Outlanders === | === Outlanders === | ||
| + | |||
| + | Never initially hostile, but you can be raided by these units if you provoke an outlander union. As friendly units, they show up in caravans or friendly reinforcements. | ||
{| {{STDT| c_01 text-center}} | {| {{STDT| c_01 text-center}} | ||
| Line 208: | Line 249: | ||
|- | |- | ||
! Villager | ! Villager | ||
| − | |[[File:Villager1557.png]] || | | + | |[[File:Villager1557.png]] || | 30 || | 20-200 || | Poor || | 300-900 || | 0-250 || | ''Autopistol'', '''Club''', Gladius, Knife, Mace, ''Machine pistol'', ''Revolver'' || | Any || | Traders and councilmen are based off of this pawn. Rarely has simple prostheses. Councilmen may be faction leader. |
|- | |- | ||
! Town Guard | ! Town Guard | ||
| − | |[[File:Guard1557.png]] || | | + | |[[File:Guard1557.png]] || | 53 || | 50-180 || | Poor || | 300-900 || | 200-600 || | Assault rifle, Autopistol, '''Bolt-action rifle''', ''Chain shotgun'', Heavy SMG, ''Incendiary launcher'', LMG, Machine pistol, Pump shotgun, Revolver, ''Sniper rifle'' || | Up to 65 || | Rarely has simple prostheses. |
|- | |- | ||
|} | |} | ||
| Line 217: | Line 258: | ||
=== Mercenaries === | === Mercenaries === | ||
| − | Elite units typically encountered from mid-game onwards. | + | Elite units typically encountered from mid-game onwards. Joins the Outlanders or Pirates in their ranks. |
{| {{STDT| c_01 text-center}} | {| {{STDT| c_01 text-center}} | ||
| Line 223: | Line 264: | ||
|- | |- | ||
! Grenadier | ! Grenadier | ||
| − | |[[File:Grenadier1557.png]] || | 65 || | 70-230 || | Normal || | 800-1400 || | 600-1000 || | [[EMP grenades]], [[Frag grenades]], [[ | + | |[[File:Grenadier1557.png]] || | 65 || | 70-230 || | Normal || | 800-1400 || | 600-1000 || | [[EMP grenades]], [[Frag grenades]], [[Molotov cocktails]] || | Up to 65 || | Comes in two flavors: destructive and EMP. Rarely has bionics. |
|- | |- | ||
! Mercenary Gunner | ! Mercenary Gunner | ||
| − | |[[File:Gunner1557.png]] || | 90 || | 70-230 || | Normal || | 1500-2800 || | 400-900 || | Assault rifle, Bolt-action rifle, Chain shotgun, Heavy SMG, Incendiary launcher, LMG, Machine pistol | + | |[[File:Gunner1557.png]] || | 90 || | 70-230 || | Normal || | 1500-2800 || | 400-900 || | Assault rifle, ''Autopistol'', Bolt-action rifle, ''Chain shotgun'', Heavy SMG, ''Incendiary launcher'', LMG, Machine pistol, Pump shotgun, ''Revolver'', Sniper rifle || | Up to 65 || | Rarely has bionics. |
|- | |- | ||
! Mercenary Sniper | ! Mercenary Sniper | ||
| − | |[[File:Sniper1557.png]] || | 95 || | 70-230 || | Normal || | 1500-2500 || | 1200-1800 || | | + | |[[File:Sniper1557.png]] || | 95 || | 70-230 || | Normal || | 1500-2500 || | 1200-1800 || | '''Sniper rifle''' || | Up to 65 || | Rarely has bionics. |
|- | |- | ||
! Mercenary Slasher | ! Mercenary Slasher | ||
| − | |[[File:Slasher1557.png]] || | 140 || | 50-230 || | Normal || | 1000-2600 || | 1200-2000 || | Club, Gladius, Knife, Longsword, Mace, Shiv | + | |[[File:Slasher1557.png]] || | 140 || | 50-230 || | Normal || | 1000-2600 || | 1200-2000 || | ''Club'', Gladius, Knife, Longsword, Mace, ''Shiv'' || | Up to 65 || | May have bionics. Always has [[shield belt]]. |
|- | |- | ||
! Heavy Mercenary | ! Heavy Mercenary | ||
| − | |[[File:Heavy1557.png]] || | 185 || | 50-140 || | Normal || | 200-350 || | 1600-2000 || | [[Doomsday rocket launcher]], [[Minigun]], [[Triple rocket launcher]] || | Up to 65 || | May have bionics. | + | |[[File:Heavy1557.png]] || | 185 || | 50-140 || | Normal || | 200-350 || | 1600-2000 || | [[Doomsday rocket launcher]], ''[[Minigun]]'', [[Triple rocket launcher]] || | Up to 65 || | May have bionics. |
|- | |- | ||
! Elite Mercenary | ! Elite Mercenary | ||
| − | |[[File:Elite1557.png]] || | 210 || | 80-350 || | Normal || | 2500-4200 || | 1600-2000 || | Assault rifle, [[Charge rifle]], LMG || | Up to 45 || | May have bionics. Bosses are functionally identical and may be faction leader. | + | |[[File:Elite1557.png]] || | 210 || | 80-350 || | Normal || | 2500-4200 || | 1600-2000 || | '''Assault rifle''', [[Charge rifle]], LMG || | Up to 45 || | May have bionics. Bosses are functionally identical and may be faction leader. |
| + | |- | ||
| + | |} | ||
| + | |||
| + | === Spacer === | ||
| + | |||
| + | These people don't appear in normal raids but are found in [[ancient shrine]]s. This variety is always hostile to the player's faction. | ||
| + | |||
| + | {| {{STDT| c_01 text-center}} | ||
| + | ! Pawn Type !! Image !! Combat Power !! Gear Health (%) !! Avg. Gear Quality !! Clothing Budget !! Weapon Budget !! Available Weapons !! Age Range !! Additional Info | ||
| + | |- | ||
| + | ! Space Soldier | ||
| + | |[[File:SpaceSoldier1722.png]] || | 100 || | 100 || | Good || | 0-3200 || | 300-900 || | Assault rifle, ''Autopistol'', Bolt-action rifle, ''Chain shotgun'', Heavy SMG, ''Incendiary launcher'', LMG, Machine pistol, Pump shotgun, ''Revolver'', Sniper rifle || | Up to 58 || | Fairly often has bionics. | ||
|- | |- | ||
|} | |} | ||
| Line 252: | Line 305: | ||
|- | |- | ||
! Scyther | ! Scyther | ||
| − | |[[File:Scyther1557.png]] || | 160 || | 100 || | Normal || | - || | 5000 || | [[Charge lance]] || | Any || | | + | |[[File:Scyther1557.png]] || | 160 || | 100 || | Normal || | - || | 5000 || | '''[[Charge lance]]''' || | Any || | |
|- | |- | ||
! Centipede | ! Centipede | ||
| − | |[[File:Centipede1557.png]] || | 290 || | 100 || | Normal || | - || | 8000 || | [[Heavy charge blaster]], [[Inferno cannon]], Minigun || | Any || | All weapons have a [[forced miss radius]]. | + | |[[File:Centipede1557.png]] || | 290 || | 100 || | Normal || | - || | 8000 || | [[Heavy charge blaster]], [[Inferno cannon]], ''Minigun'' || | Any || | All weapons have a [[forced miss radius]]. |
|- | |- | ||
|} | |} | ||
| Line 269: | Line 322: | ||
=== Mid-base Drop Pods === | === Mid-base Drop Pods === | ||
| − | Raiders will drop pod right into the middle of the base, circumventing all exterior defenses. They have a | + | Raiders will drop pod right into the middle of the base, circumventing all exterior defenses. They may drop into roofed rooms, punching a hole in the roof. They do not care if the room is occupied, and in such cases colonists may only have a few seconds to stop what they were doing and get into fighting positions. If the raiders drop into an enclosed room without colonists they will start randomly attacking the contents of the room. |
| − | Tribes do not have the technology to start a drop pod attack. | + | They have a 10% chance to choose to do so. Tribes do not have the technology to start a drop pod attack. |
=== Immediate Attack Smart === | === Immediate Attack Smart === | ||
| Line 280: | Line 333: | ||
Raiders, upon either landing in their drop pods or arriving on the map sides, will proceed to stand around in a small group near-by where they spawned for a period of time and then proceed to attack. It is possible and a completely viable strategy to attack them while they are "preparing". This preparation has no effect on their attack other than the fact that it gives you more time to prepare yourself. | Raiders, upon either landing in their drop pods or arriving on the map sides, will proceed to stand around in a small group near-by where they spawned for a period of time and then proceed to attack. It is possible and a completely viable strategy to attack them while they are "preparing". This preparation has no effect on their attack other than the fact that it gives you more time to prepare yourself. | ||
| + | |||
| + | === Melee rush === | ||
| + | |||
| + | Pirate raiders have the chance to attack your base with mercenary slashers only, meaning everyone will be shielded and have a melee weapon. | ||
| + | |||
| + | === Sniper party === | ||
| + | |||
| + | In 1.0 pirates have the chance to send snipers only, meaning that all attackers will have long ranged attacks. | ||
=== Sappers === | === Sappers === | ||
| − | + | Instead of attempting to kill your colonists by traditional attack, sappers will mine or blast their way inside rather than hitting your walls or doors as usual.Their ultimate goal is to reach one of your colonists assigned beds. They will run around for a short time and continue to dig afterward if they are under attack. | |
| − | + | The attacker with the best mining skill is chosen to dig. If that digger is killed the next best digger continues digging, and so on. | |
| − | + | They can be fairly dangerous to those who cave in to mountain bases as the defenses are usually concentrated at the entrances. The best thing to do is instantly assault them before they can mine too much. The other members will then carry on the normal assault. On the other hand, they seem to avoid go pass (dig into) the areas within the range of improvised turrets and don't mind much about other security traps (deadfall trap and all kind of IEDs).It's possible to create such an trap area to kill them before hand. | |
| + | However, in open bases they are even worse than regular raiders as they come in smaller numbers. | ||
| + | Sappers can find one tile defenses, either natural rock or built walls. This may cause them to open ancient shrines unintentionally. | ||
<gallery mode="packed-hover"> | <gallery mode="packed-hover"> | ||
File:Sappers are good at finding one tile walls.png|1: Sappers are good at finding one tile walls. | File:Sappers are good at finding one tile walls.png|1: Sappers are good at finding one tile walls. | ||
| − | File:Sappers may even open ancient structures unwisely.png|2: Sappers may even open ancient | + | File:Sappers may even open ancient structures unwisely.png|2: Sappers may even open ancient shrines unwisely. |
File:Sappers attacking ancient structures will kill spacers you would love to recruit.png|3: Sappers attacking ancient structures will kill spacers you would love to recruit. | File:Sappers attacking ancient structures will kill spacers you would love to recruit.png|3: Sappers attacking ancient structures will kill spacers you would love to recruit. | ||
File:Sappers may cause mechanoids to function as your outer defense line.png|4: Sappers may cause mechanoids to function as your outer defense line. | File:Sappers may cause mechanoids to function as your outer defense line.png|4: Sappers may cause mechanoids to function as your outer defense line. | ||
| − | File:Sappers demise.png|5: Sappers | + | File:Sappers demise.png|5: Sappers are defeated. |
</gallery> | </gallery> | ||
=== Siege === | === Siege === | ||
| − | Raiders enter your map from an edge and head towards a | + | Raiders enter your map from an edge and head towards a point to set up a makeshift siege base with supplies ([[steel]], [[packaged survival meal]]s, [[component]]s, [[high-explosive shell]]s and [[incendiary shell]]s) received from drop pods, and wil construct 2 [[mortar]]s and sandbags as cover. |
| − | + | You can intercept them before they start building up if timing is favorable to you. They will always construct two mortars regardless of the number of raiders. They rarely use their best constructors when building, sometimes failing to complete the mortars. As they will not get additional components, this will make them lose firepower. | |
| − | The siege team will not engage | + | Once ready, they will bombard you, with those not manning the mortars remaining on guard. Drop pods will continuously resupply 12 packaged survival meals and more mortar shells. They can receive different types of shell during the siege. After causing enough destruction, they will proceed to converge on your colony. |
| + | |||
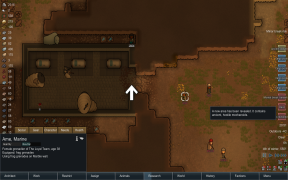
| + | The siege team will not engage friendlies while heading towards their point until they actually start constructing or you assault them first. | ||
[[File:Siege pirates not engaging friendlies yet.png|400px]] | [[File:Siege pirates not engaging friendlies yet.png|400px]] | ||
| + | |||
| + | === Ambush === | ||
| + | |||
| + | Raiders may choose to attack one of your caravans. In this case, they will charge right at your caravan without giving a second thought to strategy. | ||
| + | |||
| + | === Multiple group attacks === | ||
| + | |||
| + | In 1.0 enemies can attack using multiple groups at once. | ||
| + | |||
| + | === Drop pod scatter === | ||
| + | |||
| + | In 1.0 enemies capable of drop pods can now land scattered across the map. | ||
== Defense Strategies == | == Defense Strategies == | ||
| Line 353: | Line 430: | ||
Overall, they can deal heavy damage to your colonists; they do not have good weapons, but compensate with their sheer numbers. <br> | Overall, they can deal heavy damage to your colonists; they do not have good weapons, but compensate with their sheer numbers. <br> | ||
| − | However, as tribalwear does not provide protection and they do not wear any form of armor, they are easier to kill individually than other raiders. | + | However, as tribalwear does not provide protection and they do not wear any form of regular armor, they are easier to kill individually than other raiders. |
Crowd control is an important aspect in defeating tribal raids. The [[Minigun]] or [[LMG]] is an effective weapon to use as it can easily mow down groups of raiders. | Crowd control is an important aspect in defeating tribal raids. The [[Minigun]] or [[LMG]] is an effective weapon to use as it can easily mow down groups of raiders. | ||
Revision as of 01:31, 8 July 2018
|
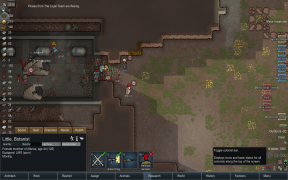
Raiders, are enemies who attack in groups during the period where the storyteller's threat cycle is active - or at possibly any time in the case of Randy Random. The group size and strength of a raiding party is determined by 'points', which will be explained in-depth further down this article.
The game will automatically display a red alert envelope with two different versions, whether they will prepare and then attack or will attack immediately.
Raiders will attack, destroy or burn random targets without any visible strategy or tactic, but will not attack natural rock walls (except sappers), wild animals or unpowered turrets. They will however, engage prisoners from enemy factions.
Besides attempting to raze your base, if not engaging your defenders due to no contact, the behavior will change into other goals such as: stealing valuables that are not properly stored in closed locations, kidnapping downed colonists to demand a ransom of silver or to recruit them into their ranks, leaving after being satisfied with the damage done, as well as give up and retreat due to exhaustion and starvation.

Ransom
Raider's negative thoughts
Pirates have given up and are leaving


Once you have downed or killed half of their crew, the remaining will flee in panic, running as fast as they can towards the map edges.
Raiders who survive may return to attack again in future raids or ambushes. This includes prisoners abandoned from caravans who are in restraint, making them unable to attack properly.
Raid strength
A raid's size and strength is determined by the amount of colonists you have, your wealth, how many big threats you've had (for the early-game), how long your faction's been around for, how long it's been since one of your colonists were downed or killed, and your difficulty.
The actual raid strength is determined by points, which is calculated by taking into account the above factors that affect raid strength.
The below is technical information on the strength of raids, through the determination of points a raid has. All of the following information is from Alpha 17b, or 0.17.1557.
Points
Your first raid will always be 35 points, regardless of the above conditions. Additionally, the first raider won't randomly die upon being downed, and they will never flee.
The base formula for raid points could be expressed as follows:
P = (( C × 42 ) + ( iW ÷ 100 ) + ( bW ÷ 200 )) × ( sR × lR ) × D × T × R
Where C is the number of colonists that your base has; iW is the base's item wealth; bW is the base's building wealth; sR is the short-term ramp-up factor; lR is the long-term ramp-up factor; D is the difficulty's threat scale factor (i.e. points multiplier); T is based on the number of big threats (i.e. raids, manhunter packs, mechanoid ship parts, and psychic waves) that your faction has experienced; and R is based on the strategy that the raiders are using.
C, iW, and bW can be checked under the 'History' tab. Colonists are always worth 42 points, regardless of if they're a peg-legged, pacifistic grandma; or a level 20 trigger-happy, bionic, CED (combat enhancing drug) junkie.
D's value is 0.05 on peaceful; 0.1 on base builder; 0.35 on some challenge; 0.65 on rough; 1 on intense; and 1.3 on extreme.
T's value is 0.5 for 1; 0.7 for 2; 0.8 for 3; 0.9 for 4; and 1 for 5 and greater. Simplified, T's value will be 0.5 for your faction's second ever big threat, and so on.
R's value is 1 for waiting and then attacking; 0.9 for immediate attacks; 0.85 for 'smart' attacks; 0.8 for sapper attacks; and 0.6 for sieges. For raids involving chased refugees it is 1.35.
Ramp-Up Factors
Ramp-ups (i.e. sR and lR) are substantially more complicated than any of the other factors involved:
sR is always 1 until 21 days in; in which case 0.000514403335 is added to it every 5,000 ticks (1.39 mins) - or 1 every 162 days.
lR is always 1 until 42 days in; in which case 0.000231481492 is added to it every 5,000 ticks - or 1 every 360 days.
If a colonist gets downed or killed, 1 is subtracted from both sR and lR - but these aren't the new values; only part of the new values. sR and lR then get multiplied by certain values independently, based on how many colonists you have, with the table below showing all possible combinations as stated in the code (RimWorld.StoryWatcher_RampUp):
| Colonists | 0 | 1 | 2 | 3 | 4 | 5 | 6 | 7 | 8 | 9 | 10 | 11 | 12 | 13 | 14 | 15 | 16+ |
|---|---|---|---|---|---|---|---|---|---|---|---|---|---|---|---|---|---|
| sR Multiplier | 0 | 0 | 0 | 0 | 0.15 | 0.25 | 0.3 | 0.35 | 0.4 | 0.45 | 0.5 | 0.55 | 0.6 | 0.65 | 0.7 | 0.75 | 0.8 |
| lR Multiplier | 0 | 0 | 0 | 0.2 | 0.4 | 0.6 | 0.7 | 0.75 | 0.8 | 0.85 | 0.9 | 0.91 | 0.92 | 0.93 | 0.94 | 0.95 | 0.95 |
After sR and lR have been multiplied by whatever corresponding values, new sR and new lR both equal 1 + old correspondents.
After the base amount of points have been calculated, the game then factors in diminishing returns as follows, using nested 'if' statements, in pseudo-code form:
   IF P > 1000 THEN
       IF P > 2000 THEN
           P = 2000 + (P - 2000) * 0.5
       P = 1000 + (P - 1000) * 0.5
In layman's terms: if P is above 1000, then P is the average of itself and 1,000. However, if P is above 2,000, then P will first be the average of itself and 2,000, before averaging with 1,000.
Finally, with Randy Random, a raid's points gets multiplied by anywhere from 0.5x to 1.5x, meaning that you could face more or less powerful raids than usual with this storyteller.
Example
So now lets plug in some real-world numbers: your colony has 4 people, it's been 17 days, and this is the colony's third raid. Your item wealth is 11,000, your building wealth is 4,000, and you're playing on rough difficulty. The raiders are attacking immediately.
The values in the formula will be as follows:
C = 4
iW = 11000
bW = 4000
sR = 1
lR = 1
D = 0.65
T = 0.7
R = 0.9
Plugging these values into the formula:
P = ((4 * 42) + (11000 / 100) + (4000 / 200)) * (1 * 1) * 0.65 * 0.7 * 0.9 or
P = (168 + 110 + 20) * 1 * 0.65 * 0.7 * 0.9 or
P = 298 * 0.4095 thus
P = 122.031 or
P = 122
Therefore, the raid will be 122 points.
Equipment
Weapons
Raiders have limited equipment possibilities; dependent on their weapon and apparel budgets, and what equipment 'tags' they are allowed to equip. Usually on Cassandra Classic and Phoebe Chillax they come equipped early on with mostly pistols and crude melee weapons, some bolt-action rifles and pump shotguns later down the line. In the late game they can come equipped with things such as frag grenades, sniper rifles, incendiary launchers and machine pistols. Rarely some will have assault rifles or even charge rifles.
A raiding party may include members equipped with melee weapons and shield belts. When a raiding party includes grenade throwers, the AI is intelligent enough to run way from grenades thrown by their own faction (though this does not apply to other explosives). Raiders wielding rocket launchers will attempt to avoid friendly fire.
Counterintuitively, they can and will quite often spawn with melee weapons that result in them having a lower DPS than unarmed combat.
Also, raiders will not use the best weapon for their skills, instead randomly picking weapons. They are often seen equipped with ranged weapons when they are better at melee (completely disregarding the Brawler trait), and vice versa.
Armor
They come in different clothing depending on their type and the outside conditions. If it's cold at your colony, they will come wearing parkas and tuques, but they don't usually wear dusters and cowboy hats in the heat.
Humanlike
There are multiple types of raiders in RimWorld, each with their own sets of equipment and budgets which the game uses to 'buy' their equipment. Similarly, the game 'buys' raiders by deducting the raiders' Combat Power rating from the amount of raid points.
Weapons that are in bold are weapons that a raider kind is particularly likely to equip; weapons that are in italics are weapons that a raider kind is particularly unlikely to equip.
Raider types are exclusive to their faction - mercenaries being exempt.
Tribals
Tribal fighters, weak but expendable. They never carry silver or medicine.
| Pawn Type | Image | Combat Power | Gear Health (%) | Avg. Gear Quality | Clothing Budget | Weapon Budget | Available Weapons | Age Range | Additional Info |
|---|---|---|---|---|---|---|---|---|---|
| Penitent | 35 | 20-110 | Poor | 50-100 | 90-150 | Club, Knife | ? | ||
| Warrior |  |
60 | 50-180 | Poor | 180-350 | 60-400 | Club, Ikwa, Knife | Up to 40 | Tribal traders are based off of this pawn. |
| Archer |  |
48 | 50-180 | Poor | 180-350 | 80 | Short bow | Up to 40 | |
| Hunter |  |
65 | 50-180 | Normal | 180-450 | 400-700 | Recurve bow | Up to 40 | Always has war veil. |
| Heavy Archer | 90 | 50-220 | Normal | 200-550 | 600-750 | Greatbow, Pila | Up to 40 | Always has war mask. | |
| Berserker |  |
90 | 50-220 | Normal | 200-550 | 600-750 | Longsword, Spear | Up to 40 | Always has war mask. |
| Archer chief | 130 | 70-300 | Superior | 450-750 | 500-1000 | Greatbow | At least 30 | Always has tribal headdress and wooden plate armor. Difficult to recruit. Can be faction leader. | |
| Berserker chief | 130 | 70-300 | Normal | 450-750 | 500-1000 | Longsword, Spear | At least 30 | Always has tribal headdress and wooden plate armor. Difficult to recruit. Can be faction leader. |
Pirates
These units are encountered most frequently in the early game, but you'll see these units throughout the game. All easily-dispatched once you get armor and high-grade weapons.
| Pawn Type | Image | Combat Power | Gear Health (%) | Avg. Gear Quality | Clothing Budget | Weapon Budget | Available Weapons | Age Range | Additional Info |
|---|---|---|---|---|---|---|---|---|---|
| Drifter |  |
30 | 20-60 | Shoddy | 90-280 | 60-200 | Autopistol, Club, Knife, Revolver | Any | Never carries food. May have a peg leg. |
| Scavenger | 45 | 20-90 | Poor | 300-500 | 250-312 | Autopistol, Bolt-action rifle, Incendiary launcher, Machine pistol, Pump shotgun, Revolver | Any | Comes in large numbers early-game. May have a peg leg. | |
| Thrasher | 45 | 40-110 | Poor | 300-800 | 60-150 | Club, Gladius, Knife, Mace | Up to 48 | May have a peg leg. Can be faction leader. | |
| Pirate | 65 | 40-150 | Normal | 500-1100 | 450-600 | Assault rifle, Autopistol, Bolt-action rifle, Chain shotgun, Heavy SMG, Incendiary launcher, LMG, Machine pistol, Pump shotgun, Revolver, Sniper rifle | Up to 50 | May have a peg leg. Can be faction leader. |
Outlanders
Never initially hostile, but you can be raided by these units if you provoke an outlander union. As friendly units, they show up in caravans or friendly reinforcements.
| Pawn Type | Image | Combat Power | Gear Health (%) | Avg. Gear Quality | Clothing Budget | Weapon Budget | Available Weapons | Age Range | Additional Info |
|---|---|---|---|---|---|---|---|---|---|
| Villager | 30 | 20-200 | Poor | 300-900 | 0-250 | Autopistol, Club, Gladius, Knife, Mace, Machine pistol, Revolver | Any | Traders and councilmen are based off of this pawn. Rarely has simple prostheses. Councilmen may be faction leader. | |
| Town Guard |  |
53 | 50-180 | Poor | 300-900 | 200-600 | Assault rifle, Autopistol, Bolt-action rifle, Chain shotgun, Heavy SMG, Incendiary launcher, LMG, Machine pistol, Pump shotgun, Revolver, Sniper rifle | Up to 65 | Rarely has simple prostheses. |
Mercenaries
Elite units typically encountered from mid-game onwards. Joins the Outlanders or Pirates in their ranks.
| Pawn Type | Image | Combat Power | Gear Health (%) | Avg. Gear Quality | Clothing Budget | Weapon Budget | Available Weapons | Age Range | Additional Info |
|---|---|---|---|---|---|---|---|---|---|
| Grenadier |  |
65 | 70-230 | Normal | 800-1400 | 600-1000 | EMP grenades, Frag grenades, Molotov cocktails | Up to 65 | Comes in two flavors: destructive and EMP. Rarely has bionics. |
| Mercenary Gunner |  |
90 | 70-230 | Normal | 1500-2800 | 400-900 | Assault rifle, Autopistol, Bolt-action rifle, Chain shotgun, Heavy SMG, Incendiary launcher, LMG, Machine pistol, Pump shotgun, Revolver, Sniper rifle | Up to 65 | Rarely has bionics. |
| Mercenary Sniper | 95 | 70-230 | Normal | 1500-2500 | 1200-1800 | Sniper rifle | Up to 65 | Rarely has bionics. | |
| Mercenary Slasher |  |
140 | 50-230 | Normal | 1000-2600 | 1200-2000 | Club, Gladius, Knife, Longsword, Mace, Shiv | Up to 65 | May have bionics. Always has shield belt. |
| Heavy Mercenary | 185 | 50-140 | Normal | 200-350 | 1600-2000 | Doomsday rocket launcher, Minigun, Triple rocket launcher | Up to 65 | May have bionics. | |
| Elite Mercenary | 210 | 80-350 | Normal | 2500-4200 | 1600-2000 | Assault rifle, Charge rifle, LMG | Up to 45 | May have bionics. Bosses are functionally identical and may be faction leader. |
Spacer
These people don't appear in normal raids but are found in ancient shrines. This variety is always hostile to the player's faction.
| Pawn Type | Image | Combat Power | Gear Health (%) | Avg. Gear Quality | Clothing Budget | Weapon Budget | Available Weapons | Age Range | Additional Info |
|---|---|---|---|---|---|---|---|---|---|
| Space Soldier | 100 | 100 | Good | 0-3200 | 300-900 | Assault rifle, Autopistol, Bolt-action rifle, Chain shotgun, Heavy SMG, Incendiary launcher, LMG, Machine pistol, Pump shotgun, Revolver, Sniper rifle | Up to 58 | Fairly often has bionics. |
Mechanoid
Mechanical enemies that neither feels pain not seeks cover.
| Pawn Type | Image | Combat Power | Gear Health (%) | Avg. Gear Quality | Clothing Budget | Weapon Budget | Available Weapons | Age Range | Additional Info |
|---|---|---|---|---|---|---|---|---|---|
| Scyther | 160 | 100 | Normal | - | 5000 | Charge lance | Any | ||
| Centipede |  |
290 | 100 | Normal | - | 8000 | Heavy charge blaster, Inferno cannon, Minigun | Any | All weapons have a forced miss radius. |
Raiders' Strategies
Immediate Attack
Raiders, upon either landing in their drop pods or arriving on the map sides, will proceed to instantaneously converge on your colony and attack. The best thing to do is to defend.
They have a 70% chance to arrive on foot at the map edges, and 20% to drop pod there, assuming they don't use other strategies and are capable of utilizing drop pods.
Mid-base Drop Pods
Raiders will drop pod right into the middle of the base, circumventing all exterior defenses. They may drop into roofed rooms, punching a hole in the roof. They do not care if the room is occupied, and in such cases colonists may only have a few seconds to stop what they were doing and get into fighting positions. If the raiders drop into an enclosed room without colonists they will start randomly attacking the contents of the room.
They have a 10% chance to choose to do so. Tribes do not have the technology to start a drop pod attack.
Immediate Attack Smart
Like Immediate Attack, but the raiders are unusually clever in their tactics because they simply steal some of your items and run. This can be devastating in early game, because a raider may steal your stockpile of components, leaving you without any means of using electricity.
Preparation
Raiders, upon either landing in their drop pods or arriving on the map sides, will proceed to stand around in a small group near-by where they spawned for a period of time and then proceed to attack. It is possible and a completely viable strategy to attack them while they are "preparing". This preparation has no effect on their attack other than the fact that it gives you more time to prepare yourself.
Melee rush
Pirate raiders have the chance to attack your base with mercenary slashers only, meaning everyone will be shielded and have a melee weapon.
Sniper party
In 1.0 pirates have the chance to send snipers only, meaning that all attackers will have long ranged attacks.
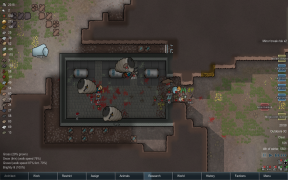
Sappers
Instead of attempting to kill your colonists by traditional attack, sappers will mine or blast their way inside rather than hitting your walls or doors as usual.Their ultimate goal is to reach one of your colonists assigned beds. They will run around for a short time and continue to dig afterward if they are under attack.
The attacker with the best mining skill is chosen to dig. If that digger is killed the next best digger continues digging, and so on.
They can be fairly dangerous to those who cave in to mountain bases as the defenses are usually concentrated at the entrances. The best thing to do is instantly assault them before they can mine too much. The other members will then carry on the normal assault. On the other hand, they seem to avoid go pass (dig into) the areas within the range of improvised turrets and don't mind much about other security traps (deadfall trap and all kind of IEDs).It's possible to create such an trap area to kill them before hand. However, in open bases they are even worse than regular raiders as they come in smaller numbers.
Sappers can find one tile defenses, either natural rock or built walls. This may cause them to open ancient shrines unintentionally.
1: Sappers are good at finding one tile walls.
2: Sappers may even open ancient shrines unwisely.

3: Sappers attacking ancient structures will kill spacers you would love to recruit.
4: Sappers may cause mechanoids to function as your outer defense line.
5: Sappers are defeated.


Siege
Raiders enter your map from an edge and head towards a point to set up a makeshift siege base with supplies (steel, packaged survival meals, components, high-explosive shells and incendiary shells) received from drop pods, and wil construct 2 mortars and sandbags as cover.
You can intercept them before they start building up if timing is favorable to you. They will always construct two mortars regardless of the number of raiders. They rarely use their best constructors when building, sometimes failing to complete the mortars. As they will not get additional components, this will make them lose firepower.
Once ready, they will bombard you, with those not manning the mortars remaining on guard. Drop pods will continuously resupply 12 packaged survival meals and more mortar shells. They can receive different types of shell during the siege. After causing enough destruction, they will proceed to converge on your colony.
The siege team will not engage friendlies while heading towards their point until they actually start constructing or you assault them first.

Ambush
Raiders may choose to attack one of your caravans. In this case, they will charge right at your caravan without giving a second thought to strategy.
Multiple group attacks
In 1.0 enemies can attack using multiple groups at once.
Drop pod scatter
In 1.0 enemies capable of drop pods can now land scattered across the map.
Defense Strategies
For a more comprehensive list of strategies, see Defense tactics.
For constructed defenses to hold against raiders, see Defense structures.
It is recommended to keep power generation, eating areas, lighting, doors, and walls near or behind a protected entrance, as raiders tend to set fire to them, potentially causing huge damage. Raiders will prioritize firing on colonists or turrets when those colonists or turrets are firing on them, but will otherwise prioritize random objects, meaning you can put doors or walls near your defenses to temporarily distract them.
Raider Preparation
Raiders will sometimes start by standing around in a group where they spawned and will continue this until they see a colonist nearby or they hit a certain preparation time limit, at which point they begin the assault. Because a colonist can set them off early, you can plan out the time you want them to attack. It is generally best to set them off early if you're well-prepared, to avoid potentially troublesome scenarios such as having no power when their timer runs out. Conversely, you should not set them off early if your defense is not prepared. Note that raiders usually take less than one day to begin, meaning that if there is an eclipse and you rely on Solar generators, you should not wait for them and should instead set them off early while you still have some power left. Also it's good to note that raiders will remember where your traps are. This doesn't apply to other factions, though -- if, say, the Vipers of Power come in and sets off your traps, then they would remember that. But, if the Rippers of Fire later attack, they won't have that knowledge and will still set off the same traps.
Siege defense
When faced with a siege, there are a few coping strategies you can use.
You can choose to either to assault the mortar base or wait it out and repair the damage as best as you can. The choice mainly depends on the surroundings of the mortar base and your base's position. If your base is located under a mountain (your base tiles will read Overhead Mountain when you hover your cursor over them), the mortar shells won't be able to hit those tiles at all! This makes deep mining a very effective strategy against heavy bombardment. If you don't build your base into a mountain, you should at least consider digging out at least one panic room for your colonists to hide within from the shells.
If you assault their base, one possibility is sniping either the shells or the mortars, hoping an explosion kills many of the raiders. If you want to leave those intact, you can snipe the raiders themselves. Keep in mind that killing enough of them prompts them to assault your colony directly instead of continuing their siege.
Mechanoid assaults
Mechanoids only come in 2 types, Scythers and Centipedes. They have much differing stats and weapons, meaning different tactics may be used.
In most raids where they come/ drop in at the edges, the Scythers will outrun the Centipedes by a great margin, giving plenty of time to deal with them before the centipedes.
Scythers
Scythers are capable of long-range sniping attacks, and are extremely deadly with melee. If fighting it from a distance, cover along with long-ranged weapons such as sniper rifles or bolt-action rifles are vital.
Despite its high melee damage, sometimes melee fighting it may be better, as long as you have good armor and weapons.
Centipedes
Centipedes, on the other hand, specialize in crowd control and area denial; the Minigun and Heavy charge blaster can annihilate groups of colonists, while the Inferno cannon sets your colonists ablaze and burns down your base if not careful. They are incredibly durable, sporting thick armor and high health, and can take many hits before they can be downed.
Centipedes wielding the Minigun and Heavy Charge Baster can be cheesed simply by making a lone colonist, preferably with a personal shield, stand in front of your other colonists. The centipede will target that colonist, but be unable to hit it due to the forced miss radii. Watch out for friendly fire.
The Inferno cannon is not as destructive towards your colonists, but is annoying to deal with. Keep watch on your colonists at all times, and remember to send them back into cover when needed. As a precaution, build your base out of non-flammable materials to prevent large-scale fires erupting all over your colony.
Engaging it in melee is not recommended due to its armor, high health and heavy damage.
Tribal raids
Tribal raiders come in large numbers, but with relatively poor equipment; as such, it may require different strategy compared to pirate or outlander raids.
Overall, they can deal heavy damage to your colonists; they do not have good weapons, but compensate with their sheer numbers.
However, as tribalwear does not provide protection and they do not wear any form of regular armor, they are easier to kill individually than other raiders.
Crowd control is an important aspect in defeating tribal raids. The Minigun or LMG is an effective weapon to use as it can easily mow down groups of raiders.
Explosive weapons are also useful in crowd control.
Explosive mortars, while inaccurate, can easily destroy a sizable group of tribals at once if they hit.
Grenades can hit archers hiding behind cover, though you have to risk a colonist or two in order to even get close enough to throw them.
Their archers are dangerous; their bows can be fired from a somewhat long distance, their pila can easily kill or incapacitate a colonist, and they always come in a large volley. As with most defensive strategies, cover is essential when fighting them.
Removing rock chunks also helps in dealing with tribal raiders hiding behind them, making them much easier to hit.