Difference between revisions of "Lost Tribe Guide"
Aardvark 1 (talk | contribs) m (fix typo) |
|||
| (15 intermediate revisions by 3 users not shown) | |||
| Line 8: | Line 8: | ||
===Skills you need=== | ===Skills you need=== | ||
| + | Trait-limited general abilities; you want to avoid any trait that limits these: | ||
| + | *'''Violence''': For food and (unplanned) self-defense, a "must have" for your entire starting tribe. | ||
| + | *'''Dumb labor''': Hauling and cleaning, no room for slackers. | ||
| − | + | There are only 12 skills in Rimworld, and you'll find that you want every one. You'll have some decisions to make... | |
| − | |||
| − | |||
| − | |||
| − | |||
| − | |||
| − | |||
| − | |||
| − | |||
| − | |||
| − | |||
| − | |||
| − | |||
| − | |||
| − | + | * '''Combat''' - Shooting and Melee. You need a couple heavy hitters in the ranged department, and as many who can help as possible. | |
| + | * '''[[Skills#Medical|Medical]]''': Treating the sick and injured, which happens a lot in neolithic cultures. | ||
| + | ** Since herbal medicine has a low medical potency, the doctor needs to be skilled and have a clean room to work in. | ||
| + | * '''[[Research]]''': Researching new projects. Since your tribe is slow to research many projects, you may want to start soon. | ||
| + | * '''[[Skills#Plants|Plants]]''': Growing food crops and cutting plants. Starting a stable food supply is a high priority because you start off with very little food. | ||
| + | ** Aim to have at least 2 growers. | ||
| + | ** Also useful for [[caravan]]s. In biomes and seasons where it's possible to do so, tribes forage at a rate of 170% while traveling. Forage amounts are determined by a colonist's Plants skill. | ||
| + | ** Consider your [[Biome]]. Healroot does not grow in Tropical Swamps; you'll need a grower with skill 8 to sow it. Desert and Tundra have very little wood; you'll need a grower with skill 6. | ||
| + | *'''[[Construction]]''': Building a shelter for your tribe, beyond any caves you mine out | ||
| + | * '''[[Mining]]''': Obtaining metallic resources such as [[steel]] for building better equipment, and quickly digging a safe hole to hide in. | ||
| + | * '''[[Cooking]]''': Cooking food without giving your colonists food poisoning. | ||
| + | * '''[[Crafting]]''': Crafting weapons and clothing. | ||
| + | * '''[[Social]]''': Convincing captured prisoners to join forces with you, as well as bartering for resources. | ||
| + | * '''[[Skills#Animals|Animals]]''': Some of the best trading items, a source of extra lift for caravans, and early "combat support". But if you have to cut a corner for the early game, this (and [[Artistic]]) may be the one. | ||
| + | === Things to avoid === | ||
*'''Can't do dumb labor''': Everyone needs to clean. Everyone needs to haul. Everyone needs to be able to refuel passive coolers in the summer and campfires in the winter. | *'''Can't do dumb labor''': Everyone needs to clean. Everyone needs to haul. Everyone needs to be able to refuel passive coolers in the summer and campfires in the winter. | ||
*'''Can't be violent''': There are likely to be situations where you've only got one pawn able to stand, and they'd better be able to hold a weapon. | *'''Can't be violent''': There are likely to be situations where you've only got one pawn able to stand, and they'd better be able to hold a weapon. | ||
| Line 36: | Line 40: | ||
*'''Addiction''': [[Drugs#Addiction and Tolerance|Addiction]] is very difficult to manage in the first in-game year. An addicted character is likely to go into withdrawal, a lengthy process which will slow or disrupt your efforts to get the colony on its feet. | *'''Addiction''': [[Drugs#Addiction and Tolerance|Addiction]] is very difficult to manage in the first in-game year. An addicted character is likely to go into withdrawal, a lengthy process which will slow or disrupt your efforts to get the colony on its feet. | ||
*'''High pain levels''': Be sure to hover over each wounded character's wounds and see how high their total pain level will be. The [[Thoughts#Pain|pain]] from old scars will remain constant until you can reliably replace [[Medical Items#Body Parts|body parts]] via surgery. But if a character's pain is 15% or higher, they will have a constant -10 to Mood (unless they're a Masochist). | *'''High pain levels''': Be sure to hover over each wounded character's wounds and see how high their total pain level will be. The [[Thoughts#Pain|pain]] from old scars will remain constant until you can reliably replace [[Medical Items#Body Parts|body parts]] via surgery. But if a character's pain is 15% or higher, they will have a constant -10 to Mood (unless they're a Masochist). | ||
| − | *'''Movement / manipulation penalties''': Old injuries also reduce the effectiveness of the injured part. This is a bit more situational than the others, depending on the colonist's skills. An artist or researcher can live with a small movement penalty, a | + | *'''Movement / manipulation penalties''': Old injuries also reduce the effectiveness of the injured part. This is a bit more situational than the others, depending on the colonist's skills. An artist or researcher can live with a small movement penalty, a cook can get by with damage to their hearing, a trader is still effective with reduced manipulation, etc. Make sure your colonists' health issues don't directly prevent them from doing their primary jobs. |
== Beginning == | == Beginning == | ||
| Line 48: | Line 52: | ||
|- align="center" | |- align="center" | ||
| width=62px height=40px | [[File:ShortBow.png|32px|link=Short bow]] | | width=62px height=40px | [[File:ShortBow.png|32px|link=Short bow]] | ||
| − | | width=62px height=40px | [[File:Pila.png|32px|link= | + | | width=62px height=40px | [[File:Pila.png|32px|link=Pila]] |
| − | | width=62px height=40px | [[File:Club.png|32px|link= | + | | width=62px height=40px | [[File:Club.png|32px|link=Club]] |
| width=62px height=40px | [[File:Ikwa.png|32px|link=Ikwa]] | | width=62px height=40px | [[File:Ikwa.png|32px|link=Ikwa]] | ||
| width=62px height=40px | [[File:Knife.png|32px|link=Knife]] | | width=62px height=40px | [[File:Knife.png|32px|link=Knife]] | ||
| Line 114: | Line 118: | ||
Whenever possible, make more pemmican. Since you start with [[pemmican]] researched already, as long as you have both meat and edible plants, you can make it. It can last over a year (70 in-game days) without spoiling, and potentially longer if it spends time being refrigerated or frozen. It also does not have a cooking skill requirement to make. | Whenever possible, make more pemmican. Since you start with [[pemmican]] researched already, as long as you have both meat and edible plants, you can make it. It can last over a year (70 in-game days) without spoiling, and potentially longer if it spends time being refrigerated or frozen. It also does not have a cooking skill requirement to make. | ||
| − | One way to do this is to have two fueled stoves, or a campfire and a fueled stove. At your primary cooking station, set a bill for meals which includes only your most skilled cook. Set a second "do forever" bill for pemmican with either no minimum skill requirement, or one which includes your second-tier cooks. ([[ | + | One way to do this is to have two fueled stoves, or a campfire and a fueled stove. At your primary cooking station, set a bill for meals which includes only your most skilled cook. Set a second "do forever" bill for pemmican with either no minimum skill requirement, or one which includes your second-tier cooks. ([[Food poisoning]] chances in previous versions were only affected only by kitchen cleanliness and cook skill level. This will make it easier to convert meat into pemmican as fast as possible whenever you have both, so you don't lose as much meat to spoilage. |
A [[passive cooler]] can't achieve true refrigeration in the summer; these are mainly useful to keep colonist living areas cool enough to avoid mood penalties. You won't be able to slow food spoilage in warm weather until you have researched Electricity and Air Conditioning. | A [[passive cooler]] can't achieve true refrigeration in the summer; these are mainly useful to keep colonist living areas cool enough to avoid mood penalties. You won't be able to slow food spoilage in warm weather until you have researched Electricity and Air Conditioning. | ||
If you are in a biome that has winter, during the winter season you can build a door between your food storage area and the outside and set that door to "hold open" to let the climate act as a freezer. Once you have researched Complex Furniture, a [[vent]] is better than a held-open door if you want to avoid wild animals wandering into your fridge. (Unless you do want wild animals wandering into your fridge—where you can shoot them.) | If you are in a biome that has winter, during the winter season you can build a door between your food storage area and the outside and set that door to "hold open" to let the climate act as a freezer. Once you have researched Complex Furniture, a [[vent]] is better than a held-open door if you want to avoid wild animals wandering into your fridge. (Unless you do want wild animals wandering into your fridge—where you can shoot them.) | ||
| + | |||
| + | [[File:Campfire work bills.jpg|300px|thumb|left|Work bills set at a campfire to provide meals for one colonist.]] | ||
[[Simple meal]]s can be made with only one ingredient, and can be eaten by all animals except wargs. Setting a bill for simple meals and forbidding vegetarian ingredients may be useful for times when vegetables have run out and you're no longer able to make pemmican. Especially in warm weather, don't cook too many simple meals; they may spoil, wasting the food. Then again, '''not''' cooking raw food will also allow it to spoil. With 5 colonists and a few animals, setting a bill at your primary campfire to make simple meals "until you have 20" may be a good balance to start. Even after your cooks are skilled enough to make fine or lavish meals, you may find yourself still needing to make simple meals occasionally when only meat is available. | [[Simple meal]]s can be made with only one ingredient, and can be eaten by all animals except wargs. Setting a bill for simple meals and forbidding vegetarian ingredients may be useful for times when vegetables have run out and you're no longer able to make pemmican. Especially in warm weather, don't cook too many simple meals; they may spoil, wasting the food. Then again, '''not''' cooking raw food will also allow it to spoil. With 5 colonists and a few animals, setting a bill at your primary campfire to make simple meals "until you have 20" may be a good balance to start. Even after your cooks are skilled enough to make fine or lavish meals, you may find yourself still needing to make simple meals occasionally when only meat is available. | ||
| Line 152: | Line 158: | ||
** you can keep tabs on kills of predators from the ''Wildlife'' tab, and pick up the remains of their kills | ** you can keep tabs on kills of predators from the ''Wildlife'' tab, and pick up the remains of their kills | ||
| − | It's best to avoid the very biggest animals if they're healthy, or numerous herds of anything. | + | It's best to avoid the very biggest animals if they're healthy, or numerous herds of anything. One maddened muffalo is a problem; ten maddened muffalo can be a colony wipe in the early game. Execute boomalope and boomrats from a distance to avoid having a colonist caught in its death explosion. |
| − | Having a hunter on the night shift | + | Having a hunter on the night shift can give them a little extra advantage, since the animals will be asleep until a shot hits them or lands near them. |
== Apparel == | == Apparel == | ||
| − | Your tribe members start wearing [[tribalwear]] and some may also have a [[parka]]. After you settle down and have spare time, chop trees for wood or hunt animals to obtain raw materials to make [[ | + | Your tribe members start wearing [[tribalwear]] and some may also have a [[parka]]. After you settle down and have spare time, chop trees for wood or hunt animals to obtain raw materials to make [[veil]]s or [[war mask]]s. These give slight protection, increase pain threshold allowing your tribespeople to hold out in battle longer before falling. |
Once you've researched Complex clothing, you may wish to prioritize temperature-resistant apparel. If your biome has extreme temperatures this is even more urgent. If you're low on crafting materials or haven't completed the research when the extreme temperature season rolls around, you may have to resort to wearing parkas or dusters scrounged from dead enemies. Avoiding heatstroke and frostbite is important, and the negative [[thoughts|thought]] from wearing one item of tainted apparel (-3) is smaller than any of the negative thoughts from being too hot or too cold. | Once you've researched Complex clothing, you may wish to prioritize temperature-resistant apparel. If your biome has extreme temperatures this is even more urgent. If you're low on crafting materials or haven't completed the research when the extreme temperature season rolls around, you may have to resort to wearing parkas or dusters scrounged from dead enemies. Avoiding heatstroke and frostbite is important, and the negative [[thoughts|thought]] from wearing one item of tainted apparel (-3) is smaller than any of the negative thoughts from being too hot or too cold. | ||
| Line 231: | Line 237: | ||
=== Construction === | === Construction === | ||
| − | Once you've build a basic hut to keep your tribals safe, and you've got some basic infrastructure up, you'll want to start | + | Once you've build a basic hut to keep your tribals safe, and you've got some basic infrastructure up, you'll want to start planning individual rooms for your colonists. As you can't build beds until you've researched them, you'll want to use bedrolls or sleeping spots at first. When you do research Complex furniture, save those bedrolls for use by your caravans. |
In the first few days, you may need to keep your stockpile outdoors. Keeping this within six tiles of your shelter's walls will let you put a roof over it. Roofs are free and reduce the rate of items' deterioration (though they don't help [[food]] from spoiling). | In the first few days, you may need to keep your stockpile outdoors. Keeping this within six tiles of your shelter's walls will let you put a roof over it. Roofs are free and reduce the rate of items' deterioration (though they don't help [[food]] from spoiling). | ||
| Line 266: | Line 272: | ||
====Mechanoids==== | ====Mechanoids==== | ||
| − | It's a good idea in general to have a collection of steel spike traps (or stone at minimum) built but uninstalled and kept in storage. These can save you time if your storyteller sends you multiple threats in a short timeframe. But they are invaluable when you begin to get mechanoid ship parts starting around year 2. The weapons and armor you have available may not be enough to defeat mechanoids without heavy casualties. | + | If your wealth is still very low by the end of the first year, you may get mechanoids approaching over land like any other raiders. Once your wealth is up around "moderate expectations," however, you will sometimes get the poison ship and psychic ship events. |
| + | |||
| + | It's a good idea in general to have a collection of steel spike traps (or stone at minimum) built but uninstalled and kept in storage. These can save you time if your storyteller sends you multiple threats in a short timeframe. But they are invaluable when you begin to get mechanoid ship parts starting around year 2. The weapons and armor you have available may not be enough to defeat mechanoids without heavy casualties. Setting up a pathway of spike traps on your outer perimeter, and if possible another along the mechanoids' path towards your base, will be very helpful in dealing with a mechanoid [[Crashed ship parts|ship part]]. | ||
| + | |||
| + | Build carefully - installing any player-built structure within 4 tiles of the ship itself will crack it open as though you had attacked it. | ||
<gallery widths="400px" heights="400px" class="center" mode="nolines"> | <gallery widths="400px" heights="400px" class="center" mode="nolines"> | ||
Tribal poison ship.jpg|'''Quick-build defenses against a poison ship using sandbags and stored spike traps.''' | Tribal poison ship.jpg|'''Quick-build defenses against a poison ship using sandbags and stored spike traps.''' | ||
Tribal poison ship 2.jpg|'''An alternative setup, using roofed sandbags and steel traps for basic protection.''' | Tribal poison ship 2.jpg|'''An alternative setup, using roofed sandbags and steel traps for basic protection.''' | ||
| + | Wall with trap line.jpg|'''A tribe uses scavenged guns against a psychic ship. Access doors in the outer wall's spike trap line provide covered firing positions.''' | ||
</gallery> | </gallery> | ||
{{nav/guides}} | {{nav/guides}} | ||
[[Category:Guides]] | [[Category:Guides]] | ||
Latest revision as of 04:53, 10 January 2024
In the Lost Tribe scenario, you start off with 5 people, but less material resources, and research slower.
Choosing tribals (Optional)[edit]
Since you have 5 people, each tribesperson doesn't have as much of an impact as colonists from other scenarios. You can spread skills across the whole party. However, Neolithic technologies are more labor-intensive, so you'll still want colonists who are good at more than one thing.
All the following are suggestions to keep in mind. In practice, you may find yourself making exceptions for a really excellent character whose positive synergies balance out their negatives. But if you keep these goals in mind, it will be easier to only deviate from the plan for a character who really is worth making an exception.
Skills you need[edit]
Trait-limited general abilities; you want to avoid any trait that limits these:
- Violence: For food and (unplanned) self-defense, a "must have" for your entire starting tribe.
- Dumb labor: Hauling and cleaning, no room for slackers.
There are only 12 skills in Rimworld, and you'll find that you want every one. You'll have some decisions to make...
- Combat - Shooting and Melee. You need a couple heavy hitters in the ranged department, and as many who can help as possible.
- Medical: Treating the sick and injured, which happens a lot in neolithic cultures.
- Since herbal medicine has a low medical potency, the doctor needs to be skilled and have a clean room to work in.
- Research: Researching new projects. Since your tribe is slow to research many projects, you may want to start soon.
- Plants: Growing food crops and cutting plants. Starting a stable food supply is a high priority because you start off with very little food.
- Aim to have at least 2 growers.
- Also useful for caravans. In biomes and seasons where it's possible to do so, tribes forage at a rate of 170% while traveling. Forage amounts are determined by a colonist's Plants skill.
- Consider your Biome. Healroot does not grow in Tropical Swamps; you'll need a grower with skill 8 to sow it. Desert and Tundra have very little wood; you'll need a grower with skill 6.
- Construction: Building a shelter for your tribe, beyond any caves you mine out
- Mining: Obtaining metallic resources such as steel for building better equipment, and quickly digging a safe hole to hide in.
- Cooking: Cooking food without giving your colonists food poisoning.
- Crafting: Crafting weapons and clothing.
- Social: Convincing captured prisoners to join forces with you, as well as bartering for resources.
- Animals: Some of the best trading items, a source of extra lift for caravans, and early "combat support". But if you have to cut a corner for the early game, this (and Artistic) may be the one.
Things to avoid[edit]
- Can't do dumb labor: Everyone needs to clean. Everyone needs to haul. Everyone needs to be able to refuel passive coolers in the summer and campfires in the winter.
- Can't be violent: There are likely to be situations where you've only got one pawn able to stand, and they'd better be able to hold a weapon.
- Incapable of caring: See above. In an emergency, everyone needs to be able to attempt doctoring. A crude herbal bandage is better than nothing.
Health[edit]
Tribal starting characters have a higher chance to be malnourished, have chemical addictions, or have scars from old wounds. Even a character with amazing traits and skills may not be your best pick if their physical or mental health is poor, because you will lack the resources needed to help them manage their conditions.
- Addiction: Addiction is very difficult to manage in the first in-game year. An addicted character is likely to go into withdrawal, a lengthy process which will slow or disrupt your efforts to get the colony on its feet.
- High pain levels: Be sure to hover over each wounded character's wounds and see how high their total pain level will be. The pain from old scars will remain constant until you can reliably replace body parts via surgery. But if a character's pain is 15% or higher, they will have a constant -10 to Mood (unless they're a Masochist).
- Movement / manipulation penalties: Old injuries also reduce the effectiveness of the injured part. This is a bit more situational than the others, depending on the colonist's skills. An artist or researcher can live with a small movement penalty, a cook can get by with damage to their hearing, a trader is still effective with reduced manipulation, etc. Make sure your colonists' health issues don't directly prevent them from doing their primary jobs.
Beginning[edit]
You appear with supplies scattered around, hungry and malnourished, the pemmican (400 units) will only last for the first day and the second morning and before everything starts off a lot of it would've been eaten.
Weapons[edit]
Your tribe starts off with a low-tech selection of weapons.
Short bow (x2)
|
The pila can be given to moderately skilled shooters, as they can deal heavy damage if they hit but don't have much range, and the long time between shots means that you'll regret missing with it.
One short bow should be equipped by the most skilled shooter, and the other by a less skilled shooter.
The steel ikwa should be given to your best melee pawn, followed by the wooden club. The jade knife is best left alone as it's the lowest damaging melee weapon; even wooden clubs, easily made, beat it in damage output.
You can place a crafting spot to make extra wooden clubs or Recurve bows, which does not require research for Tribal starts. Your ranged characters can then upgrade to recurve bows. These are fairly effective and will often serve you well through the first year.
Shelter[edit]
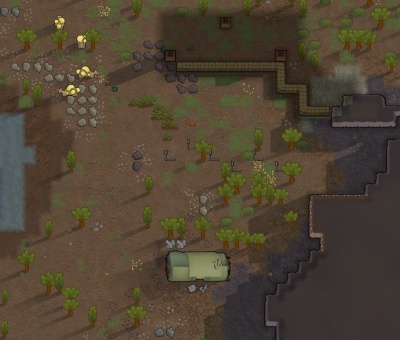
You will need to find shelter for your tribespeople. The easiest solution is to look for ancient structures in the proximities which are already standing and require a wall patch or two. If there isn't any nearby, then a simple wood hut will do. Preferably, choose an area where there's rough stone ground. Any fire that may spread around will be prevented from burning your home as long as there are 4 tiles with no flammable material between the fire and your flammable items or wooden walls. Note that tribespeople need to research stonecutting. If you can't obtain a massive amount of steel due to lacking skillful miners, you will need to stick to wood or deconstructed ruins for some time. However it's still very likely that stonecutting tech will be finished before you need to build very much. In the beginning of the game you can get by with an all-built in barrack.
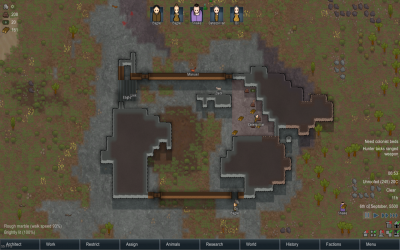
Wooden hut surrounded by rough stone
All built in barrack, early start.


Another good option, if your map has ruins, is to deconstruct some of the walls that are close to where you want to put your base. This will yield stone blocks. You can use stone blocks to build your own stone walls even before you have Stonecutting researched. If you end up with a patchwork of different stone types, that's fine -- any stone is better than steel and much better than wood. Deconstruction has the added bonus of slightly leveling up a pawn's construction skill with minimal loss. If they waste resources deconstructing a ruin, you only lose something you didn't have to begin with, and your pawn still got the experience.
With this method, on day one you could pick one of the larger ruins for your tribe to camp out in. Put a roof on it, and as soon as your plant cutters get some trees chopped, add doors. Wooden doors are fine—stone doors open much more slowly, and if your walls are stone, rebuilding a burned-down door is no big deal. Toss down some sleeping spots, butcher spot, crafting spot, campfire and a few basic stockpile zones. You may want to put in a table and stool on the first or second day. If the weather is hot, putting the campfire right outside the door and putting a torch lamp and passive cooler indoors may be better. This will be a huge help in keeping your colonists' mental state stable, as it can help you avoid negative thoughts like "Slept outdoors," "Slept in the cold" / "Slept in the heat" and potentially even "Ate without table."

As your colony gets established, you will be able to design your base to employ other low-tech survival strategies. For example, a tribal colony in a cold biome might benefit from roofing over a steam geyser.
Food[edit]
Obtaining food should be one of your priority tasks so your tribe won't starve.
Growing crops[edit]
Crops differ one from another, and your decisions will differ based on the "Growing period" of your map, be it 10/60, 20/60, 30/60 or year-round. Besides the crop of choice it is very important to analyze ground fertility, as this will influence how fast the crops grow.
Plants with a higher skill requirement take more time to sow. Your growers' skill points will affect their sowing speed.
- Rice grows fast and can be harvested soon. In a biome with a 20/60 growing period, a skilled grower should be able to get 2 rice harvests, provided they are able to replant promptly once the first harvest is in. With rich soil it may be possible to get 3.
- Strawberries are the second fastest, and can be eaten raw without any mood debuffs.
- Potatoes take a while to grow but provide more food. They are useful if there is a lack of fertile land, as potatoes have low fertility sensitivity.
- Corn has the longest growing period but it provides large quantities once it matures. This crop choice is best once you have secured a large food storage. It can also be good to plant early if your biome has a long winter, to get the largest possible amount of food in your limited available time.
- Haygrass has a very high yield and can be eaten raw by herbivorous animals. It can also be combined with meat to make kibble, which can be fed to any animal except wargs. Making sure your animals have haygrass or kibble means you can save more edible plants to cook meals and pemmican for your colonists.
While food should be your main concern, there are other plants you would do well to work on as well:
- Cotton can be harvested for cloth. In a biome with extreme cold, it will also help to have wool-bearing tame animals, as wool has a higher cold resistance factor than cloth. It will also help to keep some cloth stored to make Flak armor sets once you have researched the technology. This is important to prepare yourself against mechanoid attacks. Mechanoids start triggering once you have spent at least one year on your map. These enemies can easily blow off limbs, and you will regret not preparing yourself well if you can't make protective gear for your colonists.
- Healroot can be harvested for herbal medicine but requires a minimum skill level of eight to sow. If your growers are not ready yet, keep planting the other crops until they reach this level. If your biome has healroot growing, check often for wild healroot to harvest. Zooming the map out and double-clicking on a wild plant will highlight every plant of its species on the screen so you can quickly mark them for harvest by your plant cutters.
- If wood is scarce in your biome, you may need to plant trees or Saguaro cactus. Tribal starts begin with Tree sowing already researched. Trees have a skill requirement of 6 to sow, and stop growing but do not die if the temperature gets too cold or too hot. (The exception to this is cocoa trees, which require separate research. In a 20/60 biome or colder, cocoa trees are a complete waste of time: they have an 8 skill requirement to plant, a long growing time, cannot grow in a greenhouse and die in cold temperatures.) In a desert biome, Saguaro cacti are excellent, as they can be sown in sand, and make up for their low yield with a short growing time.
Food preservation[edit]
Unlike the other starts, lack of cooler technology means it's impossible to build a sub-zero freezer to prevent food spoilage. Until you have researched air conditioning and built a proper freezer, your colony will be walking a tightrope of "don't hunt more than you can cook / stockpile as much food as you can."
Whenever possible, make more pemmican. Since you start with pemmican researched already, as long as you have both meat and edible plants, you can make it. It can last over a year (70 in-game days) without spoiling, and potentially longer if it spends time being refrigerated or frozen. It also does not have a cooking skill requirement to make.
One way to do this is to have two fueled stoves, or a campfire and a fueled stove. At your primary cooking station, set a bill for meals which includes only your most skilled cook. Set a second "do forever" bill for pemmican with either no minimum skill requirement, or one which includes your second-tier cooks. (Food poisoning chances in previous versions were only affected only by kitchen cleanliness and cook skill level. This will make it easier to convert meat into pemmican as fast as possible whenever you have both, so you don't lose as much meat to spoilage.
A passive cooler can't achieve true refrigeration in the summer; these are mainly useful to keep colonist living areas cool enough to avoid mood penalties. You won't be able to slow food spoilage in warm weather until you have researched Electricity and Air Conditioning.
If you are in a biome that has winter, during the winter season you can build a door between your food storage area and the outside and set that door to "hold open" to let the climate act as a freezer. Once you have researched Complex Furniture, a vent is better than a held-open door if you want to avoid wild animals wandering into your fridge. (Unless you do want wild animals wandering into your fridge—where you can shoot them.)

Simple meals can be made with only one ingredient, and can be eaten by all animals except wargs. Setting a bill for simple meals and forbidding vegetarian ingredients may be useful for times when vegetables have run out and you're no longer able to make pemmican. Especially in warm weather, don't cook too many simple meals; they may spoil, wasting the food. Then again, not cooking raw food will also allow it to spoil. With 5 colonists and a few animals, setting a bill at your primary campfire to make simple meals "until you have 20" may be a good balance to start. Even after your cooks are skilled enough to make fine or lavish meals, you may find yourself still needing to make simple meals occasionally when only meat is available.
To prolong the time meat lasts until it spoils, you can forbid dead animals from butchering until they are closer to spoiling. After butchering, the time until spoilage is reset, so while the animals may have spoiled in e.g. 4 hours, the meat from it will last roughly 2 days. The same tactic can then apply between meat and meals.
Mining[edit]
Mining is not one of the top priorities for a tribal start, so you may not have any colonists with high mining skill or passion. However, if there are steel ores within proximity, some of your colonists could still be assigned to mining them.
Steel walls can be built without research and have higher resistance to fire than wood. It's also not as slow to mine as stone even for miners with modest skill, although low level miners will not get the full 40x ore out of each tile. Keep in mind that the amount of mine-able steel in each map is finite, and it'll be awhile before you have a smelter to make steel from slag. You will need a lot of steel to build spike traps, as that will be your go-to defensive structure. And you'll need even more once you get more industrial technologies researched. Any steel walls you build can be deconstructed and replaced with stone walls once you've researched Stonecutting. Once you've done so and want to replace wood walls with stone, cutting stone blocks from the random stone chunks laying around on the ground is more efficient than mining for stone in most maps.
If you choose to build a starting shelter among existing rock formations, you'll likely want to mine into them get steel or make more room. But be aware when tiles start to be roofed with "Overhead mountain." This roof type can collapse if not properly supported. Also, while your AI storyteller is unlikely to send you an infestation in the first few quadrums, any overhead mountain terrain within 30 tiles of a colony structure will be at risk later on. Consider planning to move out into a free-standing base once you have the means to do so.
Silver is free money you can use to buy food and weapons. Jade makes very effective clubs or valuable sculptures. However, stone blocks are more plentiful and all of them can be used to make art. So jade sculptures should be reserved for your top crafter unless someone has an inspired creativity.
Other minerals are more situational. You may wish to stock up on components if you're currently working on Electricity research. Low-volume rare minerals such as gold or uranium could possibly wait until you have a plan to use them for a particular project. Minerals which are still in the ground, i.e., have not yet been mined, do not count towards your colony's item wealth. Raiders tend to target your valuables, and wealth is one of several factors your storyteller uses to calculate the size of threats to send you. So stockpiling valuable minerals for which you have no immediate use is counterproductive.
Gathering and Hunting[edit]
Raspberries can be found across the map, which can be harvested for decent early-game food supply. They grow fast, can be harvested multiple times and can be eaten raw without giving mood debuffs. Most Biomes will also have enough wild healroot for you to get by early on if you keep an eye out and harvest it regularly.
Hunting is the classic feeding way of pre-agricultural tribes, since there is a gap between running out of your starter food and a successful harvest (min: 60% plant growth). You can look on the Wildlife tab to see a list of all the animals on the map and mark some animals for hunting. The Wildlife tab will also show injured animals who will be easy to hunt, or predators which might have recently killed prey nearby. Checking around the map periodically, you can sometimes find the corpses of animals which have died after being injured by predators or vengeful prey. Although there is no notification, you will hear a sound of animal distress, often a loud "squeak!" when a wild predator kills a prey animal. Unless the prey is very small, there will usually be a corpse left over with meat and leather you can use. These animal corpses are forbidden by default. If they're still fresh, you can unforbid them. Your haulers will go and collect the free food.
Once an animal is marked for hunting, your hunters equipped with ranged weapons will automatically shoot the animals from a distance. The list of animals is a great resource to find out which ones to hunt—or later on, attempt to tame. On the one hand, it's useful to go after large animals. They yield generous amounts of leather which your colonists can use to build bedrolls or tribalwear. It also conserves your hunters' effort by maximizing the amount of meat they get for their time.
However, you will want to balance these rewards against the risks of hunting a particular animal. The Wildlife tab also shows whether an animal is a predator, and what are the odds it will turn manhunter in revenge for being harmed. Just being an herbivore is no guarantee of safety. For example, a vengeful, herbivorous Megasloth can easily kill all five of your colonists on day 1 -- their movement speed is surprisingly fast for something named "sloth"! A single healthy Thrumbo is a challenge even for a well-equipped group of midgame colonists. Animals which are in a herd are also dangerous. If a herd animal goes manhunter, their entire herd might join in their revenge and overwhelm your colonists.
Thus it's best, especially in the early game, to prioritize hunting animals which:
- have a 0% revenge chance, such as deer and alpaca
- are more likely to be found alone and have a decent amount of meat, such as turkey or raccoon
- are injured in a way that restricts their movement (check the animal's Health tab)
- you can keep tabs on kills of predators from the Wildlife tab, and pick up the remains of their kills
It's best to avoid the very biggest animals if they're healthy, or numerous herds of anything. One maddened muffalo is a problem; ten maddened muffalo can be a colony wipe in the early game. Execute boomalope and boomrats from a distance to avoid having a colonist caught in its death explosion.
Having a hunter on the night shift can give them a little extra advantage, since the animals will be asleep until a shot hits them or lands near them.
Apparel[edit]
Your tribe members start wearing tribalwear and some may also have a parka. After you settle down and have spare time, chop trees for wood or hunt animals to obtain raw materials to make veils or war masks. These give slight protection, increase pain threshold allowing your tribespeople to hold out in battle longer before falling.
Once you've researched Complex clothing, you may wish to prioritize temperature-resistant apparel. If your biome has extreme temperatures this is even more urgent. If you're low on crafting materials or haven't completed the research when the extreme temperature season rolls around, you may have to resort to wearing parkas or dusters scrounged from dead enemies. Avoiding heatstroke and frostbite is important, and the negative thought from wearing one item of tainted apparel (-3) is smaller than any of the negative thoughts from being too hot or too cold.
Animals[edit]
Tribal starts begin with three random animals. If you're lucky, you may get one capable of hauling or even a pack animal. Some or all of them may start already bonded. The list of animals has all the details on what animals can be trained to do, and which produce resources. If you have a resource-producing animal or one which can be trained to haul, it can be very valuable. Make sure you enable any training you want your animals to have, and consider carefully how to set their allowed zones. Wild predators can hunt your tame animals for food, particularly the small ones. Keep those bonded Yorkies, cats and monkeys close to home!
You may need to slaughter some animals for food if your biome has harsh winters, so it's best to keep even nonessential, unbonded animals alive as long as you can. Slaughtering uses the medical skill; if possible, have one of your doctors do it. The experience is small, but it actually benefits them and isn't as much use to your animal handlers.
All animals except wargs can eat pemmican and cooked meals as well as kibble, even if the meal's ingredients conflict with the animal's diet. Wargs must eat raw meat or corpses. If there's an animal you want to keep, be sure to set its zone restriction so it has access to food. For example, wargs should always have access to the dumping zone where you bring corpses, while herbivores should always be in an area with plenty of vegetation to eat.
If an animal has been successfully trained to haul, it may be a good idea so set its zone to unrestricted. The benefit of having it occasionally haul things which your human haulers don't have time for far outweighs the fact that it can go in and out of your fridge or track dirt on the floors. Plus, if an animal hauler takes away raider corpses after a fight, your human haulers may be able to avoid some of the mood penalties from handling the bodies. Hauling animals which are larger predators themselves, such as huskies, cougars and wargs, are less likely to be hunted by wild predators.

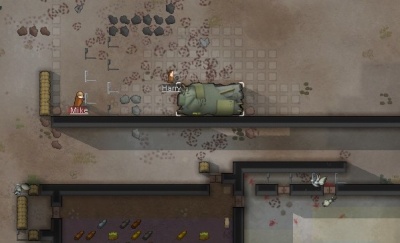
Betty the cougar, helping my colonists avoid "Observed corpse" bad thoughts.
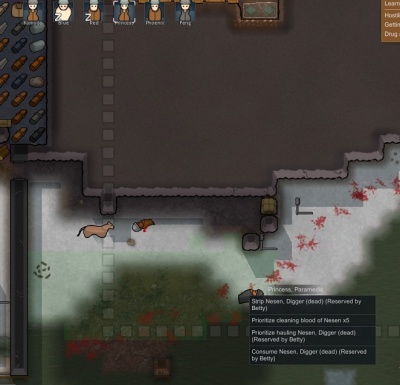
Way to go, Betty! Keep up the good work.


On the other hand, a bonded animal always has a mental break when its bonded human dies. This may only be a Daze, or it may go Berserk. This can be very disruptive if the bonded animal is a large predator such as a bear or warg.
The next steps[edit]
Once you have built an all-in barrack shelter and harvested your first crops, you should look making small step over all improvements.
Research[edit]

Research is a high priority and should begin as soon as you can spare a colonist to the task. Building a simple research bench within the first few days is not a bad idea.
Lost tribes start with the technologies Psychoid brewing, Tree sowing, Passive cooler, Pemmican and Recurve bow already researched. This means you can get basic cooling (to 17C) with a passive cooler, and you can make long-lasting pemmican food. After placing a crafting spot you can build recurve bows - which are better than the starting short bows - and war masks for improved protection and courage.
If you can't spare someone to full-time research at first, having a colonist who can multitask between research and a periodic duty such as animal training or hunting will let you start making progress even before your food supply is stable. Once you get more colonists, two researchers is well worth the time investment. If at least one of them has passion for research, it is possible to get Stonecutting, Complex clothing and Electricity finished well before the end of the second game year.
Due to their low starting tech level, research costs for tribes are doubled on Industrial and Spacer projects. Medieval techs have a 150% research costs multiplier (x1.5), while Neolithic techs have no research penalty. This means you can access the basic technologies quickly to get your colony on its feet.
| Project tech level | Research cost multiplier |
|---|---|
| Neolithic | 100% |
| Medieval | 150% |
| Industrial | 200% |
| Spacer | 200% |
If you have more than one researcher (or one of them is a Night Owl), setting one on the day shift and another on the night shift can speed up your progress.
- Stonecutting will let you build a stonecutter's table. Stone blocks are a must for constructing strong, non-flammable walls without using up steel. They are also great for making small sculptures, which have decent trade value even for crafters with modest skills.
- Complex clothing will let you make temperature-resistant clothing such as parkas for cold weather and dusters for hot weather. In a biome with extreme temperatures, this is a priority. Lack of protection from intense heat or cold can ruin your colonists' health, productivity and mental state and potentially kill them.
- After Stonecutting and Complex clothing, you may wish to prioritize upgrading your weaponry. It will be a long time before you're able to craft your own guns. Research Smithing to make better melee weapons and great bows. The Fueled smithy also allows making Simple helmet for only 40 steel, an upgrade from war masks.
- Then Plate armor for better protection against enemies who do have guns.
- Complex furniture is very valuable before you have electricity. Building vents, fueled stoves, tool cabinets and beds will help you keep your colonists healthier and more productive in the early game.
After taking care of the basics, Electricity is your main goal, then Air conditioning. (Unless your base is in an extreme cold biome, in which case vents in your fridge will take care of everything but a heat wave.) With air conditioning technology, you can build a freezer to keep your food from spoiling. This radically changes the game.
Once you have a freezer, which industrial and higher technologies to research first will vary a lot depending on your biome and play style. Remember to hang on to the components you get from mining, crashed ship chunks and mechanoid ship parts. By the time you have electricity researched, you will have a tidy stockpile you can use to build a power network.
For a traditional power grid with conduits, keep modest battery banks protected behind a switch, and only turn each one on to charge or provide backup power. These precautions won't be needed if you're going for a zero-conduit build, or if you've disabled Zzztt in the scenario options. If you prefer to minimize the impact of Zzzt by building a zero battery network, you may wish to prioritize research on different power options.
Construction[edit]
Once you've build a basic hut to keep your tribals safe, and you've got some basic infrastructure up, you'll want to start planning individual rooms for your colonists. As you can't build beds until you've researched them, you'll want to use bedrolls or sleeping spots at first. When you do research Complex furniture, save those bedrolls for use by your caravans.
In the first few days, you may need to keep your stockpile outdoors. Keeping this within six tiles of your shelter's walls will let you put a roof over it. Roofs are free and reduce the rate of items' deterioration (though they don't help food from spoiling).
A food storage area is an absolute must. Planning early how to make your fridge both well defended from the outside and easily accessible from the inside will pay off in the long run. Passive coolers lower temperature to a minimum of 17C, which will give you an extra day or two of storage for raw meats before they spoil, and an extra few days for meals. A single entrance with an airlock system (door, empty space, second door, with walls on both sides) can help maintain the coolest temperature you can create.
The exception to this is an extra door or vent to the outside in the winter, if your biome has winter, to let you take advantage of the natural cold to temporarily freeze your food. Double walls also help retain temperature. Stone or metal for the outer layer and wood for the inner layer can work just fine before you've researched Electricity, since you don't have to worry about Zzztt events setting the walls on fire from the inside.
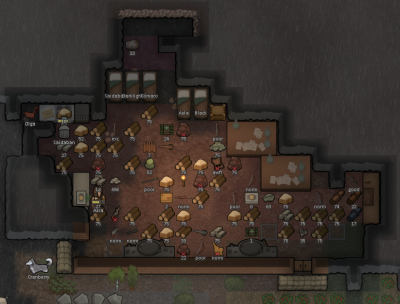
Room arrangements in general should minimize the distance colonists need to travel between tasks. The bedroom areas should provide easy access to the dining room, the kitchen should be near the fridge, the workshop should be close to the materials stockpile, etc. If you don't want to spend the space and resources to make individual bedrooms, a large barrack with a couple pieces of art of normal quality or better can be impressive enough to avoid penalties if it's kept clean. (However, your pawns will still suffer from disturbed sleep, which stacks up to -3.) In the early and midgame, a combined dining room / kitchen / workshop can be very effective. The space required to hold all these functions will make it easier to keep this room impressively spacious even before you have art. It's also helpful to centralize temperature control devices such as passive coolers and campfires as much as possible. Because neolithic temperature control uses so much wood, having a high priority dedicated stockpile just for wood very close to the entrance to your living and working space can save time for your haulers.
Walls around your growing zones will help protect them from raiders, fires spread from lightning strikes, and herbivorous wild animals. You may be able to get away with building fewer walls if the terrain allows you to have one or more sides of your growing zone bordered by a natural firebreak. (However, this will still leave your fields accessible to hungry animals who will eat your crops, or raiders who will try to set them on fire.) Some examples include ancient asphalt road, rough stone or a river. For obvious reasons, walls around your crop fields should be stone, or steel at minimum.
Defense[edit]
General[edit]

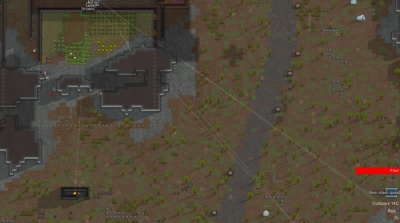
It's never too early to think about security. As you won't have gun turrets for a long time, you may need to use spike traps to your advantage. Building a wall or taking advantage of natural choke points around your base could be useful to guide raiders into an entrance protected by sandbags or covered in spike traps, and building mazes filled with traps could be useful too. Just remember that colonists have a low chance of activating the traps and severely wounding themselves, so either put them in a checkerboard pattern or include shortcuts with doors for colonist access. You'll also want to edit the allowed zone for your animals to make sure they're not allowed in the areas where you've set up spike traps.
Even in the first few days, even if you're short on steel, a few wooden spike traps in any narrow passageway can be used for defense by having your colonists flee across the area where they're set up. Although your first raid will always be a single human, animals turning manhunter in revenge or hunting your colonists for food can happen anytime. Wood spike traps do half the damage of steel spike traps. But wood is cheap and plentiful in most biomes, so it may be more efficient in the beginning. Wooden traps will be ineffective against mechanoids, however.
A natural choke point such as a rock formation near your base is an ideal place to set up traps. But a stockpile zone set to hold stone chunks and/or stone blocks can work to create an artificial choke point before you're able to build extensive stone walls. Stone chunks slow down movement and give 50% cover; they also work as a fire break if the stockpile is at least 4 tiles wide.
If you have a pawn who spends a lot of their time in your campsite, such as a cook, crafter or researcher, it's best that they have a good weapon. An injured colonist fleeing from a raider or maddened animal may need to run back towards the spike traps set up near your base. It makes a big difference to have someone taking potshots at whoever is pursuing them, or running out to give the pursuer a good whack. Some options to consider are a recurve bow, a club, or a bundle of pila (the neolithic shotgun!).
Raiders[edit]
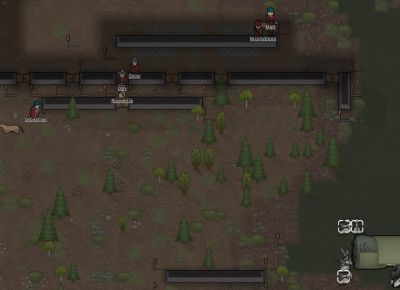
Raiders target your valuables as well as your colonists. If there are no people or tame animals close enough to attack, they'll burn crops and destroy structures wherever they can easily access them. A cheap method to distract them is to build a table and stool in a couple of different spots around the map, some distance from your base. Raiders will often detour to smash this furniture and set it on fire, buying you time to get your fighters back home to defend your crops and loot. This can serve a second function of giving your colonists an extra table where they can eat food or "relax socially" while they're out hunting, gathering or hauling.
Bait tables, chokepoints and walled trap lines: an effective combination.

Distractions may slow down attackers. Spike traps deployed in natural choke points or arranged in trap corridors can help funnel them into an open killbox area inside your walls.
Mechanoids[edit]
If your wealth is still very low by the end of the first year, you may get mechanoids approaching over land like any other raiders. Once your wealth is up around "moderate expectations," however, you will sometimes get the poison ship and psychic ship events.
It's a good idea in general to have a collection of steel spike traps (or stone at minimum) built but uninstalled and kept in storage. These can save you time if your storyteller sends you multiple threats in a short timeframe. But they are invaluable when you begin to get mechanoid ship parts starting around year 2. The weapons and armor you have available may not be enough to defeat mechanoids without heavy casualties. Setting up a pathway of spike traps on your outer perimeter, and if possible another along the mechanoids' path towards your base, will be very helpful in dealing with a mechanoid ship part.
Build carefully - installing any player-built structure within 4 tiles of the ship itself will crack it open as though you had attacked it.
Quick-build defenses against a poison ship using sandbags and stored spike traps.
An alternative setup, using roofed sandbags and steel traps for basic protection.
A tribe uses scavenged guns against a psychic ship. Access doors in the outer wall's spike trap line provide covered firing positions.


- Progression
- Quickstart Guides • Basics • Intermediate Midgame Guide • Advanced Endgame Guide • Ending the game
- Scenarios
- Lost Tribe Guide • Rich Explorer Guide • Naked Brutality Guide • The Mechanitor Guide

- Survival
- Extreme Heat Guide • Extreme Cold Guide • Extreme Desert Guide • Ice Sheet Guide • Sea Ice Guide • Events Guide
- Combat
- Defense tactics • Offense tactics • Weapon Guide
- Construction
- Colony Building Guide • Defense structures
- Production
- Food production • Money making guide
- Other
- Skill Training • Permadeath save conversion guide •
Ideology Min-Maxing