Difference between revisions of "Intermediate Midgame Guide"
m |
|||
| Line 24: | Line 24: | ||
In general: | In general: | ||
| − | + | * All areas should be well lit (no dark places). | |
| − | + | * Frequented areas should have constructed or smoothed floors. | |
| − | + | * [[Autodoor]]s should be used in frequently trafficked places (the kitchen, freezer, storage and production room). | |
Do not strive for perfection in any of these areas yet. It is better to have a makeshift hospital than none at all; so make a room with a few beds that are only used for medical purposes, before thinking about hospital beds and sterile tiles. The important point is to have medical beds on stand-by, in a clean room, at all times – not to have the perfect end-game hospital right from the start. Likewise, keeping a small, ugly, insecure prison barracks is still better than having to re-purpose rooms after every raid in order to even capture somebody (leaving some colonists without bedrooms in the process). | Do not strive for perfection in any of these areas yet. It is better to have a makeshift hospital than none at all; so make a room with a few beds that are only used for medical purposes, before thinking about hospital beds and sterile tiles. The important point is to have medical beds on stand-by, in a clean room, at all times – not to have the perfect end-game hospital right from the start. Likewise, keeping a small, ugly, insecure prison barracks is still better than having to re-purpose rooms after every raid in order to even capture somebody (leaving some colonists without bedrooms in the process). | ||
Revision as of 21:17, 23 October 2020
"Mid-game" is the phase of an established colony working towards the research and resources necessary to build the spaceship. At this point of the game, you want to create a stable community that is self-sufficient and can recover from disaster as quickly as possible. Even a string of bad events should not lead to ruin.
This is the longest phase of a typical playthrough. Your challenge is to keep all basic needs covered and, most importantly, have everybody in a good mood. The game tries to put your colonists in a bad mood in many ways. Counteracting this is how you avoid crises and increase overall productivity. A lot of the advice in this guide revolves around mood management, either directly or indirectly.
Buildings and Infrastructure
Here is a list of facilities in rough order of importance that an established base in midgame should have – all of this heavily varies by difficulty level and map conditions (but you will know when your defense was too weak for your difficulty level...).
- Power supply: the power supply must be sufficient to run all essential facilities, including lighting. Some backup (such as offline batteries) should be on stand-by. Since power is critical in some areas (e.g. to run the freezer) it must not be easily interrupted by damage; that means, run some backup power lines.
- Freezer: a refrigerated room that is large enough to hold enough fresh food to get you through the winter or special circumstances like a toxic fallout event. How much food you need to store depends on a lot of other factors.
- Kitchen: a place to prepare food. This is critical to any colony; the kitchen must be well maintained and in an accessible place.
- Food production: some capacity to farm vegetables (e.g. an outdoor farm with some protection from fire and animals, or an indoor hydroponics facility). How much is needed depends on the amount of meat available from hunting, and if you have domesticated animals yielding products. You also want to farm medication and various drugs, in addition to food.
- Warehouse: a storage area that is reasonably fire-proof and easily accessible.
- Living: good living conditions for your colonists. This usually means private bedrooms for everybody, and all colonists with special needs ("greedy", "jealous") covered, as well as a dining and recreation area. All of this should be as comfortable and beautiful as possible.
- Hospital: at least a few beds in a clean room to tend patients. Preferably the room should be sterile and include hospital beds and vitals monitors. A stockpile of medication should be in this room.
- Defenses: facilities adequate for your difficulty level to defend you from raids. This can range from a few walls to heavy fortifications and automated turrets.
- Production: a dedicated area for crafting and creating. This should be close to the warehouse, and made as comfortable and beautiful as is reasonable.
- Prison: if you get a lot of "visitors", some decent accommodation (a.k.a. brig) is in order. The prison cells should be comfortable enough to keep the prisoner as happy as possible, because that makes recruiting them easier.
- Prison: Alternately, you can use prisons as an experience farm by making it so the guests revolt as often as possible. Stack those mood debuffs to the point where they have mental breaks while in catharsis from the last one to get medical, combat, social(wardening) and construction experience in much higher amounts than you would with a "nice" prison since your guests stay much longer before you can break their will, then recruit or release them.
In general:
- All areas should be well lit (no dark places).
- Frequented areas should have constructed or smoothed floors.
- Autodoors should be used in frequently trafficked places (the kitchen, freezer, storage and production room).
Do not strive for perfection in any of these areas yet. It is better to have a makeshift hospital than none at all; so make a room with a few beds that are only used for medical purposes, before thinking about hospital beds and sterile tiles. The important point is to have medical beds on stand-by, in a clean room, at all times – not to have the perfect end-game hospital right from the start. Likewise, keeping a small, ugly, insecure prison barracks is still better than having to re-purpose rooms after every raid in order to even capture somebody (leaving some colonists without bedrooms in the process).
Create the basic facilities first, then improve them afterwards. Do not take unnecessary shortcuts (for example, do not put the butcher's table in the medical room, because "there just was no better spot at the moment"). By the midgame you should strive to have everything built out of stone.
The kitchen, hospital and laboratory (research benches) can be placed in the same room, which should be sterile. This is because room cleanliness has a major impact on cooking, medical outcomes and research speed. Moreover, both the kitchen and hospital benefit from being in a central location, and the mood impact from waking up a pawn during treatment is pretty minor compared to the impact of acute pain.
Make all rooms as cozy and beautiful as possible, especially the areas where your colonists spend a lot of time: research desks, workshops, and recreation rooms. A beautiful environment will lift up their mood; build beautiful objects anywhere your colonists spend a lot of time, not simply the recreation area. Putting good chairs in front of all production desks will make your colonists feel comfortable while they are using them.
Rooms and corridors must be spacious enough to not cause problems and allow your colonists to move around freely. Leaving a little extra room is almost always a good idea. While one-tile corridors to infrequently used locations are fine, you will probably want at least two tiles for the major travel paths.
Freezer


Even in the early game, the freezer is an indispensable facility, because meat and prepared meals spoil very quickly, and it is impossible to keep a fresh food stockpile without a controlled freezing area.
In the mid-game, you must make sure that your freezer is large enough to store enough supplies for the entire colony, and possibly many days. The freezer must be close to the room where meals are prepared. Since unbutchered animals are usually stored inside the freezer as well, it is viable to put the butcher's table inside the freezer. This also keeps the substantial filth from the butchering in a room where it does not matter. Butchering is a short, intermittent activity for your cook, so the work speed penalty is not very impactful here.
If your freezer opens directly to the kitchen, your kitchen might end up cold. If your freezer opens directly on the outside, it can lose coolness, particularly during heat waves or solar flares. You may consider building a small freezer vestibule / airlock to limit this effect.
Kitchen

By midgame usually you will have at least one electric stove, and possibly some temporary storage shelves for cooking ingredients.
At some point, you should replace the floor in this room with metal or even sterile tiles. This will reduce the chance of food poisoning, a very annoying condition that you want to avoid.
In any case, the kitchen absolutely needs to be close to the freezer, probably right next to it. The connecting door is also probably the first autodoor you should build in your base.
Prepared food has to be delivered to your dining area, and often also to prisoners and hospital patients. Position the kitchen so that this is easily possible. The kitchen door should probably be an autodoor. When the colony grows larger, you should create a secondary, small freezer room close to where prepared meals are consumed. Then do not store meals any longer in the freezer. This will reduce foot traffic in the freezer, and make it a lot easier to have colonists eat at a table. The popular Rim Fridge mod helps with this approach.
Bedrooms

Bedrooms have a high impact on the overall mood of your colonists, so it is worth investing in them. Higher quality beds make your colonists rest more quickly during sleep, increasing their productivity (work hours per day).
A good midgame bedroom needs to be impressive and provide a comfortable bed.
- To increase comfort, give the bed an end table, and put a dresser in the room. Higher quality furniture provides better comfort, while higher quality beds increase the rest effectiveness. Have your most capable builder furnish the bedrooms.
- Overall impressiveness of the room is a complex combination of several factors: wealth, room size, beauty and cleanliness. Provide a good balance of all these qualities.
- A good midgame bedroom has all of the following:
- 25 tiles of floor space; bigger is not good, because it increases cleaning effort and cost of flooring. This leaves enough room to put temporary production buildings in the bedroom, useful during base expansion.
- Bed, end table and dresser in best possible quality
- Standing lamp
- Beauty items, such as flower pot or sculpture; more is better, but do not go overboard.
- High quality flooring, such as carpets. This increases beauty. If you can smooth the floors (and walls), usually in a mountain base, this is always preferable to carpet flooring: it gives the same beauty value, but is not flammable and much cheaper to build. You need a good constructor, because smoothing floors takes a lot of work.
- Heating and/or cooling; it is far easier to heat or cool the hallways instead, and use vents to equalize the temperature with the bedrooms.
Keep the bedrooms clean, because dirt quickly lowers "impressiveness".
It is not recommended to have a table and chair in the room for colonists to eat at, because other colonists will use it as well, and possibly disturb the sleep of the owner. Put the eating tables in the hallway in front of the bedrooms if you have to.
Bedrooms should only have a single door, so they will not be used as a thoroughfare, disturbing the sleep of their owners.
Hospital

A hospital room should have sterile tile flooring; they provide a cleanliness buff that increases surgery success rate and lowers wound infection chance. Hospital beds and vitals monitors boost treatment quality and immunity gain. One vitals monitor can cover up to 8 hospital beds in the most effective layout.
Bedridden colonists have no access to recreation outside of "solitary relaxation" and "social interaction" with other colonists. This can be alleviated by placing TV sets in range of the hospital beds. Colonists sleep facing to the right, so in order for a TV to be usable by the patient, it has be either "south" or "east" of the bed (with the head rest being "north").
The quality of the hospital bed increases both rest quality and treatment quality. It is advised to have only your most capable construction workers make hospital beds.
Dresser and end tables do increase the comfort of the hospital bed. The furniture does not affect medical treatment, but improves the mood of the colonists while they are recovering. The downside is that each end table blocks a spot with vitals monitor coverage, but this is not a problem until one needs to squeeze the absolute maximum number of beds into the hospital.
It is good for the hospital to be "spacious" and "beautiful", because the mood benefits will apply to patients, who usually spend a fair amount of time in the hospital room.
Keep your medicine stockpiles close to, or inside the hospital room. Put them on shelves to eliminate the beauty penalty of the stockpiles (it also looks better).
Due to patients usually being "in pain", and therefore being in poor mood (unless they happen to be masochists), a psychic emanator is very beneficial if you can position it to cover your hospital beds (this item is only available as a quest reward).
Using hospital beds as sleeping spots
Note that hospital beds can be regular sleeping spots for colonists or prisoners. They are marked as "medical" beds by default, but can be marked for colonist or prisoner use just like a regular bed (however, turning the entire hospital into a prison is normally not viable).
Use this to your advantage. You will normally have more hospital beds than you need, and they happen to be high quality beds in a comfortable environment. If you need an extra prison cell, for example, convert the bedroom of a happy colonist into a prison cell and repurpose one of the hospital beds for the colonist.
Recreation and dining room
In the early game it is usually not viable to divert much time and resources to recreation, outside of a horse shoes pin in the sand, and a table with a few stools in the kitchen.
In the mid-game, this changes, and your growing colony demands good entertainment and a civilized dining experience.
Any room with a table and chairs, and a food source close enough can be a "dining room". However, it is efficient to combine this with the recreation area. Having an impressive room for dining and recreation gives a mood buff that lasts through the day. If you arrange for your colonists to eat in the recreation hall, you only have to invest in one impressive room instead of two.
Unless you use mods (such as Rim Fridge and the TD Enhancement Pack), it can be tricky to motivate your colonists to take their meals in a dedicated room. Your best bet is to place the source of food (usually the freezer room) as close as possible to the next available table – which should be in the recreation hall. It can even be viable to create a dedicated, small freezer room right next to the dining room, and store cooked meals exclusively there. This will also greatly shorten travel times of your colonists, because grabbing meals is such a common action.
The recreation room needs to be fairly spacious, and it should house all the recreation items that your colony can afford. Usually at least a 12x12 (or larger) area is required. It should also not be the central room in your colony, because it is infrequently used and not critical for colony operation. Having your colonists walk through, or around this room many times per day is very time consuming.
Make this room as impressive as possible. Put your great works of art there, have it well-lit and clean. The room will be used by all colonists, every day, so every mood improving effort there is very effective. It is good to have an outdoors recreation area as well (to reduce the cabin fever debuff on some colonists), but outdoors recreation is limited in an unmodded game.
The recreation room is the fun room, not only for the colonists, but also you, the player. It is the king piece, have fun with it and make it awesome.
Having production or research buildings in this room does not lower its recreational value (as long as no dirt or clutter comes with it). In fact, it can be a good idea to have buildings like the research bench, sculptor's table, and other production buildings in this room – at least temporarily. This is economical, and makes good use of the mood benefits that come with this area of your base.
Workshop
You may need to expand your workshop to accommodate more workbenches.
It is an excellent idea to put decorations such as sculptures inside the workshop, as a beautiful environment gives up to +15 mood, improving colonists' productivity.
Store frequently accessed resources near busy workbenches using shelves, so your skilled pawns aren't wasting their time crossing the map to deliver items. You can direct the output to a small, single-tile output stockpile next to the workbench with priority "Low," so that your haulers will remove the item to a more permanent location that does not impact beauty. These shelves can be shared; a cloth shelf is of use both for medicine production and tailoring.
Power
Geothermal power
Geothermal power is an important source of power from mid-game onward, as it is constant and high-powered. You will need to research Geothermal Power first before you can unlock it, and the generator itself is quite costly (though affordable in midgame). However, once researched and built you can have a constant power supply; you can even have some excess power until lategame.
Make sure your geothermal generators and their connecting conduits are well-protected as they often have to be placed far from base. Take care, however, not to enclose your generator within a room without suppling ventilation to the outside.
Laboratory
You may want to have a room dedicated to research, with hi-tech research benches, multi-analyzers to increase research speed and unlock new research, as well as sterile tiles to keep the room clean, increasing research speed. This room should generally only have one door, lest pawns path through it and leave behind unnecessary dirt.
(If you do not have sterile tiles, at least make sure it has a finished floor.)
Prison cells

Like colonists, prisoners will also suffer from the mood penalties associated with being kept together in a prison barracks. In addition, prison breaks are also more serious should they happen, for every prisoner locked up in the same room will simultaneously break out, while prisoners in different cells may choose not to join. Thus, keeping them separated improves safety.
Each cell should have a table with a chair, a bed, and a light source. This is the bare minimum you need for a prisoner to be decently kept. Decorating the cell and making bigger cells also increase mood bonuses for easier recruitment. They can't use any joy items put in the cell, but you can add them anyway for a better cell.
Prisons should have doors facing towards your base, so that escaping prisoners will go towards your base instead of away, giving your wardens time to deal with the break. A small vestibule with an extra door will also slow them down.
If you have only one prison barracks, be certain to check your prisoners' gear, as they are more likely to attempt a prison break while well-armored. If a prisoner is wearing armor, strip the prisoner with one of your pawns, then forbid the clothes which you wish your prisoner to keep so that they are not hauled away (the prisoner will ignore this designation and put the clothes back on). You may reuse, recycle, or sell the armor you capture this way.
Backup facilities
Create redundancies for important facilities of your base.
- Power can be stored in disconnected batteries. They will discharge at 5W, which will deplete a full battery over 120 days. Either put the reserve batteries behind a switch, or keep them disconnected in a stockpile. Their main use comes immediately after a short ("Zzzt..."), when all main batteries will be completely empty, often leading to a brown out if you depend on wind or solar energy.
- Strategically placed stockpiles of wood can provide backup heating during a solar flare or cold snap. Mark these wood stacks "forbidden", so your colonists will not use them during regular operation.
- Since electric stoves do not work at all during a power failure, it can be useful to have a fueled stove as backup. If some of the food in your freezer is about to go bad during a solar flare, this will allow you to quickly cook some meals and extend the shelf life of the ingredients.
- Critical power lines should be run twice, so in case of damage (or accidental deconstruction) there is no complete power failure. This is especially important around power sensitive areas like the freezer, a hydroponics bay and the power generators themselves.
- Nutrient paste dispensers are very useful if you unexpectedly run short of cooked meals. This can happen for a variety of reasons, such as a sudden influx of prisoners, or your cooks becoming incapacitated.
- There should be a spare room in your base with a couple of beds. This can be used as an overflow bedroom or makeshift prison. At the bare minimum you should have a couple of bedrolls in storage. They are very quick to craft, the leather quality does not matter, and they are useful for caravans as well.
Clean room

There are three structures that benefit from room cleanliness: the kitchen stove, the research bench and hospital beds. It is therefore economical to place these buildings into a room with sterile tiles. The research benches can be torn down for the end-game and replaced with more hospital beds.
If the room is sterile, the output from research benches is amplified by 9%. This is a substantial amount of work hours from your researchers, especially because so much time is spent researching over the course of the game. Make your laboratory sterile as soon as possible for this reason.
The "clean room design" is also efficient logistically, because both the hospital and the kitchen (with adjacent freezer) are well placed near your base's front door, easily accessible from both the inside and the outside. Food supplies need to be carried in, and injured colonists require good access to the hospital when returning from the field. Having the kitchen inside the hospital makes feeding patients quick and easy.
Foot traffic in this room should be minimized to keep it as clean as possible. Make sure your colonists do not have to pass through this room unless they have to do work here. This means that while the room should be close to the main entrance to your base, it should not be the lobby where everybody has to walk through. It should also be off-limits to colony animals. An adjacent freezer room should have its own access doors, so that bleeding corpses do not have to be carried across the clean room.
(It is, of course, perfectly acceptable to separating out the kitchen, labs or hospital into their own rooms, if you have secured the space and resources.)
Resources
Useful resources include:
- Medicine to heal wounded and sick colonists
- Glitterworld medicine for successful surgeries
- Stone Blocks to make your base
- Components and steel to make non-primitive things
- Plasteel for durable constructs and high-end equipment
- Silver to barter for nearly anything
Food
Besides plant-based foods, you should also have a source of animal products and meat so you can make better meals for your colonists.
Animal products
Some female animals produce milk. They can be milked regularly by a handler to produce their needed milk.
If you want meat you should raise some chickens. They rise in numbers extremely fast, laying eggs rapidly and growing in the span of a little more than 1 season. Raising chickens requires some heavy population management but is rewarding if done right.
Pigs are another good option for livestock, particularly if you have several skilled animal handlers. They can be trained to haul and release, and are one of the more efficient animals in terms of food consumed versus food produced.
Agriculture
At this stage you should have solved your food problems (mostly). You should have the space to grow a variety of crops to provide other resources. You should start growing corn because it has the best time to amount produced ratio.
Cash crops
Three good choices are devilstrand, psychoid plants and smokeleaf.
Devilstrand is an excellent choice as a mid-game fabric, providing good protection and can be farmed. It can net a large amount of silver for every harvest, but it's very slow-growing.
Psychoid can he harvested and made into drugs, which can sell for a lot. Be careful with drugs as colonists with the chemical interest or fascination traits will binge on drugs if given access to them.
Smokeleaf can be harvested and rolled into smokeleaf joints which can sell for quite a sum as well. It takes more work to craft, but it's also less dangerous than hard drugs which can cause immediate addiction, but smoking it carries quite some debuffs.
| Product | Grow Days | Harvest Yield | Plant/Drug | Drugs/Harvest | Work Required | Market Value | Market Cost | Max Profit | Max Profit/Plant | Max Profit/Work |
|---|---|---|---|---|---|---|---|---|---|---|
| Beer | 5 | 8 | 5 | 1.6 | 462.5 | 12 | 0 | 10.8 | 2.16 | .023 |
| Smokeleaf | 8 | 9 | 4 | 2.25 | 637 | 11 | 0 | 9.9 | 2.475 | .016 |
| Wake-up | N/A | N/A | N/A | N/A | 900 | 35 | 12 | 19.5 | N/A | .022 |
| Flake | 9 | 8 | 4 | 2 | 460 | 14 | 0 | 12.6 | 3.15 | .027 |
| Yayo | 9 | 8 | 8 | 1 | 770 | 21 | 0 | 18.9 | 2.363 | .025 |
| Psychite Tea | 9 | 8 | 4 | 2 | 610 | 10 | 0 | 9 | 2.25 | .015 |
| Go-Juice | 9 | 8 | 8 | 1 | 1370 | 53 | 12 | 35.7 | 4.463 | .026 |
| Penoxycyline | N/A | N/A | N/A | N/A | 600 | 18 | 12 | 4.2 | N/A | .007 |
| Herbal Medicine | 7 | 1 | 1 | 1 | 0 | 10 | 0 | 9 | 9 | .007 |
Note: Work Required includes work needed to plant, harvest and craft. Max Profit assumes Social Skill of 20 (90% Market Value)
Mining
There's only so much metals on the surface, but there's much more beneath your colony.
You will need to research deep drilling and ground-penetrating scanner first to use drills effectively. After this, when you put down a deep drill, you can see where mineral deposits are.
Deep drilling should be the main source of steel and plasteel for your colony at this stage onward. It's best to spare the remaining compacted steel deposits for emergency if you find yourself out of steel to build deep drills out of.
Components
You need a large supply of components for building and crafting.
The best way to obtain components is by trading. Call friendly factions to send bulk goods traders, which always sell components and also buys a lot of your raw materials. Some other traders also sell components at an increased price.
Even after you've researched it, making them at the component assembly bench is not a good source as it is cost and labor intensive (25 steel and 134 work required for just 1 component). It does train your craftsmen very fast though, so you can consider making some for practice, while solving your shortage at the same time.
Drugs & Chemicals
Once you've taken care of your food supply, you can spare some more land to grow plants to make drugs out of. They can provide a boost to colonists' mood, improve their performance at work, protect against disease or sell for a lot of silver.
Be careful with drugs, especially when you have colonists with the Chemical Interest or Fascination traits; you will have to keep drugs away from them, or they will binge on them and get addicted or die from overdose.
Neutroamine can only be purchased from traders, and is needed to make medicine, penoxycyline and wake-up. Consider carefully how much of each drug you will need when deciding how to use this resource.
Beer
Beer is a social drug that improves mood and can provide joy.
To make beer, you need to have Brewing researched. Then, you will need to grow hops. Next, you will need to build a brewery and some fermenting barrels Your colonists will turn hops into wort, a precursor to beer. They will then haul wort into the fermenting barrels and wait for the beer to be made.
Colonists can enjoy a beer occasionally (every 2.5 days or so) without risk of addiction. They can also drink quite a lot in one go without getting addicted, but then they will need to wait longer before their next drink, and they risk getting a hangover.
Smokeleaf joint
A social drug smoked to provide joy, and provide a decent mood boost. However, colonists stoned on smokeleaf suffer from quite some debuffs so it's not a good idea to smoke it unless you need it.
All you need is some smokeleaf leaves and a crafting spot. The process of rolling leaves into joints is quick and easy.
Colonists can enjoy a joint every 2 days without risk of addiction.
Psychite
A type of drug made from the leaves of the psychoid plant.
Crashlanded starts can research psychoid brewing to make psychite tea. Tribal colonies start the game with this research. Psychite tea has the same addiction chance as beer and smokeleaf but does not slow movement or reduce consciousness.
Refined psychoid comes in 2 variants: flake and yayo. While they provide a good buff to both mood and stats, they are extremely addictive. Besides this, they are highly profitable. Being very light, you can carry lots on a single caravan trip, and net you a ton of silver in return.
Go-juice
A synthetic combat drug made at the drug lab. As its description says, it's suited for your soldiers to take a hit before combat to boost their effectiveness.
It's highly addictive however, and soldiers that frequently use it will quickly find that they are hooked to it and will need to regularly take a hit or suffer from its horrible withdrawal symptoms.
While high on it, your soldiers will move faster, shoot and fight better, and also be more durable than normal- they take a lot more damage without going down, because they don't even feel much pain at all. This also means your colonist will have a much higher risk of death as they don't go down safely unless they take serious brain damage or have their spine or leg destroyed.
Wake-up
Stimulant drug that improves consciousness and reduces the need for sleep.
It does not provide any mood buffs but it isn't as addictive as other hard drugs. Colonists can take 1 every 3 days without getting addicted so it's good for occasional use.
Penoxycyline
The only medical drug in the game so far. It provides resistance to the plague, malaria or sleeping sickness.
It can be used every 5 days to prevent diseases from being contracted.
Most useful in tropical rainforests where disease is rife. Not so useful in cold or arid areas where disease is of little threat.
Luciferium
A performance-enhancing mechanite concoction. It provides good functional buffs, and given enough time can heal old scars (including dreaded brain injuries) but doesn't help at mood at all. It cannot be made and must be bought at traders or found occasionally.
One of its most significant features is that withdrawal from luciferium is fatal and incurable. Luciferium needs to be taken every 6.667 days in order to prevent withdrawal symptoms, and if the need is unmet the colonist will die in a mean of 10 days.
Due to its high price and constant need, at this stage you should only give it to colonists who need to recover from brain injuries or serious scars. Colonists with a destroyed part (e.g. a shot off leg) cannot recover without installing a new part.
Smelting
Once you've researched the electric smelter you can smelt weapons or steel slag chunks for metallic resources.
Steel slag chunks are an unreliable and rather uneconomical source of steel. Smelting should serve to get rid of them more than as a major source of steel, except in extreme survival situations.
For melee weapons it's best that you smelt them as this returns more resources than if you sold them. Weapons don't sell well, at only 20% of base value.
Ranged weapons, on the other hand, are best sold. If you smelt them you'll gain less, especially if any components making up the weapon are destroyed.
However, if the weapons are of low quality or are worn-out it's always a better idea to smelt them.
The smelter allows you to destroy non-smeltable weapons but it's best to keep them as you can sell them, even for a paltry price.
Equipment
While in early game you may need to scavenge what equipment you could, or craft some very rudimentary equipment such as tribalwear or knives. Now that you're in midgame, however, you should have the ability to manufacture your own equipment. Good equipment means that you stand a chance against raiders, even when outnumbered.
You should have a fueled smithy or an electric smithy to craft melee weapons, electric tailoring bench for sewing clothes (faster than a hand-tailoring bench), and a machining table for armor and guns.
Apparel
You should always craft button-down shirts over T-shirts, as they provide better insulation and coverage than simply T-shirts. It's always worth it spending a little more cloth than a replacement arm.
In addition, you can equip your colonists with dusters, jackets or parkas if you need to.
- Jackets provide additional protection against attacks or the cold.
- Dusters provide protection against both heat or cold, as well as additional protection. Has a larger coverage than the Jacket, protecting the neck and legs as well.
- Parkas provide very good insulation against cold, but provide minimal protection. They should only be worn when actually needed.
Devilstrand is the best for protection; though it isn't as protective as hyperweave (which is hard to find and very costly), it can be farmed and produced in mass amounts.
Wool is best for insulation.
For your soldiers, you should always have armor vests and advanced helmets. Just this can protect against a large part of the damage taken. If you're short on materials you can always use the simple helmet, which is significantly cheaper though providing less protection.
Melee fighters should have shield belts, though these may be harder to obtain as uranium is rare and raiders don't come with shields that often.
Power armor should wait until later as it costs a lot, either to buy or to make.
Apparel management
You can choose which kind of apparel your colonists will wear. Go to the Assign tab then you can change the outfit worn by colonists under 'Current outfit'. You can also go to 'Manage outfits' and change the settings of each outfit.
- 'Anything' isn't recommended as your apparel will not be allocated properly.
- 'Worker' allows colonists to wear casual clothes, but not armor. Best for your workers who don't engage in combat much.
- 'Soldier' allows colonist to wear armor and some clothes beneath them.
- By default, jackets and dusters aren't allowed; you should allow them as they can provide extra protection on top of your armor vests.
- 'Nudist' makes them wear nothing other than headgear, and obviously is intended for your nudist colonists only.
Once you set them, colonists will automatically switch apparel when needed. They will switch low-quality apparel or worn-out apparel for better ones.
You can also force colonists to wear apparel. If forced, they won't replace it automatically; you have to manually direct them to remove them. Choosing 'Clear forced' in the Apparel tab clears the forced status on apparel allowing colonists to replace them if needed.
Weapons
Obviously, you should give your best fighters your best and most skill-based weapons.
For guns:
- Bolt-action rifles are good for long-ranged combat in midgame. Sniper rifles are more niche due to their low DPS but longer range.
- Assault rifles are suited for gunning down mid-long range targets, when handled by good soldiers.
- LMGs can mow down clustered targets at medium range. Best served in the hands of mid-skilled colonists.
- CQB weaponry such as Heavy SMGs or Pump shotguns are optimal for regular workers for self-defense.
- Chain shotguns are not an effective weapon choice on its own due to their horribly short range. However, their high damage output makes them excellent against grouped targets.
- Miniguns excel at point-blank destruction or crowd control.
Note that it's best that you hold off crafting guns until you have a steady supply of components, as crafting them can quickly chew through your stock of components.
For melee:
- Longswords are the must-have weapon for melee colonists, being the highest damage dealing melee weapon in the game.
- Spears or gladius are cheaper but deal less damage, as such you should leave these for lower-skilled colonists.
- Maces are cheaper and deal blunt damage, best used by wardens for taking down escaping prisoners or berserk colonists without killing them. It's also more effective at fighting armored enemies as most armor protect poorly against blunt trauma.
Prosthetics & Organ Replacements
By now you'll probably have colonists missing fingers, toes, arms, legs or other body parts (especially captured people, prone to have lost limbs in combat). If you can you should get a replacement for them. All prostheses except the peg leg can only be bought from traders in the base game.
All prostheses heal like normal limbs, but do not bleed and never scar.
Peg leg
Your humble peg leg is for replacing a missing foot or leg. All you need is 1 log of wood, medicine and a doctor. At 60% efficiency, it's good for getting a colonist back up and running but not good for anything else. This should only be used if you can't afford better.
Simple prostheses
Simple prosthetic legs work at 85% efficiency, making it good for replacing a few missing toes.
Simple prosthetic arms, in comparison, work at 50% efficiency only; it should only be used to replace a missing hand or arm.
Bionics
All bionics have 125% efficiency, making them superior to normal parts.
Bionic legs give +12.5% moving; two of them means a total of 125% moving. Good for caravaneers, kiters, first respondents or anyone who needs to move fast.
Bionic arms give +12.5% bonus to manipulation; they are good at a large variety of tasks, from shooting to mining to crafting.
Bionic eyes give +12.5% on average to sight; it's the only eye replacement so far, meaning you will have to depend on it to replace colonists' missing or damaged eyes. Sight isn't very important for most tasks, with bonuses from sight capping at 100% sight for most tasks (except medicinal or combat tasks), meaning that enhanced sight is obsolete in many cases. Shooting however relies greatly on sight, so you may consider giving your gunners (especially snipers or marksmen) bionic eye replacements before they actually need them. Melee also depends on sight but the impact isn't so large.
Combat hands
Power claws are a good hand replacement for front-line combatants. It incurs a small manipulation penalty, but greatly increases unarmed damage, to the point where it can even rival a normal or good plasteel longsword.
Organs
You can buy natural organ replacements from traders, or brutally harvest them from colonists and prisoners. Harvesting them gives a mood penalty for the whole colony (except your trusty psychopath colonists), a dire mood debuff of -30 to the victim, and also affects Factions relations between yours and the one the victim belongs to. So think twice before harvesting organs from anyone. Never harvest from colonists unless in the direst of situations.
As of 1.0 the only organ replacements are the bionic heart and bionic stomach, though mods exist to add more bionic organs in-game.
Combat & defense tactics
When you are outnumbered, thinking smart with your combat tactics is also key to not losing colonists. It's also worth checking out Defense tactics with more in-depth detail in defensive strategy, Defense structures for building defenses and cover for how cover works.
Turret mounds
Sometimes sandbags and your colonists alone are just not enough. Building "turret mounds" around the map in strategic locations can decimate a good number of raiders before they even get to the colony. Turret mounds are built on a 3x3 block of land:
O#O
###
O#O
Where O is a turret and # is a stone wall. Remember, however, that turrets can be a bit expensive to build and repair. They also require a lot of electricity, so try hooking them up to a wire which is remotely turned on to save your batteries.
Note that you will have to sacrifice some turrets this way as raiders often target the turrets before your colonists due to proximity.
Diffusing your opponent
Don't be too arrogant when facing a bombardment of arrows and pila - each can deal almost an equivalent amount of damage as a bolt-action rifle. Diffusing your opponent consists of separating the melee attackers from the ranged, and dealing with each of them with your melee and ranged colonists.
Fighting in the small numbers
Once you have diffused your opponent's army, their forces will trickle towards you slowly so you can easily deal with each one alone.
Kiting
Kiting is the method of using a colonist as bait for an attacker to run towards, and a second colonist taking shots off while the attacker is focused on the first. It does not work if the raider has a personal shield that protects them from bullets. Note: Colonists incapable of violence can still act as bait.
         R
 C       |
         v
         C
Diagram of kiting. C is a colonist, R is a raider and -> is the direction the raider is going.
Splitting
When two of your colonists are being chased by one person and your weaponry is significantly poorer than the attacker's, you can conduct a split so that the enemy can only chase and down 1 colonist while the other escapes. If one of your colonists has ranged weapons, then you could split and then conduct a kite.
Rushing
Rushing is the tactic of sending your best melee attackers to finish off the ranged attackers at the back. The ranged attackers who do not succumb to the attention suppressor could be a pain for your own ranged forces, so it's best to send your melee colonists with shield belts to distract the ranged attackers. Before battle, hide your melee attackers behind a nearby hill outside your base so that they remain hidden until all enemy melee attackers are engaged with either the walls or your ranged.
Colonist management
Training

You can now dedicate more time to train your colonists' skills so they can perform better.
One way of training them is to have them dedicate all their time to a single task only. In the 'Work' tab, have them prioritize the job type you want them to be good at. Set the priority to 2 and prioritize other more vital tasks (such as Patient or Doctor for medics) at 1.
New colonists
With more colonists in, the chance of you getting wanderers or escape pods become much rarer. From midgame onward, capturing and recruiting prisoners becomes the main source of new blood. Occasionally, you will still see slaves for sale, wanderers, escape pods or chased refugees, but don't count on them.
Attacking enemy bases
However, now that you have more colonists and better equipment, you have a new option to getting new blood: attacking enemy faction bases.
To do so, create a caravan with your soldiers, food for the journey and medicine to treat the wounded. Once the caravan is ready, set it to go attack an enemy.
Once you succeed in destroying the base, you will be given 24 hours to treat the wounded and rest before your caravan packs up and leaves.
The journey usually takes days so remember to bring enough food. There will also be people and turrets guarding the base so you should have enough soldiers. 12 well-equipped soldiers should be enough to take down any base without much problem, though sometimes you will still lose someone. The base also has food, drugs and medicine. They always have some food, but don't count on them having enough medicine to treat all your injuries.
Sometimes an enemy outpost event will also trigger, generating an outpost that is weaker than a standard base. Defeating this requires less manpower (around 8 will be sufficient) and will allow you to collect payment.
Note that attacking enemies does not seem to make raids happen less often and you will still need defenders back at base.
Animals
Besides raising them for meat, wool or milk, you can train an animal army for attacking, or a worker band for hauling. You will need food to train animals, which you can easily provide in midgame if nothing bad happens.
Hauling becomes a rather important job in midgame as you gather more and more resources and thus need more manpower to haul them to your warehouses, but can't divert colonists from other jobs to haul.
Pigs can be farmed for both food and hauling purposes.
For offensive purposes, there are a few choices available.
- Wild boars are a decent choice, despite being nerfed somewhat in the latest versions of RimWorld. They hit reasonably hard, reproduce fast allowing you to amass a large army easily, can graze, and are found in many biomes.
- Ostriches are another good pick. They hit hard, are faster and more durable.
- Taming cougars, wolves or bears provides great combat power, but will require a constant source of meat to train them.
- Elephants or rhinos are very durable and hit hard individually, though their large size also makes them be hit much more often.
Mobility
Sometimes you will need to move around the world for various reasons, such as attacking an enemy base, trading at a faction base or starting a new base.
Caravans
You can get a group of colonists to form a caravan to travel around the world.
Caravans have a weight capacity which determines how much each character can carry. Each colonist or alpaca carries 35 kg at most; muffalos can carry up to 73.5 kg, while dromedaries carry 70.
Caravans are somewhat slow, taking days, or sometimes seasons to reach their destination; remember to pack enough food that does not rot easily. Animals that can eat grass/ other plants do not need food when grazing is available, but all others do. You can speed it up by having faster colonists or animals in the caravan, this brings up the average speed of the caravan allowing it to travel faster.
Sometimes hostile random events can occur such as an ambush; remember to bring a suitable escort if needed.
Transport pods
This method is extremely fast; it takes up to 1 in-game hour at most to reach its destination.
However, it's also expensive; each pod costs 80 steel and 1 component, in addition to the chemfuel required to power it. It also requires research before it becomes buildable. Chemfuel can be produced by researching Refining, allowing the construction of a Refinery that refines chemfuel using wood or organic matter.
Each pod carries 150 kg, just enough for 2 barely clothed humans. If colonists land on an empty tile they will form a caravan. Remember to take into account the carrying capacity of its members as if you put too much inside the pods, the colonists will be unable to carry it all, and will be immobilized.
Crossing oceans
Unfortunately, there's no way to navigate over the deep sea. If you happened to have chosen your starting point on an island (intentionally or not), the only way to get to the mainland is by launching transport pods.
Trade
You can travel around using caravans, as well as transport pods. This greatly opens trade opportunities and enables the player to command multiple colonies (options) at once. It also raises the importance of Silver and economics in the game, as well as, inevitably, drug trafficking.
For the average colony, earning money mainly relies on either cash crops like Smokeleaf, stone sculptures or the brutal treatment of prisoners. It is important for every colony to select at least one of these options as their main income source, to obtain important resources like Steel.
With the comms console you are able to call factions to send traders to visit your base. It's better to do so than wait for them to send traders on their own, as they rarely do so without being prompted.
You should also send your own caravans to friendly bases for trade, as they are considerably better-stocked than their traders, and also offer a small discount.
Factions
Each world has 5 major factions, which you may have already seen before starting (their bases are littered all over the world).
Dealing with them can constitute a large part of running a successful faction.
Diplomacy
The comms console also allows you to give gifts of silver to factions, improving goodwill.
To do so, call the faction, then select 'Offer gift'. As with trading, select your colonist best at Social to improve the goodwill increase.
Increasing goodwill allows you to call traders at a lower price and to call for immediate military assistance if you need help.
If tribals raid you should pacify them by capturing, healing and releasing their prisoners, as well as gift them. Turning them friendly will stop them from trying to raid your colony with their massive raider forces, which is helpful at long-term survival. You don't want to deal with 100+ angry tribals shooting arrows, throwing pila or clubbing your colonists all at once.
Pirates cannot be reasoned with; releasing their prisoners won't grant any goodwill, they refuse any kind of communication and they live just to make others' lives worse by raiding their bases and stealing their stuff. You can wipe them off the face of this rimworld by destroying ALL their bases but it'll take an immense amount of time.
Black Ops
Attacking members of other factions will degrade foreign affairs. Foreigners attacked by enraged animals in your territory will affect your relationships, but less.
You can attack a random animal and escape in-between visitors or a trade caravan so that the wild animal attacks them instead of you. If they die, all their belongings become available to you. If some survive, you can medically treat them which counts towards positive interaction between colonies so long as they can leave your map by their own in good health. They won't report any kind of awkward behavior by your people. Have in mind that angry animals due to manhunter will remain roaming until next day, so "saving" them might become difficult, and if there's anybody who is downed but not dead yet, he/she may recover during the night and start moving again. In case the enraged animal is still around, another attack is likely to end the survivor's life for last.
More difficult to perform in Tropical Rainforest biomes or when there's thick snow around due to plants or snow hampering movement.
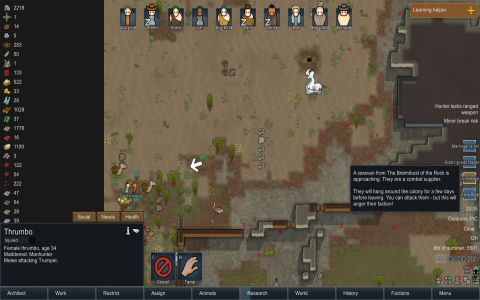
Thrumbo revenge aiming at foreign trade caravan, awesome timing
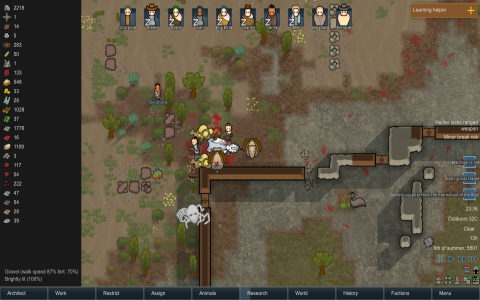
Black Ops success
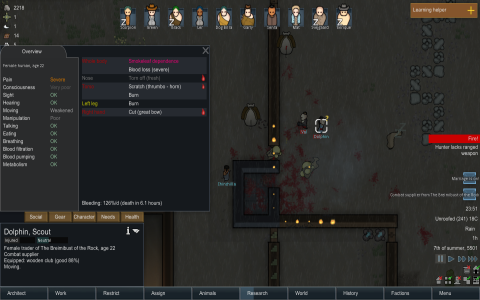
Foreign trade caravan with boomalopes, bad idea.


- Progression
- Quickstart Guides • Basics • Intermediate Midgame Guide • Advanced Endgame Guide • Ending the game
- Scenarios
- Lost Tribe Guide • Rich Explorer Guide • Naked Brutality Guide • The Mechanitor Guide

- Survival
- Extreme Heat Guide • Extreme Cold Guide • Extreme Desert Guide • Ice Sheet Guide • Sea Ice Guide • Events Guide
- Combat
- Defense tactics • Offense tactics • Weapon Guide
- Construction
- Colony Building Guide • Defense structures
- Production
- Food production • Money making guide
- Other
- Skill Training • Permadeath save conversion guide •
Ideology Min-Maxing