Difference between revisions of "Caravan"
PigeonGuru (talk | contribs) |
|||
| (33 intermediate revisions by 11 users not shown) | |||
| Line 1: | Line 1: | ||
{{Tocright}} | {{Tocright}} | ||
| − | '''Caravans''' are a group of one or more colonists who gather together for | + | '''Caravans''' are a group of one or more colonists who gather together for different purposes. Goods can be carried by animals, colonists or prisoners, to facilitate trading on your own schedule; and a caravan can also act as a raid squad to attack other establishments. Each caravan is represented on the [[Menus#World|world map]] by a yellow icon. Double-clicking a caravan will select all caravans on the screen, allowing them all to be ordered to a single destination. |
| − | Sending caravans out from your home, instead of just waiting for other tribes to come to you, helps keep up fluid commerce. It provides a wider selection of goods since friendly outposts have much more inventory than the limited selection traders (who are restricted by carrying capacity) show up with, and you get a 2% price bonus for direct trading. | + | Sending caravans out from your home, instead of just waiting for other tribes to come to you, helps keep up fluid commerce. It provides a wider selection of goods since friendly outposts have much more inventory than the limited selection traders (who are restricted by carrying capacity) show up with, and you get a 2% price bonus for direct trading. It's also cheaper than requesting traders at the comms console. |
== Creation == | == Creation == | ||
| Line 14: | Line 14: | ||
=== People and Animals === | === People and Animals === | ||
| − | Choose the colonists who will take part | + | Choose the colonists who will take part in the convoy, the animals (e.g. [[alpaca]], [[dromedary]] or [[muffalo]]) that will carry the items for sale, and prisoners you want to transport. At least one colonist must be chosen. Make sure to select those whose health are in optimal conditions, as wounded and/or sick colonists slow the caravan down. |
There are three different arrangements when forming caravans: | There are three different arrangements when forming caravans: | ||
| Line 22: | Line 22: | ||
Incapacitated pawns cannot be chosen to be part of the caravan initiation process, but once your caravan is travelling you can pick up incapacitated people to come with you. They will slow down your caravan by a lot, so be warned. | Incapacitated pawns cannot be chosen to be part of the caravan initiation process, but once your caravan is travelling you can pick up incapacitated people to come with you. They will slow down your caravan by a lot, so be warned. | ||
| + | |||
| + | The caravan will take the name of the best negotiator in the caravan. | ||
[[File:Caravan party.png|300px]] | [[File:Caravan party.png|300px]] | ||
| Line 33: | Line 35: | ||
* Dromedary: 70 kg | * Dromedary: 70 kg | ||
* Alpaca: 35 kg | * Alpaca: 35 kg | ||
| + | * Elephant: 140 kg | ||
Baby or juvenile animals have a reduced carrying capacity. | Baby or juvenile animals have a reduced carrying capacity. | ||
| Line 43: | Line 46: | ||
{{Key|CTRL}}: +10 <br/>{{Key|SHIFT}}: +100 <br/>{{Key|CTRL}}+{{Key|SHIFT}}: +1000. <br/>These keys work similarly for the [<] arrow to subtract. | {{Key|CTRL}}: +10 <br/>{{Key|SHIFT}}: +100 <br/>{{Key|CTRL}}+{{Key|SHIFT}}: +1000. <br/>These keys work similarly for the [<] arrow to subtract. | ||
| − | If a caravan member dies in the close up view, they will drop their items which must be picked up. If they die on the global map (such as from blood loss), their gear will be lost. If all party members die, the entire caravan disappears and everything is lost. | + | If a caravan member dies in the close-up view, they will drop their items which must be picked up. If they die on the global map (such as from blood loss), their gear will be lost. If all party members die, the entire caravan disappears and everything is lost. |
[[File:Caravan inventory.png|300px]] | [[File:Caravan inventory.png|300px]] | ||
| Line 49: | Line 52: | ||
==== Food ==== | ==== Food ==== | ||
| − | Caravans will feed as needed during the journey, so long as there's enough within the supply. | + | Caravans will feed as needed during the journey, so long as there's enough within the supply. Colonists who are part of a caravan will automatically forage for food while on the way, the speed of which depends on the environment and the colonist's growing skill. |
| − | It's vital to bring sufficient food for the journey | + | It's vital to bring sufficient food for the journey. If you're bringing pack animals the caravan may be slower so bring more food to compensate. |
Food spoils without refrigeration so careful selection is needed: | Food spoils without refrigeration so careful selection is needed: | ||
| − | * [[Simple meal]]s will suffice for short journeys (<4 days). | + | * [[Simple meal]]s will suffice for short journeys (<2.4 days). |
| − | * [[Berries]] are good for mid-length journeys, despite being less weight-efficient. (< | + | * [[Berries]] are good for mid-length journeys, despite being less weight-efficient. (<7 days). |
* [[Pemmican]] will be needed for long distance travels (up to 75 days). | * [[Pemmican]] will be needed for long distance travels (up to 75 days). | ||
* [[Packaged survival meal]]s will be necessary for extremely long journeys (>75 days). | * [[Packaged survival meal]]s will be necessary for extremely long journeys (>75 days). | ||
| Line 62: | Line 65: | ||
Supplies that expire soonest will be consumed first. | Supplies that expire soonest will be consumed first. | ||
| − | While traveling, world map events may trigger such as manhunter packs, raids, or other traders crossing paths, which can generate mini-maps. After threats | + | While traveling, world map events may trigger such as manhunter packs, raids, or other traders crossing paths, which can generate mini-maps. After threats have been eliminated, it's possible to scavenge a bit of food and herbal medicine before the map closes down. It is likely that you will have some items scattered in the mini-map; these must be picked up or chosen to take with your reformed caravan or they'll be lost forever. |
| − | |||
| − | |||
| − | |||
=== Formation process === | === Formation process === | ||
| − | Once the order to form the caravan is given, colonists will gather around a [[caravan packing spot]] or a random place within your home area and wait for all members to assemble. Animals will be rounded up by colonists which will then proceed towards the assembly spot. | + | Once the order to form the caravan is given, colonists will gather around a [[caravan packing spot]] or a random place within your home area and wait for all members to assemble. Animals will be rounded up by colonists which will then proceed towards the assembly spot, and follow them around when they are loading the caravan. |
It's recommended to put the caravan packing spot inside your warehouse to reduce loading time. | It's recommended to put the caravan packing spot inside your warehouse to reduce loading time. | ||
| Line 93: | Line 93: | ||
[[File:Colonist roster of those at home and at caravan.png|500px]] | [[File:Colonist roster of those at home and at caravan.png|500px]] | ||
| − | === Caravan pathing === | + | === Caravan route & pathing === |
| − | Once items have been loaded, party members will proceed separate ways according to their own classifications made by the player | + | |
| + | The 'Choose Route' button allows you to decide destinations for your colonists' caravan. Once a path is chosen, colonists will choose an exit direction that can best reduce travel time. | ||
| + | |||
| + | Once items have been loaded, party members will proceed separate ways according to their own classifications made by the player. | ||
<gallery widths="300px" heights="300px" class="center" mode="nolines"> | <gallery widths="300px" heights="300px" class="center" mode="nolines"> | ||
| − | File:Caravan pathing.png| '''Caravan clear division between colonist path and muffalos path.''' | + | File:Caravan pathing.png| '''Caravan clear division between colonist path and muffalos' path.''' |
| − | File:Caravan pathing 2.png| '''The apparent reason behind | + | File:Caravan pathing 2.png| '''The apparent reason behind the animal area drawn is to prevent them from eating your plantations.''' |
</gallery> | </gallery> | ||
| Line 105: | Line 108: | ||
== Travelling == | == Travelling == | ||
| − | Once your caravan enters the world map you can give it orders. | + | Once your caravan enters the world map, you can give it orders. |
A caravan can: | A caravan can: | ||
| Line 117: | Line 120: | ||
* Trade - When a caravan has reached a friendly faction outpost, click the trade button to open the trade dialog window. | * Trade - When a caravan has reached a friendly faction outpost, click the trade button to open the trade dialog window. | ||
* Attack - A caravan can attack any faction outpost, regardless of relations status, though attacking will worsen relations. | * Attack - A caravan can attack any faction outpost, regardless of relations status, though attacking will worsen relations. | ||
| + | * Offer gifts - If your relations with a faction are not high enough to trade, you can offer them gifts in an attempt to improve relations. | ||
[[File:Caravan optimal route.png|300px]] | [[File:Caravan optimal route.png|300px]] | ||
=== Status box === | === Status box === | ||
| − | |||
| − | |||
| − | |||
| − | |||
| − | |||
| − | |||
| − | |||
| − | |||
| − | |||
| − | |||
| − | |||
| − | |||
| − | |||
| − | + | Several items are displayed in the status box. | |
| − | Current tile movement time: Current movement speed based on the terrain, biome, weather (only affected during autumn-winter) or roads. (See table on this page for details.) | + | #Movement status: |
| + | #* Traveling - moving to destination. | ||
| + | #* Resting - caravan automatically stops between hours 22 and 6 to sleep. | ||
| + | #* Waiting - no destination selected. | ||
| + | #* Stopped - stopped moving with reason given. | ||
| + | #Estimated time to destination - time to destination based on the current tile movement time. | ||
| + | #Days of food - compare this to 'estimated time to destination' to determine if your caravan has enough food for the journey. | ||
| + | #Base movement time: Movement speed based on the average speed of all the pawns in the caravan. | ||
| + | #Current tile movement time: Current movement speed based on the terrain, biome, weather (only affected during autumn-winter) or roads. (See table on this page for details.) | ||
| + | #Stealthiness: How stealthy your caravan is. Stealthier caravans are less prone to being ambushed. | ||
A caravan may stop for various reasons, such as when; | A caravan may stop for various reasons, such as when; | ||
*Between hours 22 and 6 while the members sleep and rest. | *Between hours 22 and 6 while the members sleep and rest. | ||
**They still continue to rest even if all members are fully rested. | **They still continue to rest even if all members are fully rested. | ||
| + | **Colonists who had been assigned to the night shift in the Restrict tab will still follow this schedule. | ||
*All colonists are downed or having a minor/major mental break. | *All colonists are downed or having a minor/major mental break. | ||
*Any member is having an extreme mental break. | *Any member is having an extreme mental break. | ||
**Nobody will be harmed even if the colonist is going berserk. | **Nobody will be harmed even if the colonist is going berserk. | ||
| − | **Minor or major mental breaks won't stop the caravan | + | **Minor or major mental breaks won't stop the caravan as long as at least one person is still functional. If a colonist is in the midst of a mental break when you settle or get ambushed, they will still be having it when they appear on the map. |
| + | *The player manually pauses the caravan. | ||
| + | **While paused caravans forage faster, members can socialize and the caravan is less likely to be attacked. | ||
| + | |||
| + | === Sustenance === | ||
| + | Pawns traveling in a caravan will eat automatically when necessary. Grazing animals, when hungry in a place with grazable plants, will instantly have their hunger bar refilled without any cost. If not, they will proceed to eat food carried in the caravan. Pawns will prioritize food that spoils earlier. | ||
| − | + | If a colonist has an injury or disease that requires tending, doctors will tend to them as necessary, using medicine if available to them. If self-tend is on they will also tend to themselves. | |
| − | === | + | If you bring [[Beer]] along with you, colonists may drink it during their journey. The mood bonus it provides can help keep them sane when away from the colony for long stretches of time. (They don't appear to consume other recreational foods, such as chocolate or insect jelly. Testing is needed.) |
| − | + | ||
| + | ==== Foraging ==== | ||
| + | |||
| + | From Beta 19 onwards, every colonist in a caravan can forage for food. | ||
| + | |||
| + | Each colonist can forage 0.09 nutrition per day per level of Growing at a baseline, i.e. in temperate forests or swamps. Given that each colonist consumes 1.6 nutrition per day, this means that a level 9 Growing colonist can break even with food consumption when the caravan is resting, and a level 18 colonist can constantly forage more than he eats. | ||
| + | |||
| + | Foraging is affected by manipulation (50% importance, 100% max) or sight (90% importance), so giving caravanners [[bionic eye]]s or [[archotech eye]]s can help increase forage and hence let your food stocks last longer. | ||
| − | + | In addition, having a tribal start grants an extra 170% multiplier to foraging, as shown by a "Faction Type: 170%" line in the tooltip. If Tribal colonists with good Growing skills have enough meals or other food to eat during a trip through terrain with good forage, they may return with a nontrivial quantity of berries. | |
=== Movement Speed === | === Movement Speed === | ||
| − | Many things can affect the | + | Many things can affect the traveling speed of caravans. Clothing, armor, traits, and health conditions all affect a pawn's movement speed. A caravan's movement speed is determined by the average speed of all of the members of the caravan across colonists and animals, followed by the total mass the caravan is carrying. Incapacitated pawns will greatly slow movement. |
| + | |||
| + | If inventory mass exceeds carrying capacity the caravan will become immobilized until the mass is reduced, such as by eating food, discarding goods or having another caravan join up to bring capacity above inventory mass. | ||
| − | Some | + | Some examples of things that may slow you down: |
| − | * Clothing and armor (varies; | + | * Clothing and armor (varies; [[flak vest]], [[flak jacket]], [[flak pants]], [[plate armor]] and [[marine armor]] have high movement penalties) |
* Injured or downed colonists and prisoners | * Injured or downed colonists and prisoners | ||
** Downed pawns can significantly slow down caravans, much more than injured ones that are capable of walking. | ** Downed pawns can significantly slow down caravans, much more than injured ones that are capable of walking. | ||
| Line 174: | Line 189: | ||
*Colonists equipped with [[Bionic leg]]s or high on [[go-juice]] or [[yayo]]. | *Colonists equipped with [[Bionic leg]]s or high on [[go-juice]] or [[yayo]]. | ||
*Roads halve the time it takes to travel through a tile. | *Roads halve the time it takes to travel through a tile. | ||
| + | *Caravans carrying lighter items will move faster. | ||
While the slower Muffalo and Dromedary speeds compared to the human base speed won't significantly affect shorter distances, baby animals and seriously injured colonists can have a significant impact, increasing travel time by 30% or more. | While the slower Muffalo and Dromedary speeds compared to the human base speed won't significantly affect shorter distances, baby animals and seriously injured colonists can have a significant impact, increasing travel time by 30% or more. | ||
| Line 183: | Line 199: | ||
{{#vardefine: color3 | BBCC22}} | {{#vardefine: color3 | BBCC22}} | ||
{{#vardefine: color4 | EE9900}} | {{#vardefine: color4 | EE9900}} | ||
| + | |||
| + | '''Note: this chart is outdated as of 1.0.''' | ||
The following table lists the base caravan movement speed in hours per tile for an unencumbered human. Flat terrain is naturally easiest to travel. Hills and mountains will worsen travel speed, while roads speed it up. Biomes with cold winters have reduced movement speed during the winter. It appears to be interpolated based on the current season and temperature with the worst case values listed in the table below. | The following table lists the base caravan movement speed in hours per tile for an unencumbered human. Flat terrain is naturally easiest to travel. Hills and mountains will worsen travel speed, while roads speed it up. Biomes with cold winters have reduced movement speed during the winter. It appears to be interpolated based on the current season and temperature with the worst case values listed in the table below. | ||
| Line 251: | Line 269: | ||
{{clear}} | {{clear}} | ||
| − | + | === Returning home === | |
| − | === Returning | ||
After you arrive back to your colony, you will notice two details must be addressed before continuing the game. | After you arrive back to your colony, you will notice two details must be addressed before continuing the game. | ||
| − | * | + | * Pack animals may go straight to their animal bed or just wander around still with all your items inside their packing gear. If you happen to need something at the moment, you will have to make them drop it. You may want to restrict them to a roofed zone and wait for them to go there before doing this, so the dropped belongings won't deteriorate due to exposure, or you can wait until night when they are sleeping inside a room. Pack animals who have been trained for Obedience can be assigned to follow their master, who can be drafted to storage areas and wait until the animals follow him/her too to drop the items as well. |
| − | |||
* Prisoners will still be carrying your caravan items too, even armor and weaponry (as odd as it may be). They will not unload their inventory after returning to base unless directed to through the gear tab, and will start to unload only after being recruited. | * Prisoners will still be carrying your caravan items too, even armor and weaponry (as odd as it may be). They will not unload their inventory after returning to base unless directed to through the gear tab, and will start to unload only after being recruited. | ||
<gallery widths="300px" heights="300px" class="center" mode="nolines"> | <gallery widths="300px" heights="300px" class="center" mode="nolines"> | ||
| Line 268: | Line 284: | ||
Many basic technology options prove to be very helpful for long distance travel. Make frequent use of [[Campfire]]s, [[Pemmican]], [[Passive cooler]]s and [[Crafting spot]]s to resupply your caravans and keep healthy on the road, instead of one large ride. Take advantage by building settlements whenever you run low on food or resources. Generated maps can have forageable food and animals to hunt or even tame into the convoy. Colonists will also need time off to relax and restore their joy. | Many basic technology options prove to be very helpful for long distance travel. Make frequent use of [[Campfire]]s, [[Pemmican]], [[Passive cooler]]s and [[Crafting spot]]s to resupply your caravans and keep healthy on the road, instead of one large ride. Take advantage by building settlements whenever you run low on food or resources. Generated maps can have forageable food and animals to hunt or even tame into the convoy. Colonists will also need time off to relax and restore their joy. | ||
| − | === Multiple | + | === Multiple colonies and pitstops === |
The game options let you choose how many colonies (up to 5) you can have active on the globe at once. Temporary maps from events do not count towards this limit. In order to build beyond the game menu limits you must abandon an existing colony. | The game options let you choose how many colonies (up to 5) you can have active on the globe at once. Temporary maps from events do not count towards this limit. In order to build beyond the game menu limits you must abandon an existing colony. | ||
| − | Should you choose to make multiple settlements, it is not necessary to carry all your raw materials all the way from home base to a new spot. Lighten the load by carrying valuables such as silver, gold, [[drugs]] and then trading them with your new neighbors, or if you settled close enough, use transport | + | Should you choose to make multiple settlements, it is not necessary to carry all your raw materials all the way from home base to a new spot. Lighten the load by carrying valuables such as silver, gold, [[drugs]] and then trading them with your new neighbors, or if you settled close enough, use [[transport pod]]s to launch everything over. |
While travelling long distances consider bringing valuable items, then bartering for necessary supplies instead of bringing them. | While travelling long distances consider bringing valuable items, then bartering for necessary supplies instead of bringing them. | ||
| + | |||
| + | If you know certain resources will be scarce in your new map's biome, or if you want to save time mining, some resources can be [[Advanced_Endgame_Guide#Resource_compression|compressed]] -- that is, built into items with a lower mass than their raw materials. | ||
== Events == | == Events == | ||
| Line 289: | Line 307: | ||
File:Caravan ambushed by pirates.png|2.- You can see the incoming attackers from a distance. | File:Caravan ambushed by pirates.png|2.- You can see the incoming attackers from a distance. | ||
File:Caravan ambushed in World view.png|3.- World view is a red dot. | File:Caravan ambushed in World view.png|3.- World view is a red dot. | ||
| − | File:Caravan ambushed victory.png|4.- Once | + | File:Caravan ambushed victory.png|4.- Once victorious, you have 24 hours before the caravan automatically reforms to leave. |
File:Capturing prisoners after ambush.png|5.- Make a tiny room enough to capture downed enemies with a sleeping spot each. | File:Capturing prisoners after ambush.png|5.- Make a tiny room enough to capture downed enemies with a sleeping spot each. | ||
File:Prisoners brought to colony.png|Prisoners arrive to your colony, wandering around. | File:Prisoners brought to colony.png|Prisoners arrive to your colony, wandering around. | ||
</gallery> | </gallery> | ||
| − | + | # The game notifies you that an ambush is taking place, prompting you to check on your caravan. | |
| − | + | # Pause the game to survey the enemy, and position yourself by taking cover behind terrain features. | |
| − | + | # Check where it's happening. As it is, in this case, right next to the colony, it's possible to quickly send reinforcements. However, you cannot send the back-up caravan right into the battle, but must first move to an adjacent tile before joining your comrades. | |
| − | + | # After an encounter ends, a 24-hour countdown begins so you can recover, pick up items, strip the dead/downed and take care of any other need. | |
| − | + | # To take prisoners, you should build the smallest room possible (remember you are on a countdown) which can just fit the same amount of sleeping spots for each downed enemy. Treat their wounds so they don't die while carrying them to your colony. Finally, reforming the caravan makes captives come with you (you will see them listed). | |
| − | + | # Your prisoners are finally brought to your colony, but you see them wandering around (!!!). Don't worry as they won't attempt to escape. Your characters will proceed to unload their items. Eventually, wardens will come to pick them up and escort them to designated prison cells. Any incapacitated prisoners will remain downed and need to be carried. | |
| − | |||
| − | |||
| − | |||
| − | |||
| − | |||
==== Manhunter Ambush ==== | ==== Manhunter Ambush ==== | ||
| Line 330: | Line 343: | ||
== Attacking other settlements == | == Attacking other settlements == | ||
| − | + | You may raid other settlements on the world map, much like other factions do to your colony. To do this, all you need is to send a caravan to a site, and select the "Attack" interaction option. Attacking settlements gives you an opportunity to steal valuable goods such as [[glitterworld medicine]], [[luciferium]], [[component]]s, as well as weapons and armor. | |
| − | '''The below shows bases from Alpha 16. Settlement defenders of later updates are significantly strengthened and are harder to defeat.''' | + | '''The below shows bases from Alpha 16. Settlement defenders of later updates are significantly strengthened and are harder to defeat, and are not scaled by difficulty as other raids are.''' |
<gallery mode="packed-hover"> | <gallery mode="packed-hover"> | ||
File:Caravan raiding another settlement.png|1.- Moving towards target settlement for raid | File:Caravan raiding another settlement.png|1.- Moving towards target settlement for raid | ||
| Line 344: | Line 357: | ||
File:Stampede casualty.png|9.- Stampede casualty | File:Stampede casualty.png|9.- Stampede casualty | ||
File:Using their base as your own.png|10.- Using their base as your own | File:Using their base as your own.png|10.- Using their base as your own | ||
| − | File:Outpost destroyed 24h countdown.png|11.- Outpost destroyed 24h countdown | + | File:Outpost destroyed 24h countdown.png|11.- Outpost destroyed, 24h countdown before leaving |
File:Resting at enemy base.png|12.- Resting at enemy base | File:Resting at enemy base.png|12.- Resting at enemy base | ||
File:Looting.png|13.- Looting | File:Looting.png|13.- Looting | ||
| Line 353: | Line 366: | ||
=== Walkthrough === | === Walkthrough === | ||
| + | |||
| + | See [[Offense_tactics|offense tactics]] for specific tips on how to assault outposts and bases. | ||
# Right click to select destination gives approximate travel time and distance.<p> | # Right click to select destination gives approximate travel time and distance.<p> | ||
# Once your caravan arrives, the game generates a map with an enemy base.</p><p> | # Once your caravan arrives, the game generates a map with an enemy base.</p><p> | ||
# The "Attack begun" blue envelope opens a message which allows you to see the targeted area.</p><p> | # The "Attack begun" blue envelope opens a message which allows you to see the targeted area.</p><p> | ||
| − | # You can click on individual enemy members to see their character skills, gear and health. | + | # You can click on individual enemy members to see their character skills, gear and health. Use this to prioritize your targets.</p><p> |
# Base layout, nothing tricky.</p><p> | # Base layout, nothing tricky.</p><p> | ||
# Enemy base is very simple, nothing too complicated.</p><p> | # Enemy base is very simple, nothing too complicated.</p><p> | ||
| Line 364: | Line 379: | ||
# Stampede casualty with animal wounds.</p><p> | # Stampede casualty with animal wounds.</p><p> | ||
# Tactics split and kite allows you to enter their base and use choke points, with friendly fire safety ensured. Melee with ranged shooting on his/her shoulder.</p><p> | # Tactics split and kite allows you to enter their base and use choke points, with friendly fire safety ensured. Melee with ranged shooting on his/her shoulder.</p><p> | ||
| − | # After 8 of 11 enemies were killed, the remaining 3 start to flee and the game considers the outpost destroyed, and a 24 hour countdown timer begins for treating your wounded, looting and resting. You don't need to destroy the base once captured, just claim their doors and they will open as if they were yours from the beginning.</p><p> | + | # After 8 of 11 enemies were killed, the remaining 3 start to flee and the game considers the outpost destroyed, and a 24-hour countdown timer begins for treating your wounded, looting and resting. You don't need to destroy the base once captured, just claim their doors and they will open as if they were yours from the beginning.</p><p> |
# Since they had two rooms, one can be used as an infirmary and the other as a prison to handle your prisoners.</p><p> | # Since they had two rooms, one can be used as an infirmary and the other as a prison to handle your prisoners.</p><p> | ||
# You can strip all your killed or downed enemies to take their weapons and armor. Be careful with the deadman's apparel mood penalty if you took them off the dead, though.</p><p> | # You can strip all your killed or downed enemies to take their weapons and armor. Be careful with the deadman's apparel mood penalty if you took them off the dead, though.</p><p> | ||
| Line 372: | Line 387: | ||
| − | [[Category: | + | [[Category:Game mechanics]] |
Revision as of 18:45, 9 January 2020
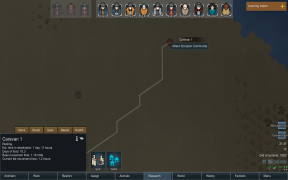
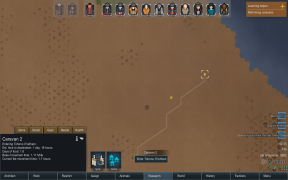
Caravans are a group of one or more colonists who gather together for different purposes. Goods can be carried by animals, colonists or prisoners, to facilitate trading on your own schedule; and a caravan can also act as a raid squad to attack other establishments. Each caravan is represented on the world map by a yellow icon. Double-clicking a caravan will select all caravans on the screen, allowing them all to be ordered to a single destination.
Sending caravans out from your home, instead of just waiting for other tribes to come to you, helps keep up fluid commerce. It provides a wider selection of goods since friendly outposts have much more inventory than the limited selection traders (who are restricted by carrying capacity) show up with, and you get a 2% price bonus for direct trading. It's also cheaper than requesting traders at the comms console.
Creation
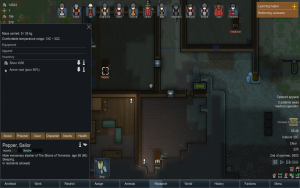
In the World map, select the colony icon and click 'Form caravan'. A dialog is shown to assign pawns, animals and items. You can create multiple caravans.
Caution: Clicking 'Abandon' on an unoccupied colony will not prompt for any confirmation before making it an inaccessible ruins and lost forever.
People and Animals
Choose the colonists who will take part in the convoy, the animals (e.g. alpaca, dromedary or muffalo) that will carry the items for sale, and prisoners you want to transport. At least one colonist must be chosen. Make sure to select those whose health are in optimal conditions, as wounded and/or sick colonists slow the caravan down.
There are three different arrangements when forming caravans:
- A caravan without pack animals forms the fastest, as colonists only need to pack items on their backs and will leave quickly.
- Caravans with pack animals endure a loading phase where colonists must load the pack animals. This can take a long time if there are lots of stuff to pack and you don't have enough haulers on hand.
- Caravans already traveling through the globe will reform instantly and not require a hauling phase.
Incapacitated pawns cannot be chosen to be part of the caravan initiation process, but once your caravan is travelling you can pick up incapacitated people to come with you. They will slow down your caravan by a lot, so be warned.
The caravan will take the name of the best negotiator in the caravan.

Items
Use the Items tab to select supplies. Only items located in your Stockpiles or Home Area are shown while initially packing; when reforming the caravan you can select any item on the map.
Carrying capacity:
- Colonists/prisoners: 35 kilograms (kg). This capacity includes clothing, gear and inventory they already have.
- Muffalo: 73.5 kg
- Dromedary: 70 kg
- Alpaca: 35 kg
- Elephant: 140 kg
Baby or juvenile animals have a reduced carrying capacity.
If the colonist or animal is already carrying something (such as clothes worn) then they will appear to have a reduced carry weight.
The combined carrying capacity and mass of selected items is listed at the top. Buttons are used to select items/amounts. A double arrow [>>] will take the full quantity of an item. The arrow [>M] indicates you cannot carry the full quantity, but it will automatically take the maximum amount. When over capacity, the arrow [M<] will return some or all of those items so that the mass total does not exceed the caravan's carrying capacity.
Modifier keys can be used to change the [>] arrow from +1 to adding more as follows:
Ctrl: +10
⇧ Shift: +100
Ctrl+⇧ Shift: +1000.
These keys work similarly for the [<] arrow to subtract.
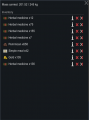
If a caravan member dies in the close-up view, they will drop their items which must be picked up. If they die on the global map (such as from blood loss), their gear will be lost. If all party members die, the entire caravan disappears and everything is lost.

Food
Caravans will feed as needed during the journey, so long as there's enough within the supply. Colonists who are part of a caravan will automatically forage for food while on the way, the speed of which depends on the environment and the colonist's growing skill.
It's vital to bring sufficient food for the journey. If you're bringing pack animals the caravan may be slower so bring more food to compensate.
Food spoils without refrigeration so careful selection is needed:
- Simple meals will suffice for short journeys (<2.4 days).
- Berries are good for mid-length journeys, despite being less weight-efficient. (<7 days).
- Pemmican will be needed for long distance travels (up to 75 days).
- Packaged survival meals will be necessary for extremely long journeys (>75 days).
Supplies that expire soonest will be consumed first.
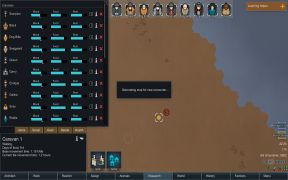
While traveling, world map events may trigger such as manhunter packs, raids, or other traders crossing paths, which can generate mini-maps. After threats have been eliminated, it's possible to scavenge a bit of food and herbal medicine before the map closes down. It is likely that you will have some items scattered in the mini-map; these must be picked up or chosen to take with your reformed caravan or they'll be lost forever.
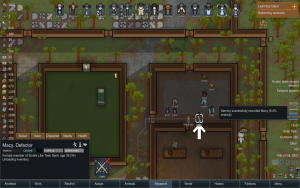
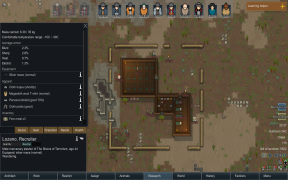
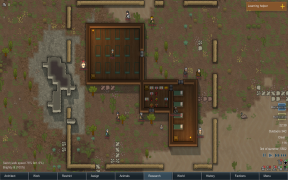
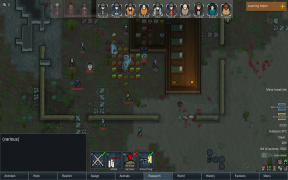
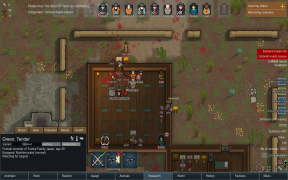
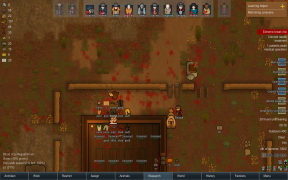
Formation process
Once the order to form the caravan is given, colonists will gather around a caravan packing spot or a random place within your home area and wait for all members to assemble. Animals will be rounded up by colonists which will then proceed towards the assembly spot, and follow them around when they are loading the caravan.
It's recommended to put the caravan packing spot inside your warehouse to reduce loading time.
After assembly, they will gather any needed supplies, putting them on pack animals if available. When they finish, they will head out to the map edges and wait for the other members to arrive, then exit the colony map and enter the world map.
Haulers not part of the caravan will also help in gathering the supplies.

Colonists will ignore any needs during the formation, except food (once they're starving they'll take a break to eat if food is available). Should they feel exhausted during the process, they won't rest in their bedrooms but collapse near the caravan packing spot.
They will also override the 'Forbid' command, taking forbidden items. If there is less of an item than ordered (e.g. meals which other colonists ate during the process), members will take what they can and then carry on without stopping.
A pawn can be temporarily interrupted by manually assigning them to do another task. They will resume caravan loading once the task is complete.
Any mental break of its members will pause the process until that member recovers. Downing or killing that member will interrupt the process, causing it to be cancelled.

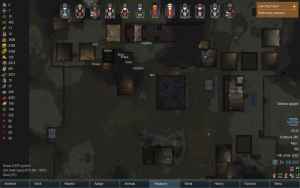
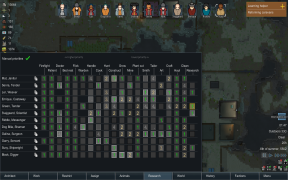
If the formation was successful, the character roster on top of the screen will split, showing those who stayed at home and those who left with the caravan by greying them on a different "box".

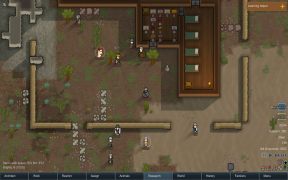
Caravan route & pathing
The 'Choose Route' button allows you to decide destinations for your colonists' caravan. Once a path is chosen, colonists will choose an exit direction that can best reduce travel time.
Once items have been loaded, party members will proceed separate ways according to their own classifications made by the player.
Caravan clear division between colonist path and muffalos' path.

The apparent reason behind the animal area drawn is to prevent them from eating your plantations.


Tricks
- The act of gathering supplies allows a colonist to carry huge stacks of lightweight materials like cloth or food. This can be exploited to perform Super Hauling by having a colonist pick up all the goods on the map, drafting them into the storage room, and cancelling the caravan to unload. They will have hauled a massive number of supplies in one trip.
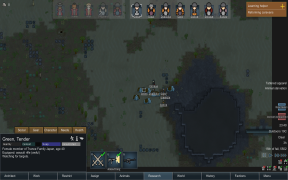
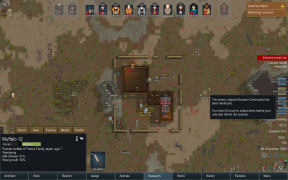
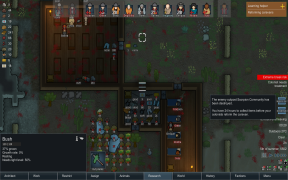
Travelling
Once your caravan enters the world map, you can give it orders.
A caravan can:
- Move - Right-click to select destination. A line indicates the optimal route (accounting for terrain speed and elevation changes).
- Settle - Click Settle to create a new colony.
- You may not settle a new colony when already at maximum. The default maximum is one. This can increased to up to five in Menu - Options.
- Settling directly adjacent to your own colony or any other settlement is not allowed.
- Enter back into the colony - Right-click the colony.
- Split - Click the Split button. Each caravan must consist of at least one colonist.
- Merge - Select two or more caravans in the same tile (by dragging a square zone) and click Merge to form a single caravan.
- Trade - When a caravan has reached a friendly faction outpost, click the trade button to open the trade dialog window.
- Attack - A caravan can attack any faction outpost, regardless of relations status, though attacking will worsen relations.
- Offer gifts - If your relations with a faction are not high enough to trade, you can offer them gifts in an attempt to improve relations.

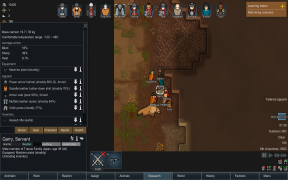
Status box
Several items are displayed in the status box.
- Movement status:
- Traveling - moving to destination.
- Resting - caravan automatically stops between hours 22 and 6 to sleep.
- Waiting - no destination selected.
- Stopped - stopped moving with reason given.
- Estimated time to destination - time to destination based on the current tile movement time.
- Days of food - compare this to 'estimated time to destination' to determine if your caravan has enough food for the journey.
- Base movement time: Movement speed based on the average speed of all the pawns in the caravan.
- Current tile movement time: Current movement speed based on the terrain, biome, weather (only affected during autumn-winter) or roads. (See table on this page for details.)
- Stealthiness: How stealthy your caravan is. Stealthier caravans are less prone to being ambushed.
A caravan may stop for various reasons, such as when;
- Between hours 22 and 6 while the members sleep and rest.
- They still continue to rest even if all members are fully rested.
- Colonists who had been assigned to the night shift in the Restrict tab will still follow this schedule.
- All colonists are downed or having a minor/major mental break.
- Any member is having an extreme mental break.
- Nobody will be harmed even if the colonist is going berserk.
- Minor or major mental breaks won't stop the caravan as long as at least one person is still functional. If a colonist is in the midst of a mental break when you settle or get ambushed, they will still be having it when they appear on the map.
- The player manually pauses the caravan.
- While paused caravans forage faster, members can socialize and the caravan is less likely to be attacked.
Sustenance
Pawns traveling in a caravan will eat automatically when necessary. Grazing animals, when hungry in a place with grazable plants, will instantly have their hunger bar refilled without any cost. If not, they will proceed to eat food carried in the caravan. Pawns will prioritize food that spoils earlier.
If a colonist has an injury or disease that requires tending, doctors will tend to them as necessary, using medicine if available to them. If self-tend is on they will also tend to themselves.
If you bring Beer along with you, colonists may drink it during their journey. The mood bonus it provides can help keep them sane when away from the colony for long stretches of time. (They don't appear to consume other recreational foods, such as chocolate or insect jelly. Testing is needed.)
Foraging
From Beta 19 onwards, every colonist in a caravan can forage for food.
Each colonist can forage 0.09 nutrition per day per level of Growing at a baseline, i.e. in temperate forests or swamps. Given that each colonist consumes 1.6 nutrition per day, this means that a level 9 Growing colonist can break even with food consumption when the caravan is resting, and a level 18 colonist can constantly forage more than he eats.
Foraging is affected by manipulation (50% importance, 100% max) or sight (90% importance), so giving caravanners bionic eyes or archotech eyes can help increase forage and hence let your food stocks last longer.
In addition, having a tribal start grants an extra 170% multiplier to foraging, as shown by a "Faction Type: 170%" line in the tooltip. If Tribal colonists with good Growing skills have enough meals or other food to eat during a trip through terrain with good forage, they may return with a nontrivial quantity of berries.
Movement Speed
Many things can affect the traveling speed of caravans. Clothing, armor, traits, and health conditions all affect a pawn's movement speed. A caravan's movement speed is determined by the average speed of all of the members of the caravan across colonists and animals, followed by the total mass the caravan is carrying. Incapacitated pawns will greatly slow movement.
If inventory mass exceeds carrying capacity the caravan will become immobilized until the mass is reduced, such as by eating food, discarding goods or having another caravan join up to bring capacity above inventory mass.
Some examples of things that may slow you down:
- Clothing and armor (varies; flak vest, flak jacket, flak pants, plate armor and marine armor have high movement penalties)
- Injured or downed colonists and prisoners
- Downed pawns can significantly slow down caravans, much more than injured ones that are capable of walking.
- Traits (e.g. Slowpoke)
- Slower animals, including muffalo, dromedaries or alpacas (the animals that can haul goods in caravans)
- Animals can be injured too. A muffalo missing a leg or two will slow down your caravan even more.
- Middle-stage pregnant animals move at 85% speed.
- Late-stage pregnant animals move at 70% speed.
- Juvenile animals move at 90% speed.
- Baby animals move at 50% speed.
Some things that can speed you up:
- Colonists equipped with Bionic legs or high on go-juice or yayo.
- Roads halve the time it takes to travel through a tile.
- Caravans carrying lighter items will move faster.
While the slower Muffalo and Dromedary speeds compared to the human base speed won't significantly affect shorter distances, baby animals and seriously injured colonists can have a significant impact, increasing travel time by 30% or more.
Movement Speed Table
Note: this chart is outdated as of 1.0.
The following table lists the base caravan movement speed in hours per tile for an unencumbered human. Flat terrain is naturally easiest to travel. Hills and mountains will worsen travel speed, while roads speed it up. Biomes with cold winters have reduced movement speed during the winter. It appears to be interpolated based on the current season and temperature with the worst case values listed in the table below.
Note that it is unlikely that your caravan will travel at the speed listed here.
| Terrain | Biome | Flat | Small Hills | Large Hills | Mountains |
|---|---|---|---|---|---|
| Easy | Arid Shrubland | 0.99 | 1.8 | 3.4 | 13 |
| Desert | 0.99 | 1.8 | 3.4 | 13 | |
| Extreme Desert | 0.99 | 1.8 | 3.4 | 13 | |
| Tundra (summer) | 0.99 | 1.8 | 3.4 | 13 | |
| Tundra (winter) | 17 | 18 | 19 | 28 | |
| Moderate | Boreal Forest (summer) | 1.6 | 2.4 | 4 | 14 |
| Boreal Forest (winter) | 17 | 18 | 19 | 28 | |
| Temperate Forest (summer) | 1.6 | 2.4 | 4 | 14 | |
| Temperate Forest (winter) | 11 | 12 | 13 | 23 | |
| Rough | Ice Sheet | 3 | 3.8 | 5.4 | 15 |
| Difficult | Tropical Rainforest | 5 | 5.8 | 7.4 | 17 |
| Sea Ice | 5 | -- | -- | -- |
Tabs
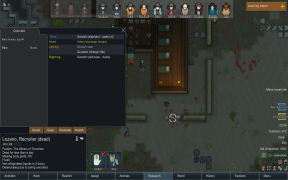
The inspection pane has tabs to manage the caravan and view details.
In the 'Gear' tab, by clicking the red X you can drop items and lose them forever. Dropping items may be necessary if the caravan becomes overburdened and unable to move.
You can also abandon colonists and prisoners in the 'Social' tab. Items carried by a dismissed pawn will be lost. Abandoning a caravan member will cause their friends and family to have sad thoughts, and if the colonist is unlikely to survive (such as low temperatures) there will be a more severe penalty. Colonists who survive may eventually make their way back to your colony, or return as part of an enemy raid or friendly caravan.
In the 'Gear' tab you can swap gear by dragging and dropping gear onto different colonists, or to and from the caravan inventory.
Gear & Inventory
Mass carried

Status
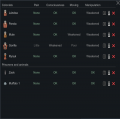
Health


Once you arrive to the destination, just click the Trade icon to start negotiations.
![]()
Route planner

There is a route planner that allows you to roughly check the amount of time it takes to reach a destination, allowing you to plan ahead.
When it is opened, you can drop various waypoints around the world map. The game will calculate the time it takes for a 1 tile/h caravan to travel through the planned route. You can also place the starting point on an existing caravan to determine the time taken for a journey based on that caravan's speed.
Returning home
After you arrive back to your colony, you will notice two details must be addressed before continuing the game.
- Pack animals may go straight to their animal bed or just wander around still with all your items inside their packing gear. If you happen to need something at the moment, you will have to make them drop it. You may want to restrict them to a roofed zone and wait for them to go there before doing this, so the dropped belongings won't deteriorate due to exposure, or you can wait until night when they are sleeping inside a room. Pack animals who have been trained for Obedience can be assigned to follow their master, who can be drafted to storage areas and wait until the animals follow him/her too to drop the items as well.
- Prisoners will still be carrying your caravan items too, even armor and weaponry (as odd as it may be). They will not unload their inventory after returning to base unless directed to through the gear tab, and will start to unload only after being recruited.
Prisoners keep your caravan items
Prisoner unloading inventory after recruitment


Long distance journeys
Many basic technology options prove to be very helpful for long distance travel. Make frequent use of Campfires, Pemmican, Passive coolers and Crafting spots to resupply your caravans and keep healthy on the road, instead of one large ride. Take advantage by building settlements whenever you run low on food or resources. Generated maps can have forageable food and animals to hunt or even tame into the convoy. Colonists will also need time off to relax and restore their joy.
Multiple colonies and pitstops
The game options let you choose how many colonies (up to 5) you can have active on the globe at once. Temporary maps from events do not count towards this limit. In order to build beyond the game menu limits you must abandon an existing colony.
Should you choose to make multiple settlements, it is not necessary to carry all your raw materials all the way from home base to a new spot. Lighten the load by carrying valuables such as silver, gold, drugs and then trading them with your new neighbors, or if you settled close enough, use transport pods to launch everything over.
While travelling long distances consider bringing valuable items, then bartering for necessary supplies instead of bringing them.
If you know certain resources will be scarce in your new map's biome, or if you want to save time mining, some resources can be compressed -- that is, built into items with a lower mass than their raw materials.
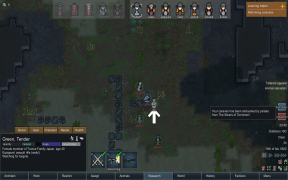
Events
Caravan events take place on the road, which means that neither side will be engaging with the benefit of a base. The action takes place in the open and the player must take advantage on terrain features to defend themselves. Those who survive will have a 24 hours window to perform vital needs such as doctoring, resting and feeding as well as re-packing. Eliminated hostiles can be fed to your animals.
There are two different ways of re-packing: manually giving cargo animals the selected item to be carried or re-forming the caravan. The first alternative lets you make the most out of the area which may include mining, harvesting and cooking, while the last option will instantly leave the place. Either way, before the countdown timer ends, all items must be put to be carried or they will be lost once the time runs out.
Ambush
Your caravan has been ambushed by an enemy faction. Colonists cannot exit the map until the attackers are defeated (killed, downed, or fled). If all are killed, the caravan is considered destroyed and will disappear along with any carried items.
1.- Red envelope alert zooms in to the battle tile.
2.- You can see the incoming attackers from a distance.
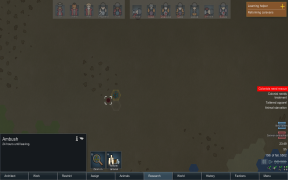
3.- World view is a red dot.
4.- Once victorious, you have 24 hours before the caravan automatically reforms to leave.
5.- Make a tiny room enough to capture downed enemies with a sleeping spot each.
Prisoners arrive to your colony, wandering around.


- The game notifies you that an ambush is taking place, prompting you to check on your caravan.
- Pause the game to survey the enemy, and position yourself by taking cover behind terrain features.
- Check where it's happening. As it is, in this case, right next to the colony, it's possible to quickly send reinforcements. However, you cannot send the back-up caravan right into the battle, but must first move to an adjacent tile before joining your comrades.
- After an encounter ends, a 24-hour countdown begins so you can recover, pick up items, strip the dead/downed and take care of any other need.
- To take prisoners, you should build the smallest room possible (remember you are on a countdown) which can just fit the same amount of sleeping spots for each downed enemy. Treat their wounds so they don't die while carrying them to your colony. Finally, reforming the caravan makes captives come with you (you will see them listed).
- Your prisoners are finally brought to your colony, but you see them wandering around (!!!). Don't worry as they won't attempt to escape. Your characters will proceed to unload their items. Eventually, wardens will come to pick them up and escort them to designated prison cells. Any incapacitated prisoners will remain downed and need to be carried.
Manhunter Ambush
Same as Ambush except with a manhunter pack. Manhunters won't attempt to flee, and colonists can't, either.
Demand
Pirates approach your caravan and demand that you give them items and hand over members as slaves. If you don't they will proceed to assault the caravan.
You can see the number of pirates when they are demanding you hand over items, as well as the items they are demanding.
It's nearly always a better choice to fight back as pirates usually come in poor numbers.
Encounter
Another friendly caravan crosses path with you, opening an opportunity to trade.
You can attack them if you wish, damaging relations. Your pawns may exit the map while engaging the caravan. Since you will be informed of their party composition but cannot clearly see who is in the caravan, you can decide if they're worth robbing.
Sometimes when attacking them, they may decide to do a 'bloody exit', that is to exit as aggressively as possible.

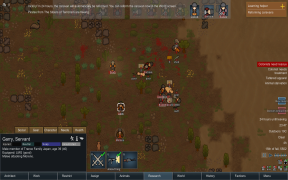
Attacking other settlements
You may raid other settlements on the world map, much like other factions do to your colony. To do this, all you need is to send a caravan to a site, and select the "Attack" interaction option. Attacking settlements gives you an opportunity to steal valuable goods such as glitterworld medicine, luciferium, components, as well as weapons and armor.
The below shows bases from Alpha 16. Settlement defenders of later updates are significantly strengthened and are harder to defeat, and are not scaled by difficulty as other raids are.
1.- Moving towards target settlement for raid
2.- Generating map for new encounter

3.- Attack begun
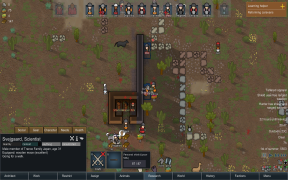
4.- Studying enemies
5.- Enemy base layout
6.- Enemy base zoomed out
7.- Enemy positioning and loot
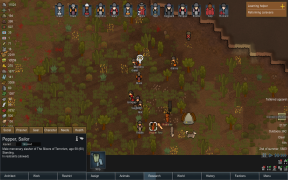
8.- First stampede
9.- Stampede casualty
10.- Using their base as your own
11.- Outpost destroyed, 24h countdown before leaving
12.- Resting at enemy base
13.- Looting
14.- Caravan back to home
15.- Unloading inventory
16.- Work tab order shift


Walkthrough
See offense tactics for specific tips on how to assault outposts and bases.
- Right click to select destination gives approximate travel time and distance.
- Once your caravan arrives, the game generates a map with an enemy base.
- The "Attack begun" blue envelope opens a message which allows you to see the targeted area.
- You can click on individual enemy members to see their character skills, gear and health. Use this to prioritize your targets.
- Base layout, nothing tricky.
- Enemy base is very simple, nothing too complicated.
- Approaching from the front will make enemies line up facing you right away automatically.
- Stampede offense tactic to weaken their defenses. Train your offensive animals to be capable of "Release", leaving pack animals behind
- Stampede casualty with animal wounds.
- Tactics split and kite allows you to enter their base and use choke points, with friendly fire safety ensured. Melee with ranged shooting on his/her shoulder.
- After 8 of 11 enemies were killed, the remaining 3 start to flee and the game considers the outpost destroyed, and a 24-hour countdown timer begins for treating your wounded, looting and resting. You don't need to destroy the base once captured, just claim their doors and they will open as if they were yours from the beginning.
- Since they had two rooms, one can be used as an infirmary and the other as a prison to handle your prisoners.
- You can strip all your killed or downed enemies to take their weapons and armor. Be careful with the deadman's apparel mood penalty if you took them off the dead, though.
- Once those 24 hours had passed, the game automatically kicks you back to the world map at which point you can return home and/or visit friendly outposts as well. If you want you can also choose 'Reform Caravan' which allows you to choose what you want to bring, and leave early.
- Once you arrive back home, characters will start unloading their inventory, sorting items properly.
- The work tab order will shift to a different sequence than the original before leaving. May be a problem, or not.