Quickstart Guides
As its name suggests, this is a quick guide for starting quickly - when you want to play now. Detailed analysis, tips and tricks, and "best practices" will be skipped in this guide, excepting only to avoid "game over" level pitfalls.
For a more detailed basic introduction see Basics.
Setup
Choosing a scenario
The first thing you'll be able to pick is a story scenario. There are 4 prebuilt scenarios to choose from. This guide assumes that you're choosing the classic "Crashlanded" scenario; it's a good "first game" start, and many veteran players prefer it.
Choosing a storyteller
You can pick one of the 3 AI Storytellers, and a difficulty level. The storytellers only determine the random events that occur during your game. The difficulty and storyteller can be changed at any time by going into the Options, selecting the Gameplay tab, and click "Modify Storyteller".
It is recommended to choose Cassandra Classic on Strive to Survive to get a feel for how the game is designed to play out. However, there is no shame in picking an easier difficulty. Play Peaceful if you want to get a hang of how the UI works and how to control your colonists.
Creating a world
You can play with the seed* and map size of the world, but it isn't anything that will make a big difference to you yet. The default dimensions is a good size that won't cause too much lag.
- (* The "seed" is just a random word, lower/upper case sensitive. Write it down for reference if you might want to duplicate your map later, once you know the game better.)
Once the world is created, pick a temperate forest biome to start, hopefully not too far from friendly(ish) tribes - the yellows and purples. Bonus points for a river/creek, but hardly necessary.
Now, look in the info tab (lower left on the screen). A map with a "year-round" growing season is the easiest, but you don't want to be too hot. Try between latitude 20 and 30 or so - too far south, near the equator, will be brutally hot very soon (summer), and too far north will have unforgiving winters.
You will also want to pay attention to the terrain type. Terrain goes from Flat, Small Hills, Large Hills, and Mountain. The bigger the hills, the more ore and natural defenses are available, but the less open space there is to build and grow. Pick either Small Hills or Large Hills; they are a nice balance between minerals, defense, and growing space.
Choosing your characters
This can take some time, but with only 3 starting characters, you may want to get a good starting trio. You can click randomize on your colonists as many times as you want, without penalty. You can also move them down to "save" them while you randomize a different character, if you find one you're not sure about.
Skills
You will want at least 1 colonist with a passion (one/two flames) and 5 or more levels for the following skills:
- Shooting - Defending your colony
- Plants - Feeding your colony
- Construction - Building your colony
- Medical - Healing injuries and disease, both which are inevitable.
Rolling for passions (one or two flames) in a skill is just as important as rolling for a high skill, because they will level up faster.
Having a colonist skilled in each of Cooking (cooking food), Social (recruiting prisoners, trade), Mining (harvesting ore), and Intellectual (faster research) is also useful to have. You don't need every single one of these skills, but having most/all of these covered can hasten your advancement in the early game.
- (That leaves 4 skills not covered; if you get them, great! But none are needed at the start, nor should be worried about for a quick start...
- Melee: How to club someone/something with your gun when you missed too many times. Can be brutal.
- Animals: Taming, training, and hunting. For food, you can rely on plants for the entire game - it's much less hassle.
- Crafting: Making high quality gear, clothing, weapons. "good enough" is good enough to start.
- Art: Beauty can wait until survival is covered.)
Remember, your characters can only do one thing at a time, and they need time to eat, recreate, and sleep. While skills like Shooting and Medicial won't be used all the time, remember that a full-time Planter can't be a full-time Cook. In this type of situation, you don't need to abandon the colonist good at 2 things; instead, you should grab another colonist that is also good at Plants and/or Cooking.
Traits
RimWorld is designed around non-perfect colonists. Good traits don't matter too much - whilst helpful, the game is playable without them. However, there are some very bad traits that should be avoided.
- Lazy / Slothful / Slowpoke (works more slowly)
- Pessimist / Depressive (permanent mood penalty)
- Chemical fascination / Chemical Interest (likely to become addicted to anything you have lying around)
- Pyromaniac (you are starting with wooden walls... do I have to explain this one?)
Other Factors
Try not to accept characters who have a lot of health ailments, old painful wounds, or are addicted to drugs. A bad heart can be a killer, of that character and the colony that depended on them. Look under the Health tab to see how problems affect their overall Movement, Consciousness, Manipulation, etc.
Lastly, be conscious of potential problems with characters "Incapable of..." Dumb Labor (hauling, cleaning), Firefighting, or Violence (both hunting and self-defense). "Incapable of Skilled Labor" should be an immediate rejection. Have at least 2 colonists able to do Dumb Labor and Violence.
That said, some combinations of {good traits + skills} can balance out otherwise unacceptable bad traits. If you have a great Researcher, who has piles of movement penalties and no violence - well, he's not going to be moving very much while sitting at his desk doing research, is he? No character is perfect, find ones you can live with, and a group of 3 that covers most of the bases.
Getting off on the right foot
Landing
- PAUSE THE GAME! - Wait for the colonists to emerge from their pods, then press spacebar. (Note: "Pause on load" can be set to default in the Options.)
- Unforbid Everything! At the start, every item is "Forbidden", prohibiting your colonists from using them. The easiest way to unforbid everything on the map (at any time) is to simply right click the 'Allow' order and allowing all. You can also un/forbid items, one or a few at a time, by selecting them and hitting the [f] key, or you can open the Architect/Orders tab, select "Allow", and left-click-hold and drag an area across your entire map.
- Arm Yourselves: You'll start with a bolt-action rifle, a revolver, and a plasteel knife. Select the pawn with the best Shooting skill and then right-click the bolt-action rifle and select Equip. Equip the next best shooter with a pistol, then equip the knife on the last pawn or the brawler.
- (You can decide which person to wear the armor. The flak pants and vest each slow down movement slightly, which is not a great thing, and you probably(?) don't need protection at this point. Put the helmet on someone, that doesn't hurt.)
- Prioritize: Go into your "Work" tab, and turn on manual priorities.
- Firefight, Patient, Bed Rest, and Basic, should be set to priority 1 on everyone.
- Doctor, Warden, Cook, Construct, and Grow should be set to priority 1 on the colonist with the highest skill and disabled for everyone else.
- Any passions or interests should be set to priority 2, then 4 for every other work.
Even if they have poor Intellectual, a colonist is better off researching than being idle - you can't fail research. - Temporarily set Hauling to 1 until they are done hauling sensitive equipment (explained later).
- Recon: Take a look around and get a feel for the terrain. Where are natural choke points to create kill zones? Where are standing structures that you can make use of?
- Prepare: Decide on a site for your initial base camp. Find a spot on the map relatively close to the landing site where you feel you can set up in a reasonably short period of time. If there are abandoned buildings or a hill nearby, consider taking advantage of them by building against them. Then set up a chop wood order to gather more wood.
- You need to get a single wooden building up as soon as possible so your colonists can sleep under a roof, and you can haul materials inside to stop them from deteriorating. Don't use steel if avoidable* - trees are plentiful in the suggested biome and steel is a valuable resource throughout the entire game, too valuable for walls (for now).Even if you plan on digging a mountain base, throwing up some walls is much faster to get settled in quickly.
- Go into the Architect menu to start to get familiar with it. You can change the material of a building by clicking on it in the menu and selecting the desired material. Wood will be a your preferred building material for now - plentiful, and cheap to replace if you make a mistake*. Construct a decent sized room ~ 9 by 9 or larger, and place 3 wooden beds inside. Walls and doors are in the "Structure" submenu, and beds are in "Furniture". Remember to unforbid the wood lying on the ground, or your colonists will not use them to build.
- (* When you tear down things like walls or doors you only get 1/2 the resources back. Replacing wood is not a problem on a Temperate Forest biome. In contrast, furniture items, like beds, can be uninstalled and moved freely.)
- Unpause the game: Enjoy watching your colonists working on the building. Remember you can always un/pause by tapping your [spacebar], or change the speed by pressing 1, 2, or 3.
Your first day
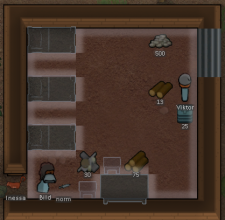
Colonists will automatically haul to the zone if they are assigned to Hauling.
Your goal before nightfall is to get everything under a roof, and your 3 colonists in beds. Light a campfire in the middle of your building (unless it's very hot, then build it outside.) Get your first small crops planted (30-40 tiles or so). If you have extra time, build a 1x2 table and 2 chairs - your colonists will enjoy sitting there to eat.
- Home: For your first building, make it ~about~ 50 tiles on the inside, so 7x7 or 6x8 or the equivalent. You don't want much bigger yet, but you can use the Architect/Plan graphics to plan for the future. Add a (wooden) door or three, the roof will be built automatically.
- Stocking Up: Materials (except for metals) will deteriorate when left outside, so you need to put them under a roof. Items marked with a red X are forbidden; be sure to un-forbid them so they can be hauled. In the architect menu, select "Zone/Area", "Stockpile zone", and make a stockpile that covers the entire floor of your building. You can specify exactly what is allowed in the stockpile by selecting it and then clicking "Storage", but for now this is not necessary. Selecting a character, then right-clicking on something that needs doing, then pressing the "prioritize" button will make them prioritize the task.
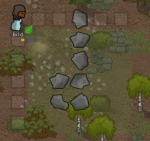
- Farming: You need to start farming, now. While you might have food today, by the time your crops have finished growing, you'll be running low. If there is rich soil nearby, which has a darker colour and is labeled "rich soil" on the bottom left corner of your screen when you mouse over it, use that.* If rich soil is too far away, then just plant on regular soil. Use "Architect -> Zone/Area -> Growing zone" and create 4 plots that are 5x5 each, using the Architect/Orders menu to "cut plants" and "chop wood" to clear the land first. A newly placed Growing Zone will plant potatoes by default, but you can change the crop by selecting that (single) plot, then clicking on the icon for the type of plant and choosing from a pop-up menu. Plant 2 rice, 1 strawberries, and 1 potatoes (in that order, if you're short on time) . You can easily change them later, but this is a good start.
- (* There is also a toggle, located in the bottom right corner of the screen, for "Toggle fertility overlay". This will show rich soil as bright green, normal soil as pale green, poor soil (gravel/etc.) as yellow, and stone (unplantable) as brown. You could use the Architecture/Plan feature to mark it out for later.)
- Sowing/Hauling: Your colonists will go about the business of planting and hauling things on their own. Seeds are in infinite supply in this game. Take a moment to observe them so you get a feel for how fast they move around. For now you want to keep everything fairly close by, so your colonists don't waste a whole day walking across the entire map and back again because they got hungry.
- Food: Your characters will need to eat, but for now they can survive on packaged survival meals.
- Animals: If you've started with a pen animal - like a yak, horse, or cow, you'll need to make a pen for them. This is signified with a "Pen needed" indicator on the corner of the screen. Right now, you can place a caravan hitching spot (under the Misc tab), and your animal handler will rope the animal to the spot, preventing them from roaming away. With only a single animal, you can keep them hitched to the spot indefinitely; they'll feed on the grass. "Free-running" animals, like the husky, can walk on their own.
- You can slaughter your animal if you don't want to bother - a warg will be difficult to feed, for instance. However, it may upset one of your starting colonists.
Your first night
Not much happens at night time, so you can pass the time by letting the game fast forward while you familiarize yourself with the controls and check up on your colonists.
- Reviewing colonists: You can check out a colonist's mood in their Needs tab. There's nothing you can do about the "Awful-Decent Barracks" mood debuff for now, but see if there are any easily addressable debuffs, like a nudist wearing clothes or a brawler with a ranged weapon. Try not to give them commands right now or they will get the "disturbed sleep" debuff. Allow them to wake up naturally.
The next few days
- Getting more supplies: Gather some more wood by going to "Orders -> Chop wood" and selecting some nearby trees to chop. Gather berries and Healroot if you find some nearby and it's "Ready to Harvest". Be sure that your colonists have plant cut and mining turned on in the Work tab.
- (Keep an eye out for veins of "compacted steel" in the surrounding hills - you start with 450 steel, but that won't last long, and you'll have to mine more sooner than later.)
- Getting more food: Your packaged survival meals will likely run low before your crops are ready to harvest. You can tide yourself over by hunting and gathering in the meantime. If you see berry bushes ready to harvest, you can use "Order -> Harvest" to gather them.
- Expand your crops: A few more 5x5 growing zones; one (or two) for cotton (for textiles, later), one for corn (which is slow to grow, but is the best work:food crop), and one for Healroot - you'll want more than just what's growing naturally. (Of the "medicinal" crops, only Smokeleaf can be processed without Research - add a growing zone for that too, if you want to experiment. First one's free, little colonist.)
- (After your first or second rice and strawberry harvest, swap one or two fields to potatoes. Once you have a good reserve in cool storage, swap to 2 potatoes and 2 corn. Add more if your colony is growing.)
- Get cooking: Cooking food has 3 benefits. Raw food, except for berries (and a few foods you won't have yet), gives −7 mood. Unless your cook is terrible - < 3 Cooking skill - or the cooking area is unclean, you'll reduce the chance food poisoning. Finally, cooking food makes food more nutritious. 10 raw food will make 1 simple meal; a simple meal is worth 18 raw food.
- In addition to a wooden butcher table, you'll want to build a fueled stove. If you can wait until you have electricity, an electric stove is future proof and will ultimately save on resources. However, the fueled stove will allow you to start cooking quicker, meaning you'll avoid the mood hit and food poisoning quicker.
- It's a good idea to build a separate kitchen close to the freezer so your cook does not have to walk as far. Add a Cook simple meal bill to the stove, and change it to Do until you have X. 10 to 20 is a decent number. Your cook will not do anything until you add a bill, so click on the butcher table, click Bills -> Add Bill -> Butcher creature, then click Do X Times and change it to Do forever. Build floors in the kitchen to avoid food poisoning.
- Forget about nutrient paste dispensers, at least right now. They require electricity and come with a mood penalty compared to simple meals.
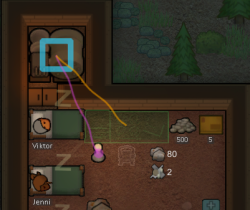
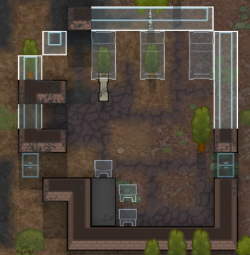
N.B. Wood generators create heat. If making an isolated generator room, like this, make sure to set up a remove roof area to let the heat out.
- Set up electricity: From the Power submenu under Architect, your options of power generation are either Wood-fired generator or Wind turbine. The generator is the preferred choice if wood is abundant on your map, as it provides a steady 1000 watts of electricity, unlike the wind turbine which might provide 3000 watts one second and 50 the next. The generator takes away your colonists' time as they have to refuel it, so it's not a permanent fix, but good enough for now until you can Research better options. Conduits are needed to carry electricity, but items that use electricity only need to be 6 tiles from it; you do not need to physically connect the conduit to everything, just get "close". Add some electric lights to your rooms so your colonists do not complain about being "in the dark".
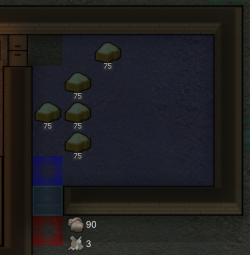
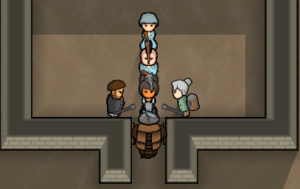
- Build a freezer: Build a room about 7x7 with a single door in the wall (this can be your starting room if you want, wall up any extra doors). If it's too big (or if you started too close to the equator, where it will be HOT), a single cooler will have problems keeping it cold. Under Architect->Temperature, build a cooler in the gap, make sure the cold side (blue) points into the room and the hot side (red) points outwards (rotate with Q and E keys), then connect the cooler to your power grid with conduits. Set the temperature to -5°C/~23°F. Make another stockpile inside, set it to allow fresh food, animal corpses, potatoes* and herbal medicine, but forbid "rotten", and set the stockpile's priority to "important". (* Rice and corn are very slow to rot, so long as they're indoors.)
- You'll soon want to build shelves in the freezer. As of 1.4, shelves can hold 3 items per tile, allowing you to make the most out of a small freezer room. Too large of a freezer, and you'll need another cooler to actually bring temperature below freezing.
- Pro tip: If you're having trouble keeping your freezer at freezing, making the walls double-thick will help insulate it, especially from extreme mid-summer heat. Your cooler will also use less electricity if you build an airlock - halls at least 6 tiles long with doors at each end, which prevent too much hot air from getting in through open doors whenever a pawn enters/leaves. While it doesn't have to be big at start, you will be expanding it later on, so make sure to leave space in your base.
- Note: If you're digging a mountain base, make sure the hot side of the cooler points either outside, or into an unroofed room. Otherwise it may overheat, send back heat into the freezer, and even start a fire. In order to freeze and preserve your food, you must also set up a power supply so the coolers can function.
- Start Research: Build a research bench under Production. You can put this in your main room for now. The first research item you want to rush as soon as possible is the Battery* and the Solar Panel* to provide a steady power source and to store power from unstable power sources such as the wind turbine or solar panel. It does not take very long, so turn up the researching priority on your researcher. After this, you can research at a more leisurely pace. Microelectronics basics should be the next thing you research. Now you can probably afford to put a standing lamp (under Furniture) inside your main room, so your colonists don't get the "in darkness" mood debuff when they're inside.
- (* If you're lucky enough to have a river running through your map, you could instead research Watermill Generator. Batteries will still be useful for emergencies and burst-power needs (see turret), and Solar will be handy for the increased power needed with daytime workloads, but with a river those could wait.)
- See also: Research recommendations for further commentary.
- New colonist: Whenever a new colonist joins, whether through the recruitment of a prisoner, a random person joining, or rescuing an independent survivor of a drop pod crash, remember to set their work priorities and build another bed for them. A sleeping spot will do short-term, but they (you) will want a bed as soon as possible.
Your first battle
Hopefully, everything has been uneventful so far, but inevitably the first threat will arrive. It will either be a local animal gone mad or a single raider with a crappy shiv or club - it will not be very dangerous and easily handled by your starting weapons.
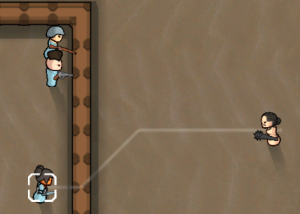
- Combat basics: Draft your colonists and put them in cover with a clear view of the direction your enemy seems to be coming from. When the enemy approaches, start shooting. If the enemy has made it all the way close up to your shooters, engage with your melee colonist, and move the shooters back. Friendly fire can happen if colonists are too far apart, but in the line of fire. Either keep your colonists close, or avoid standing in the way of bullets.
- Barricades and sandbags have 55% cover, so they'll block 55% of bullets. All walls have up to 75% cover, but this is reduced as a pawn needs to "lean out" to fire. Trees have 25% cover, rock chunks have 50%. See Cover for more info on cover. While melee attacks ignore cover, you'll have a bad time if you stand in the open.
- Alternatively, if your shooters suck but you have an amazing melee pawn, just go ahead and stab 'em - unless the melee enemy is also amazing and suitably armed that is. It's riskier, but it works until you have better shooters.
- Tending to wounds: If a colonist gets injured in the fight, you want to make them rest. If they're not resting, then increase their Bed Rest priority. You can check the colonist's injuries in the Health tab. You don't have to set a medical bed, they can rest in their own beds just fine. If your doctor is the one wounded, then you'll need to either, 1. check "Self-Tend" in the Health tab, or 2. assign another colonist to Doctoring in the bottom Work tab. Ideally, you don't have your doctor in the front lines.
- If there are just a few bruises and scratches, you don't have to waste precious medicine on them, so select "no medicine" in the Health -> Overview tab. Medicine should be reserved for diseases and moderate/extreme cases of blood loss. Even without medicine, colonists will usually heal from injuries without any complication.
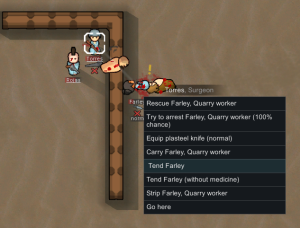
- In an emergency - say, one of your colonists will bleed to death in 2 hours - you'll want to tend on the field, rather than dragging them to a bed. To do this, draft the doctor or nearest pawn with the best Medical Tend Quality. This is usually the one with the highest Medical skill, but can be affected by injury, artificial body parts, drugs, and other effects. Once drafted, select the doctor, right-click on the downed pawn, and order them to tend the downed pawn. You can draft-tend with available medicine, even if the Health tab is set otherwise. Ideally, pawns skilled in medicine will always carry medicine. But if you don't have the time to retrieve it, then tend without medicine.
- Taking a prisoner: If the enemy was downed, you can capture them, mainly for 3 purposes:
- Recruitment - Capturing enemy raiders is one of the primary ways to recruit new pawns. Select the pawn, then the Prisoner tab, then select "Recruit". You don't need new people right away; your storyteller is very kind with pawn opportunities. So if an enemy has a drug addiction, chronic conditions like Bad Back or Cataracts, or simply doesn't have any desirable skills, then don't recruit them.
- Release - Releasing a healthy prisoner will increase goodwill with their respective faction. Check the Prisoner tab to see if releasing would do anything. Don't bother with savage tribes or pirates - they are always "Hostile", and goodwill has no impact. (You can check their faction in the bio, then open the factions tab to see which faction is their faction. If the label is savage tribe or pirate band, then releasing is pointless). Don't waste medical supplies - go to the prisoner's Health tab, select the Defaults button next to medicine, and set enemies to not use any medicine.
- Monetary - You can sell a prisoner directly to slavers and faction bases, though colonists will be slightly disturbed by it (−3 mood per prisoner). You can also do organ harvesting, which is more profitable, but more damaging to colonist mood.
- Prisoners must sleep in a prison. Prisoners must be inside, and they can't sleep in the same room as colonists. A bed or sleeping spot must be set "For Prisoners". In a pinch, you can turn a kitchen room or colonist room for prisoners, while you build a small prison. If you don't want an enemy for these purposes, then just let them die. Killing them yourself means a higher risk of 'Witnessed Corpse' mood penalty. If you want the raider's clothing, then strip them before they die.
- Burying corpses: You can butcher a mad animal's corpse without worry, diseases in Rimworld are not contagious. Rotten corpses cannot be butchered at all.
- However, colonists get a mood penalty if they see a human corpse. If you want to honor the dead, construct a grave somewhere out of the way under Architect -> Misc and bury the corpse in it. You can strip corpses of their clothes, but the apparel will be tainted. Tainted clothes give a mood penalty and will not be bought by traders. Don't put the grave too far away, because colonists will occasionally visit graves as recreation, and you do not want them to waste the whole day walking there. Also, corpses start to "stink" after a while. So, if you don't want to build a cemetery, keep your garbage away from the colonists!
- If you want to dispose of them without much work, build a small rock building, then haul the bodies into the building. Later in the game, craft molotov cocktails and throw them in the building to burn the corpses.
Moving forward
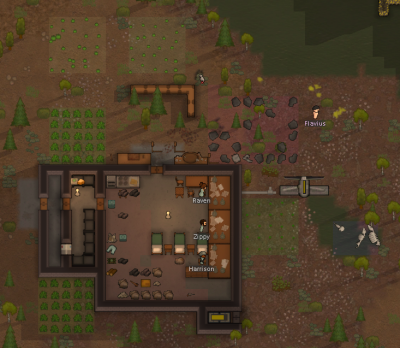
The wind turbine is vulnerable; you should make a wall around it.
Note that the cooler's "hot" side points to an unroofed room.
- Stone walls: Build a stonecutting bench, set a bill, and start churning out stone blocks made from chunks. General labor speed, and traits like Hard Worker and Industrious affect stonecutting speed. However, skills do not. Therefore, choose your stonecutter wisely - pick a colonist who doesn't have important work, such as a grower once you've finished planting. You should begin to replace your wooden walls with stone walls.
- Watch out for roof collapses! Roofs require a wall, door, or similar within 6 tiles. If a roof's support is removed, then it will fall, which can potentially kill your colonists. Replace walls a few at a time, or place a remove roof area first. Removing roofs directly with a remove roof area will never cause a collapse, even if the roof would no longer be supported.
- Hunting: To make a fine meal, which gives a +5 mood boost, you need meat as well as vegetables (berries will do fine for now). You can select animals and mark them for hunting (on the map, or under the "Wildlife" tab), and any colonists with Hunting enabled will go and hunt them. Do NOT hunt boomrats, boomalopes, animals in packs, or predators! It is a bad idea, don't do it. Predators, which are fast, and whole herds of animals in packs may revenge when a single animal revenges. Boomalopes and boomrats explode, and can create large forest fires. However, simply turning on "hunting" has some flaws because your hunter tends to stand too far away from the animal, decreasing their accuracy and making them waste a whole day trying to shoot a turtle. Sometimes they might even accidentally shoot another colonist walking in front of them.
- Instead, if you're willing to micromanage a little, you can hunt manually. Select the colonist with the rifle, draft them, then right click on a spot nearby your chosen target to make them walk there. (You can click the rifle icon to see the range.) Click their weapon, then left-click the animal to make them start shooting. Walk closer to the animal if it moves away. If the animal is downed but not dead (twitching on the ground with exclamation mark), undraft the colonist, right-click the animal and select "prioritize hunting animal". The hunter will slit the animal's neck and haul it to the appropriate stockpile zone.
Your first winter
Assuming your biome has a major winter - if you started with a "year-round" growing period, then you don't need to worry about it (as much).
- Food - By the beginning of winter you should try to have at least a thousand units of food stored. As winter progresses, your outside crops will die. Sun lamps can be used to grow crops indoors, but it is costly. Depending on the local climate, most plants on the map will also die. Hunting is still a viable option.
- Warmth - Make sure your living areas are heated to around 21 degrees Celsius (70 degrees Fahrenheit). If they are colder than this, your colonists may complain about the cold. Significantly colder, and they will contract hypothermia and/or frostbite if they are exposed for too long. Parkas and tuques will help keep colonists warm in cold weather, but heaters are still necessary to avoid −4 Slept in the cold, as well as work-related penalties from being too cold.
Other tips moving forward
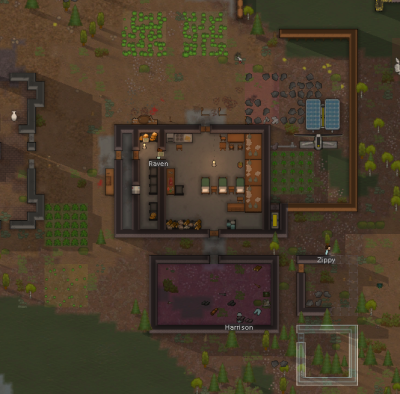
- Wild and tamed animals will eat your crops and food if you let them. Kill the wild animals and restrict your animals in a zone that only contains hay or kibble.
- Visitors will get into your freezer and drink your beer regardless if you forbid doors.
- The notification when a hungry predator attacks a colonist is easily missed, only manhunters trigger the red flashing envelope notification. Be wary if there's a wild predator hanging around your base.
- If a person crash lands in an escape pod and you want to recruit them, you must capture them and then recruit them like any other prisoner, even if they're a colonist's family member. If you choose rescue, there's a chance that they'll choose to join you out of gratitude after being fully healed, but they may also simply wander off on their own as soon as they've recovered, especially when your colony is well-populated.
See also
- Colony Building Guide - building a successful base at any stage of the game
- Defense tactics and Defense structures - defending against enemy attacks
- Intermediate Midgame Guide - expanding after settling down


