Difference between revisions of "Basics"
PigeonGuru (talk | contribs) |
PigeonGuru (talk | contribs) |
||
| (15 intermediate revisions by 4 users not shown) | |||
| Line 9: | Line 9: | ||
[[File:Tutorial.jpg|300px]] | [[File:Tutorial.jpg|300px]] | ||
| − | The tutorial teaches the basics by highlights including: game set up, short walkthrough about building a small colony and defeating the first raider. At the end, the player can continue the same game after choosing a storyteller. This feature was added in [[Version# | + | The tutorial teaches the basics by highlights including: game set up, short walkthrough about building a small colony and defeating the first raider. At the end, the player can continue the same game after choosing a storyteller. This feature was added in [[Version#Recent_Version_:_Alpha_16|Alpha 16]]. |
While the tutorial mode teaches you the basics, this article provides more insight while still not getting into depth. | While the tutorial mode teaches you the basics, this article provides more insight while still not getting into depth. | ||
| + | === [[Learning helper]] === | ||
| + | |||
| + | Besides this, there is also a learning helper in-game which will teach players on various concepts. | ||
== The basics == | == The basics == | ||
| Line 49: | Line 52: | ||
**Some are extremely toxic: | **Some are extremely toxic: | ||
*** Abrasive will tend to insult others and start fights. | *** Abrasive will tend to insult others and start fights. | ||
| − | *** Chemical interest/fascination will often go on drug binges. | + | *** Chemical interest/fascination will often go on drug binges if provided. |
| − | *** Volatile colonists go into mental breaks very easily. | + | *** Volatile colonists go into mental breaks very easily when their mood is low. |
*** Pyromaniacs will start fires randomly, doing so more often when stressed. | *** Pyromaniacs will start fires randomly, doing so more often when stressed. | ||
** Some other traits are not as bad but are still worth watching out: | ** Some other traits are not as bad but are still worth watching out: | ||
| Line 102: | Line 105: | ||
| width=62px height=40px | [[File:Knife.png|32px|link=Knife]] | | width=62px height=40px | [[File:Knife.png|32px|link=Knife]] | ||
| width=62px height=40px | [[File:Pistol.png|32px|link=Pistol]] | | width=62px height=40px | [[File:Pistol.png|32px|link=Pistol]] | ||
| − | | width=62px height=40px | [[File:SurvivalRifle.png|32px|link= | + | | width=62px height=40px | [[File:SurvivalRifle.png|32px|link=Bolt-action rifle]] |
|- align="center" | |- align="center" | ||
| <div><small>[[Knife]]</small></div> | | <div><small>[[Knife]]</small></div> | ||
| <div><small>[[Pistol]]</small></div> | | <div><small>[[Pistol]]</small></div> | ||
| − | | <div><small>[[ | + | | <div><small>[[Bolt-action rifle]]</small></div> |
|} | |} | ||
The tutorial forces the player to assign weapons to colonist randomly without analyzing their character profile. But there are basically two type of fighters: ranged and melee. Giving characters the wrong type of weapon can cause negative mood and at the same time, lose efficiency as a whole. So please, sort compatibility. | The tutorial forces the player to assign weapons to colonist randomly without analyzing their character profile. But there are basically two type of fighters: ranged and melee. Giving characters the wrong type of weapon can cause negative mood and at the same time, lose efficiency as a whole. So please, sort compatibility. | ||
| − | + | Choose the colonist with the highest melee skill and give them the knife, the colonist with the highest shooting skill should be given the bolt-action rifle and the remaining colonist the pistol. Give every colonist a weapon even if that means giving a brawler a ranged weapon, you can make them a shiv later but everybody should be armed. | |
{{clear}} | {{clear}} | ||
| Line 164: | Line 167: | ||
=== Building a Freezer === | === Building a Freezer === | ||
| − | You may | + | You may or may not have noticed by now a notification message at the top saying "X" food has rotted away in storage. |
| − | This is because food needs to be refrigerated. To upgrade your colony, you will need access to [[Power|power]] to produce Electricity and build [[cooler]]s. There`s a variety of original ideas when designing power grid planning, but basically constructing these devices require [[components]] that can be mined, traded, manufactured and salvaged from [[Ship chunk|ship chunks]]. In early game, you may have limited supplies so treat them as delicate devices. This means, do not place them on your outline leaving them exposed to attack, watch for fire alarms and stop shooting in their direction. | + | This is because food needs to be refrigerated. To upgrade your colony, you will need access to [[Power|power]] to produce Electricity and build [[cooler]]s. There`s a variety of original ideas when designing power grid planning, but basically constructing these devices require [[components]] that can be mined, traded, manufactured and salvaged from [[Ship chunk|ship chunks]]. In the early game, you may have limited supplies so treat them as delicate devices. This means, do not place them on your outline leaving them exposed to attack, watch for fire alarms and stop shooting in their direction. |
| − | The power source be it Fueled generator, Solar generator or Wind turbine, | + | The power source, be it Fueled generator, Solar generator or Wind turbine, all possess their pros and cons, but must be connected via Power conduits to the Coolers themselves. The coolers have directions, blue indicates cold and red means heat, so make sure you rotate blue towards the inside. Once you have done that, the device is set up. |
| − | The default temperature is always 21 Celsius | + | The default temperature is always 21 Celsius but that won't help, so use the buttons to adjust. The cooler will attempt to reach your designated value, but it all depends in details such as not leaving unroofed areas and the room size itself. Sometimes one cooler alone is not enough. So always hover your mouse to check if the desired temperature has been achieved. In winter you can also completely turn coolers off and in extreme summers you may need to build additional units. |
<gallery widths="300px" heights="300px" class="center" mode="nolines"> | <gallery widths="300px" heights="300px" class="center" mode="nolines"> | ||
| Line 249: | Line 252: | ||
There are many occurrences that can threaten your colony, be it accidents, [[illness]]es, manhunter packs, etc. And by the time a negative incident takes place, it might be too late to start building up an emergency room. So its wise to construct a spare room with beds which can be switched to either Hospital or Prison. If time and resources allow, having medical supplies nearby may mean the difference between life and death for the patient. If possible, ensure the surrounding area has a clear free path towards the room without much obstacles in the way. Like mentioned earlier, this facility located at the heart of the colony may be a good choice too as incidents can take place at map corners and having to rush across the entire land while bleeding may prove fatal. | There are many occurrences that can threaten your colony, be it accidents, [[illness]]es, manhunter packs, etc. And by the time a negative incident takes place, it might be too late to start building up an emergency room. So its wise to construct a spare room with beds which can be switched to either Hospital or Prison. If time and resources allow, having medical supplies nearby may mean the difference between life and death for the patient. If possible, ensure the surrounding area has a clear free path towards the room without much obstacles in the way. Like mentioned earlier, this facility located at the heart of the colony may be a good choice too as incidents can take place at map corners and having to rush across the entire land while bleeding may prove fatal. | ||
| − | |||
| − | |||
| − | |||
=== New colony members === | === New colony members === | ||
[[File:Recruiting.png|thumb|right|Take a look at Prisoner tab.]] | [[File:Recruiting.png|thumb|right|Take a look at Prisoner tab.]] | ||
| − | Your character roster can | + | Your character roster can be increased in many ways. |
* Recruiting captured [[prisoner]]s: As mentioned, if you already performed the first steps, capturing alone does not mean that person will join you right away after he/she has healed. You will have to recruit that pawn. In order to accomplish that, you will need to send someone to talk to that person and convince him/her to join, it may take several attempts. It will be easier if the wanted pawn receives proper medical care, is fed, feels as comfortable and happy as possible, and you use your best wardens to recruit them. | * Recruiting captured [[prisoner]]s: As mentioned, if you already performed the first steps, capturing alone does not mean that person will join you right away after he/she has healed. You will have to recruit that pawn. In order to accomplish that, you will need to send someone to talk to that person and convince him/her to join, it may take several attempts. It will be easier if the wanted pawn receives proper medical care, is fed, feels as comfortable and happy as possible, and you use your best wardens to recruit them. | ||
| Line 320: | Line 320: | ||
| − | Since we already start with knowledge of Electricity, access to power is available so long as | + | Since we already start with knowledge of Electricity, access to power is available so long as there's abundance in materials required, steel and components. |
* [[Fueled generator]] requires wood and refueling on regular basis (make sure to roof). | * [[Fueled generator]] requires wood and refueling on regular basis (make sure to roof). | ||
| Line 365: | Line 365: | ||
[[File:Simple wall.png|400px|thumb|center|Wall with doors for friendlies and several deadfall traps for hostiles to be filled with chunks to slow them down.]] | [[File:Simple wall.png|400px|thumb|center|Wall with doors for friendlies and several deadfall traps for hostiles to be filled with chunks to slow them down.]] | ||
| − | It | + | It's easier to build walls by filling in the gaps between mountain and old ruins. Walls will be of better use to protect your plantations from herbivorous animals and any other locations where your pawns tend to walk around the limits of your colony to avoid said predator attacks. |
Make sure you clear your Home zone (the blue one) so that pawns do not go beyond the wall by selecting Architect > Zone/Area > Clear allowed area > Home. | Make sure you clear your Home zone (the blue one) so that pawns do not go beyond the wall by selecting Architect > Zone/Area > Clear allowed area > Home. | ||
| Line 375: | Line 375: | ||
Hopefully you didn't had the need to survive winter by hunting only due to lack of berries or crops. Assuming you already manage to somehow settle, by now you should be with your first three starter characters and maybe some more who joined you along the course of time, still most likely your colony will be rather a militia than an army. | Hopefully you didn't had the need to survive winter by hunting only due to lack of berries or crops. Assuming you already manage to somehow settle, by now you should be with your first three starter characters and maybe some more who joined you along the course of time, still most likely your colony will be rather a militia than an army. | ||
| − | If you didn't realize yet, characters can progress their skills except for those who are incapable of at certain categories. It | + | If you didn't realize yet, characters can progress their skills except for those who are incapable of at certain categories. It's best if those who can Hunt, can be trained to reach at least level 10, same for melee fighters as well. What counts towards their learning is "practice", which means to let your pawns to shoot many times or swing their weapons many times. For shooters, the smaller the target, the harder to hit. Which is wise and convenient, since your colony is still small, untrained and maybe you leave someone good in Doctoring behind to tend the wounded later, it would be too dangerous to risk your men against large animals that could leave your people with permanent health problems. |
<gallery widths="300px" heights="300px" class="center" mode="nolines"> | <gallery widths="300px" heights="300px" class="center" mode="nolines"> | ||
File:Mad animal.png|'''Friendly fire safety tactic vs mad animal, once downed melees can practice some swinging.''' | File:Mad animal.png|'''Friendly fire safety tactic vs mad animal, once downed melees can practice some swinging.''' | ||
File:Melee ed.png|'''Mad animal finished off by melee fighters only.''' | File:Melee ed.png|'''Mad animal finished off by melee fighters only.''' | ||
</gallery> | </gallery> | ||
| − | Friendly fire safety tactic, as taught at the "learning helper" on the top right of the screen is a good start, basically your ranged characters will be shooting over the shoulders of their melee friends who will be guarding them when hostiles reach their position. But of course, melee characters don | + | Friendly fire safety tactic, as taught at the "learning helper" on the top right of the screen is a good start, basically your ranged characters will be shooting over the shoulders of their melee friends who will be guarding them when hostiles reach their position. But of course, melee characters don't need to wait until enraged animals get close. After shooters have downed a target, instead of making the shooters to keep firing, just order the melee to finish them, and practice more swinging. Remember to tell the shooters to stop firing. |
| − | Don | + | Don't waste your practiced target (unforbid their corpses), and deliver them to your butcher to take as much as possible meat and fur from them. |
===== Shooting skill leveling ===== | ===== Shooting skill leveling ===== | ||
| Line 397: | Line 397: | ||
=== Hunting === | === Hunting === | ||
| − | You may need meat for food or fur for apparel. Consider you current situation and pick a target accordingly. Don | + | You may need meat for food or fur for apparel. Consider you current situation and pick a target accordingly. Don't go against a [[Thrumbo]] with just 3 poorly equipped dudes. Of course, the smaller the target the lesser the gain, but it's still best to play it safe. |
| − | When you select animals to be hunted, the game will assign one pawn to go after it and considering your character may be unskilled, it's best if more than one can go hunt for the needed items. So instead of just assigning targets to hunt, use the alternative method of [[ | + | When you select animals to be hunted, the game will assign one pawn to go after it and considering your character may be unskilled, it's best if more than one can go hunt for the needed items. So instead of just assigning targets to hunt, use the alternative method of [[drafting]] multiple characters and then right click, the red cross equals the hunt task. This also allows you to use melee weapons, which have a much better chance at hitting and killing smaller animals (though more of a death wish against large ones). |
Once you have hunted your prey, you will need a [[butcher table]] to process the corpse into edible meat and leather as well. Make sure to get the prey back home, as leaving it there too long may cause it to deteriorate and start rotting (at which point it's wasted), or be eaten by opportunistic predators. | Once you have hunted your prey, you will need a [[butcher table]] to process the corpse into edible meat and leather as well. Make sure to get the prey back home, as leaving it there too long may cause it to deteriorate and start rotting (at which point it's wasted), or be eaten by opportunistic predators. | ||
| − | On the other hand, predators like bears for example, feed on deer and since the body mass is large, its often left without getting completely eaten, you can pick the | + | On the other hand, predators like bears for example, feed on deer and since the body mass is large, its often left without getting completely eaten, you can pick the leftovers for yourself without risking manhunter revenge. |
[[File:Picking up left overs.png|300px|thumb|none|Picking up left overs]] | [[File:Picking up left overs.png|300px|thumb|none|Picking up left overs]] | ||
| + | |||
Meat can be cooked into [[fine meal]]s in conjunction with plant-based foods. They are slightly more nourishing than simple meal and provide +5 mood which is good for lifting colonists' spirits, even well into the mid-game. | Meat can be cooked into [[fine meal]]s in conjunction with plant-based foods. They are slightly more nourishing than simple meal and provide +5 mood which is good for lifting colonists' spirits, even well into the mid-game. | ||
| Line 413: | Line 414: | ||
=== Apparel === | === Apparel === | ||
[[File:Wardrobe.png|thumb|500px|center|Tailor bench nearby the materials store and the wardrobe, with a cotton plantation surrounding it.]] | [[File:Wardrobe.png|thumb|500px|center|Tailor bench nearby the materials store and the wardrobe, with a cotton plantation surrounding it.]] | ||
| − | Either Tutorial or Crash-landed scenarios start with characters wearing [[Synthread]] gear which is resistant enough to last a year long before deteriorating, so it | + | Either Tutorial or Crash-landed scenarios start with characters wearing [[Synthread]] gear which is resistant enough to last a year long before deteriorating, so it's not a high priority. For a pawn assigned to Tailor work swiftly, it's convenient if both the fabrics storage is somewhat close and with a next room designated to store finished wear. Characters react faster to available clothing if the product is listed in the items column instead of just laying by the bench. |
=== Fire Handling === | === Fire Handling === | ||
| Line 434: | Line 435: | ||
=== Mining === | === Mining === | ||
| − | Mining can be ignored at the very beginning of the game. However its still wise to pause the game at the start to take a careful look around the map by checking the borders of each mountain. [[Metals]] like [[Gold]], [[Silver]], [[Steel]] and [[Plasteel]] will turn very useful as well as [[Jade]]. While you need just wood to build most of your beginning improvisations, these materials are valuable enough to let you buy items that cannot be crafted by players and are only available from traders such as [[Medicine]]. You won | + | Mining can be ignored at the very beginning of the game. However its still wise to pause the game at the start to take a careful look around the map by checking the borders of each mountain. [[Metals]] like [[Gold]], [[Silver]], [[Steel]] and [[Plasteel]] will turn very useful as well as [[Jade]]. While you need just wood to build most of your beginning improvisations, these materials are valuable enough to let you buy items that cannot be crafted by players and are only available from traders such as [[Medicine]]. You won't have much currency at first so these materials can come very handy. [[Component|Compacted machinery]] provide components when mined out. |
Click on the the ores and then press on Mine. | Click on the the ores and then press on Mine. | ||
| Line 451: | Line 452: | ||
{{stub}} | {{stub}} | ||
| + | === Performing an operation === | ||
| + | Normally you won't need to operate on someone that early in-game, but in case you do, you should always get prepared. | ||
| + | |||
| + | You will need a healthy high-skill surgeon, a clean room for your surgeons to operate, and decent-quality medicine. Herbal medicine won't do for any kind of surgery except if your surgeon has received mid-late game bionic enhancement. | ||
=== Stonecutting === | === Stonecutting === | ||
| Line 459: | Line 464: | ||
Building stone structures is a key part of upgrading your base to becoming more durable. It is not essential to survival however, and is best done mid-game. Stone also has its shortcomings; stone structures take ages to build, and stone furniture is less comfortable. Unless you really need your beds or other furniture to be fireproof, build them out of wood instead. | Building stone structures is a key part of upgrading your base to becoming more durable. It is not essential to survival however, and is best done mid-game. Stone also has its shortcomings; stone structures take ages to build, and stone furniture is less comfortable. Unless you really need your beds or other furniture to be fireproof, build them out of wood instead. | ||
| − | Depending on your situation you may or not need stone blocks, however cutting stones can prove worthwhile if you start this practice from early days as later in game, you may need craftsman to make components, a material needed in abundance to build your spaceship and only character with crafting skill 10 or above can do so, and cutting stones can improve your craftsmen's crafting skill (albeit slowly). Having more than one person able to work at the [[component assembly bench]] | + | Depending on your situation you may or not need stone blocks, however cutting stones can prove worthwhile if you start this practice from early days as later in game, you may need craftsman to make components, a material needed in abundance to build your spaceship and only character with crafting skill 10 or above can do so, and cutting stones can improve your craftsmen's crafting skill (albeit slowly). Having more than one person able to work at the [[component assembly bench]] 24/7 will considerably halve the time needed to complete the ''enterprise''. |
=== Quality Furniture === | === Quality Furniture === | ||
| Line 469: | Line 474: | ||
Feature that targets aesthetically the mood of your colonists. Some can be more [[Traits#General_Traits|demanding]] and may specify their desire in their needs tab. There are three different categories which improve based on the material used: | Feature that targets aesthetically the mood of your colonists. Some can be more [[Traits#General_Traits|demanding]] and may specify their desire in their needs tab. There are three different categories which improve based on the material used: | ||
| − | * Furniture: Plant | + | * Furniture: [[Plant pot]]s, can be placed anywhere and requires a [[Skills#Growing|gardener]] to fill the pot, who may enter rooms without care if occupants are sleeping, interrupting their rest. |
| − | * Flooring: can be laid on any ground except water. Gives movement bonus and | + | * Flooring: can be laid on any ground except water. Gives movement bonus and most are non-flammable (except wood floors and carpets). Requires a considerable amount of material, except when smoothing rough stone areas. Player can gain access to carpets after researching [[Research|carpet making]] and harvesting cotton which demands plantation wait. There's also stone flooring by using bricks cut at the stonecutter's table meaning a prior step and hauling pick ups. |
| − | |||
| − | |||
| + | * Sculptures crafted at a [[sculptor's table]]. The artist's [[Skills#Crafting|crafting skill]] will determine the resulting outcome of beauty, not always providing a positive effect, the used material will also factor in. Since sculptures attract viewers, they are convenient when installed on public spaces rather than bedrooms. | ||
== Other Guides == | == Other Guides == | ||
*[[Intermediate Midgame Guide]] - continuing expansion of your base | *[[Intermediate Midgame Guide]] - continuing expansion of your base | ||
| + | |||
| + | |||
| + | {{nav/guides}} | ||
| + | [[Category:Gameplay]] | ||
Revision as of 10:26, 6 August 2017
|
Tutorial

The tutorial teaches the basics by highlights including: game set up, short walkthrough about building a small colony and defeating the first raider. At the end, the player can continue the same game after choosing a storyteller. This feature was added in Alpha 16.
While the tutorial mode teaches you the basics, this article provides more insight while still not getting into depth.
Learning helper
Besides this, there is also a learning helper in-game which will teach players on various concepts.
The basics
This page excludes content addressed elsewhere such as Game creation, Scenario system, AI Storytellers, World generation and Biomes. Instead, it focusing on basic topics like: Prisoners, hunting, trade, animal taming and much more.
This page also assumes you play using the original Crashlanded scenario. If you intend on playing other default scenarios, you may want to check the other guides.
New colony

Main menu

Scenario Selection

Storyteller Selection

World Generation
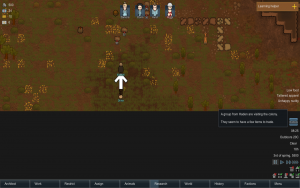
Landing Selection


For your first time playing it is strongly suggested that you:
- Pick the standard Crashlanded scenario since it is what most tutorials/information are geared towards.
- Select the storyteller Cassandra Classic or Phoebe Chillax on Base Builder or Some Challenge difficulty.
- Alternatively, you may pick Peaceful but you may lose out on learning how to deal with major threats.
- Pick your landing site by clicking on the generated map.
- For biomes, choose Temperate Forest or Arid Shrubland, this will give you a comfortable location to learn the game and food will not be a factor unless during events.
- For climate, choose an area where the growing season is 'Year-round', that way you can grow crops year-round. Temperature won't grow low enough to be a threat, though in summer be prepared to face some serious heat.
- For terrain, choose Flat or Small Hills, this gives you enough area to expand later on.
Colonist Selection
You will start with three colonists, picks are randomized and cannot be fully customized by the player`s will. There are a few aspects worth taking into consideration:
- Look into their inabilities:
- Colonists who are incapable of violence, will not be able to fight incoming threats.
- Colonists who are incapable of dumb labor will not willingly haul, clean or cut plants. Hauling and cleaning are especially important early-game jobs.
- Look into their traits.
- Some are extremely toxic:
- Abrasive will tend to insult others and start fights.
- Chemical interest/fascination will often go on drug binges if provided.
- Volatile colonists go into mental breaks very easily when their mood is low.
- Pyromaniacs will start fires randomly, doing so more often when stressed.
- Some other traits are not as bad but are still worth watching out:
- Prosthophobes will reject any form of bionic enhancement.
- Some traits bring both benefit and harm:
- Trigger-happy colonists fire faster but are less accurate.
- Neurotic colonists work faster but also more prone to breakdown.
- Some are extremely toxic:
- Watch their health conditions.
- Older characters are more prone to chronic conditions, gain immunity slower (meaning higher chance of death by illness) and can randomly have heart attacks.
- Asthmatic characters will require constant medical attention.
- Drug addicts require drugs to keep them in check, or will lapse into withdrawal.
- With multiple withdrawals the colonist may fall unconscious, and stay down for a long time.
- Artery blockage means you have a deadline to get a replacement heart for that colonist before their heart stops working and they die.
- Rarely it is possible for a colonist to be incapacitated from the start.
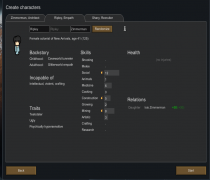
Colonist #1 incapable of violence.
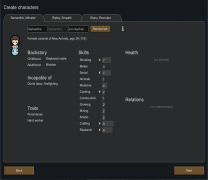
Colonist #2 is a pyromaniac.
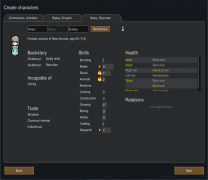
Colonist #3 with health issues.


Aim to get all three colonists who combined are incapable of none. Additionally, at least one colonist should be proficient in the following skills (you are aiming for 5+ skills with passion, max is 20):
- Social - Recruiting new colonists and improving trade deals
- Medicine - Healing the colonists you have
- Cooking - Making food
- Construction - Building
- Growing - Growing/harvesting food
- Mining - Hollowing out mountains/hills and mining for mineral resources
- Crafting - Creating clothing, weapons and other trade goods
- Research - Advancing your technology
Additionally, characters have Passions which are represented by fire icons (single and double) meaning that will learn such skill faster. Colonists with one flame learn the skill at 100% speed, while those with two learn it at 150%.
But do not worry too much about traits as characters will evolve their levels within time (they are not fixed values) base on the orders you give to them. And others will be joining soon!
At the beginning
Starter weapons

The tutorial forces the player to assign weapons to colonist randomly without analyzing their character profile. But there are basically two type of fighters: ranged and melee. Giving characters the wrong type of weapon can cause negative mood and at the same time, lose efficiency as a whole. So please, sort compatibility.
Choose the colonist with the highest melee skill and give them the knife, the colonist with the highest shooting skill should be given the bolt-action rifle and the remaining colonist the pistol. Give every colonist a weapon even if that means giving a brawler a ranged weapon, you can make them a shiv later but everybody should be armed.
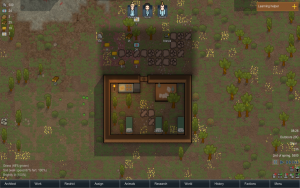
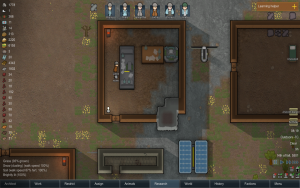
Making a home

In the tutorial you are taught to build your early home at the center of the map, to fasten the lecture. This makes sense since its around the area where the starter items dropped, building home too far away will increase the travel distance from pick-up point to blueprint area. Still, look around near to where you land, any pre-constructed structures will speed your set up (just fill in the gaps). And don't forget to place an animal sleeping spot indoors as well, if they sleep outdoors they run the risk of predator attack and exposure to dangerous weather.
Work
Colonists will have default settings and for a while you will see them "occupied", however soon you will notice that some are just "wandering" around or complete idle. This is because there's need of adjustments within their tasks.
To improve their cooperation, open the Work tab at the bottom. Tick green on each character when possible to give them additional tasks or free them from others, colonists will prioritize from left to right as indicated. However this system is somehow precaic. Toggle to "Manual priorities" by clicking the red cross for the green tick.

This will give you 5 degrees of priority for each task: 1 (higher) - 4 (lower) + unassigned.
Example behavior:
- Samantha will proceed by: Patient, Doctor, Bed rest, Warden, Cook, Research then follow by Construct, Grow continue with Smith, Tailor, Craft and finally Hunt. This is so long as once a task is completed, there isn't any other with tiger priority in need of taking care. This means that if the player sees her growing crops and more blueprints are laid, but at the same time there`s a cooking bill; she will cook first before constructing.
This is because all tasks are weighted left to right, even while marking everything with 1. You break the priority assignment with different values. A colonist will look at all level 1 tasks, left to right, to see if any need accomplishing. If the colonist cannot find a level 1 task that needs accomplishing, he/she will move onto any level 2 tasks, then 3, then 4. They will never work on any task that is unnumbered.
While setting up a colonists work priorities there are two visual cues that help give you an idea of this colonists suitability for the task:
- The first is the box outline itself for the number becomes brighter the more proficient a colonist is at the task.
- The second cue, are the small fire marks in the bottom corner of a task box which denote the colonists passion for the task, or how quickly they will learn it. A colonist with no passion learns at 33%, with a single passion at 100%, and with a double passion at 150%. Consider making colonists with low skill but high passions work their preferred task as they will skill up quickly.
Stockpiles

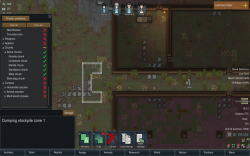
There are two types of stockpiles, the common Stockpile and the Dumping Stockpile. They work similarly but have different uses, the first for wanted goods and the later for unwanted junk.
Since we are starting from the ground, a common stockpile for materials like wood will make building an entire colony faster if the needed resources are already stored at one single place rather scattered around the map. While laying down the blueprints, its faster if at the same time, all trees and bushes are assigned to be chopped, harvested and cut to clear the ground for easier construction while leaving all the wood close by. To ensure this last step, designate already the same space for common stockpile. Have in mind that roofs can extend up to 6 tiles away from a wall (7 including the wall roof itself), any area larger than that will need columns to sustain an extensive roof.
Items left out in the open will deteriorate due to exposure so it is in your best interest to haul them in as soon as possible. Make sure to check what items you want in each storage room by settings accordingly. Later on you can repeat this same process to build other storages exclusive for weapons and armor, raw materials, trade goods, etc. You can also rename each area by clicking the highlight on the ground.
The dumping stockpile is not crucial at the beginning and it's better to spend the first days with other aspects of the game that are more pressing matters.
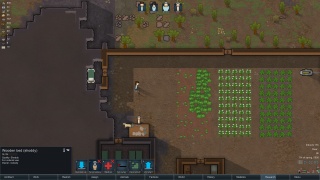
Harvest and Plantation

After settling a temporal home, the next concern is food. You will need two things: the food itself and a storage. Everything within the proximities, select the order to harvest and drag the mouse to assign an area for search, the game will automatically task grown bushes with fruits to collect their berries. This is just to ensure easy access on nutrition. Now you must have a place to store the gatherings. Either storage of food or materials will become frequently accessed spots so placing them in the heart of your colony will reduce hauling distance and speed.
The food storage may need expansion later on so leave one of its side areas free for the future. Ideally it is convenient if the storage is attached to your future kitchen, so building a next room for the fueled stove and butcher table is wise. As well as using another side of the storage for the dinning room where you can place tables and chairs.
With the storage free of space and a kitchen ready to cook, now its a good time to start building farms. There are three basic foods you can plant: rice, potatoes and corn. Rice grows quickly but is nutrient weak, corn grows slowly but is nutrient dense; and potatoes are the middle ground. You may as well plant cotton for clothing and, if you have a colonist with farming skill at 8 or above, you should also start growing healroot. It is the early variant of medicine that your colonists can use to heal each other.
When selecting locations to build your farms, consider proximity to the food storage for convenience.
Building a Freezer
You may or may not have noticed by now a notification message at the top saying "X" food has rotted away in storage.
This is because food needs to be refrigerated. To upgrade your colony, you will need access to power to produce Electricity and build coolers. There`s a variety of original ideas when designing power grid planning, but basically constructing these devices require components that can be mined, traded, manufactured and salvaged from ship chunks. In the early game, you may have limited supplies so treat them as delicate devices. This means, do not place them on your outline leaving them exposed to attack, watch for fire alarms and stop shooting in their direction.
The power source, be it Fueled generator, Solar generator or Wind turbine, all possess their pros and cons, but must be connected via Power conduits to the Coolers themselves. The coolers have directions, blue indicates cold and red means heat, so make sure you rotate blue towards the inside. Once you have done that, the device is set up.
The default temperature is always 21 Celsius but that won't help, so use the buttons to adjust. The cooler will attempt to reach your designated value, but it all depends in details such as not leaving unroofed areas and the room size itself. Sometimes one cooler alone is not enough. So always hover your mouse to check if the desired temperature has been achieved. In winter you can also completely turn coolers off and in extreme summers you may need to build additional units.
Notification: Food has rotted away in storage
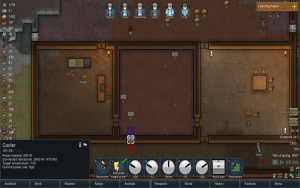
Cooler settings


Joy
If you are coming from the Tutorial, you will already have your horseshoe pin, if not, build one and that will clear the notification list on the right. Joy counters stress and as you progress through the rise of your colony continue upgrading their entertainment by adding other items such as chess table (with dinning chairs) and billiards table. Note that joy is also performed by other actions that do not require you to construct anything, see activities.
When you construct a horseshoes pin, place it somewhere you can keep watch so as to not risk a surprise attack. Later on, with more colonists and resources, you can move it inside to make a rec room.
Basic Defense
The game will prompt the notification of "Need defenses" early on, probably at the same time you are still building the basic rooms (storage, kitchen, dinning room, quarters) while still haven't started cutting stones. So you would be counting on wood and steel mainly. If you just want to turn off the message, setting up sandbags will do. Pause the game and take a wide large view of the entire map. It will be unlikely to have enemies arrive through mountains or sea and large forest areas abundant of trees will slow down any intruder. Watch taking into account your colony`s rooms plan to find vulnerable areas and construct your first sandbags. You don`t need to make a 25 tiles line, steel doesn't come as easy as wood.
There are two other cheap alternatives for early game stage that are walls and an imitation of wall made of chunks placed next to each other by designing a dumping stockpile with the shape of a base defense. Must set the priority to at least Preferred, this way, designated chunks will be hauled to your defenses first before placed into your general dumping stockpile zone. It`s easier to build walls between mountains as they serve as choke points.
Primitive base defense of chunks

Place deadfall traps in locations where hostiles would most likely come by intentionally creating bottle neck corridors as well.
- In the future, if you do happen to get attacked, it`s best if you don`t kill the hostile so that you can make him/her a prisoner for sale as slave or recruit for your colony. Once the enemy has been weakened sufficiently, continue your self-defense with fists or blunt weapons only to maximize chance of downing rather than killing.
Research
- If coming from the Tutorial, you already have a Research bench placed within the barracks and next to the Fueled stove.
- If you skipped the Tutorial and started right away, its best if you can place beds, build the kitchen and the research lab, all three in different rooms. Beds can be reinstalled elsewhere but not the fueled stove or the desk.
Tutorial ending
Research lab


Raids
- If coming from the Tutorial, you already faced this threat.
- If playing without the Tutorial...
It will not take long for your first raid. Typically it is a single individual armed with a melee weapon. He may or may not immediately attack. Draft your men behind cover, be it chunks, trees, walls or sandbags and make sure they are next to each other by positioning them with multi-selection (see Friendly fire safe in the in game help).

As it was mentioned earlier in the above section, you're lucky if you downed the hostile without killing him/her as you can make a prisoner and recruit, sell or harvest organs if you are willing to. If he/she is still alive, quickly convert your barrack or other spare rooms if available to a Prison and choose Capture on the intruder. If needed, immediately heal wounds by prioritizing a doctor.
If the hostile died, either:
- Bury in a grave by making a cemetery.
- Place in a dumping stockpile (away from your base to prevent mood debuffs).
- Eat them (mood + relation penalty for non-cannibals).
- Use them for animal feed.
Doctoring
If a colonist is injured or sick, doctors will treat them.
On the patient's Health tab, overview you will be able to choose which type of medical care will be provided, there are 5 options: No Care, Doctor Care, Herbal Medicine, Normal Medicine or Best Quality.
When the need to combat comes, if possible, try not to take the most skillful doctor to battle as you may end up with no one able to treat the wounded afterwards.
Spare Room

- If coming from the Tutorial like written just above, you had to convert your barracks into an improvised infirmary. You can now choose to either build private rooms for each colonist or just a single room to turn into Prison or Hospital for the recently captured/rescued.
- If playing a normal new game, the timing of your first incoming raid will vary and you may as well get an Escape pod event beforehand.
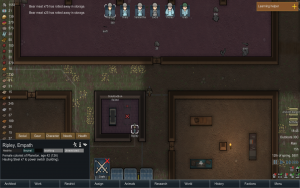
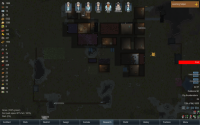
There are many occurrences that can threaten your colony, be it accidents, illnesses, manhunter packs, etc. And by the time a negative incident takes place, it might be too late to start building up an emergency room. So its wise to construct a spare room with beds which can be switched to either Hospital or Prison. If time and resources allow, having medical supplies nearby may mean the difference between life and death for the patient. If possible, ensure the surrounding area has a clear free path towards the room without much obstacles in the way. Like mentioned earlier, this facility located at the heart of the colony may be a good choice too as incidents can take place at map corners and having to rush across the entire land while bleeding may prove fatal.
New colony members

Your character roster can be increased in many ways.
- Recruiting captured prisoners: As mentioned, if you already performed the first steps, capturing alone does not mean that person will join you right away after he/she has healed. You will have to recruit that pawn. In order to accomplish that, you will need to send someone to talk to that person and convince him/her to join, it may take several attempts. It will be easier if the wanted pawn receives proper medical care, is fed, feels as comfortable and happy as possible, and you use your best wardens to recruit them.
- You can also try to take downed friendlies but this will cause the faction to turn hostile. If you care about relations it's best that you rescue them instead, this gives a +15 relations boost for every rescued person.
- Slave purchase: Slaves are easier as you won`t need to recruit them, they will join you immediately after purchase from pirate merchants, which ain't cheap... Their price depends on their skills and health.
- Wanderer joins: This one is the luckiest you can get. A stranger will just join without need of recruit or purchase.
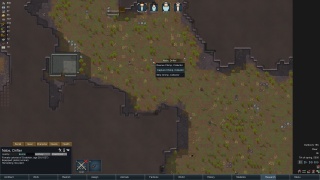
- Chased refugee: A refugee being chased asks for asylum. Like the Wanderer Joins event, colonists joining this way immediately become available to the colony. However, very soon after the new colonist arrives, a raid will follow. You will have to fight off the incoming raid, possibly putting more colonists at risk, but at the same time gives the opportunity to capture more prisoners. You can see the kind of person they are (i.e. adult backstory, or child if under 20), and reject the offer if you know the colonist is not much use or you can't risk a raid.
- Escape pod survivor: As mentioned, this one will mean that you have to rush someone for rescue. The main difference between crash-landed characters like yours and escape pod survivors is that you arrived intact, will in this case, the pawn will arrive unconscious and critically hurt. If you aren't quick enough and their injuries aren't severe, they might be able to recover and walk off the map.
1: Notification window.
2: Rush to Capture.
3: Urgently assign another pawn to build a bed (room not a must)

4: Turn bed into Prison bed.

5: Heal the wounds so it survives


The gallery above was edited so text can be read as you hover your mouse pointer over the pictures.
Basically, the main difference between a raid capture and an escape pod survivor, is that the later one falls elsewhere while the raider comes towards you, "healthy" at first. Note that in this example, instead of building a whole new room, if you happen to have a mountain nearby, caving in saves work to do.
Careful when you assign a rusher to get the escape pod survivor as selecting "Rescue" has a chance that the survivor does not join, instead leaving the map once his injuries are healed. This is more likely to happen when you have more colonists. If they join, however, they do so immediately without needing to go through recruitment. If the pawn is not of your liking, just let go. But if you intend to keep them, then you must Capture, which means double the work for you to do that could have been simplified if Captured at first action.
Capturing also has the advantage of allowing wardens to practice social; if you don't want them to recruit the survivor simply set Interaction to 'Friendly chat', and let them go when you are satisfied with the results.
Animals

Either from the Tutorial or a new game in Crashlanded, you will be starting with an already tamed animal. In the main Animal tab, you will see their training selection, who interacts with and their zones. You need to turn the red crosses into green ticks so that the characters assigned to Handle will teach them valuable skills such as Rescue and Haul. Then the zones you assign them to wander around are important. Depending on the type of animal you get, some can handle themselves in the wild while other are better taken care of at home.
You can keep expanding your roster by taming more species or trading with Bulk Goods Traders, they come in with already tamed and ready to train animals.
Predators may be roaming nearby, these mid-large size carnivorous animals will not pose any immediate threat and its best to just let them be, unless of course, you or your pets get attacked. So always keep watch of your surroundings and their proximity range. Their "Needs" tab will show a Food meter, and if you see them getting empty, that's when they will be likely to go for prey.
Taming
To tame an animal, simply select the animal, then hit 'Tame'. Your colonists will automatically go and tame the animal using food to attract them into joining your colony, thus it's not recommended to tame any animals until you have a stable food supply.
There are a wide variety of animals you can tame. Some animals can be trained into ferocious attack beasts or beasts of burden, while others can be farmed to produce milk or wool.
If you plan on taming them then you might want to check their Information for their Wildness, which determines how hard it is for that animal to be tamed. Some of them, while being attractive in stats, are very hard to tame. You should also check their diet; herbivorous animals can graze, meaning you won't need to feed them much (though training still needs food), while carnivores will need to be fed, or hunt on their own.
Muffalo are a good starter animal to tame; they produce wool (albeit very slowly) and milk, hit quite hard, and are fairly easy to tame with a wildness of only 50%. Later on they will also be extremely useful in caravans, but you needn't worry about that now. Wild boars are a good choice if you need expendable battle animals; they do good damage, are quick and agile, breed fast and eats nearly anything. They can even be trained into hauling animals
Trading
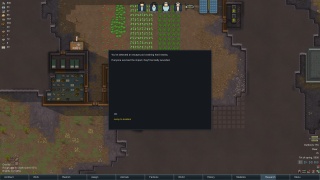
Soon you will be visited by other Factions. Once they arrive to your colony, pick the colonist with the highest Social skill you have among your members and send him/her to open trade by right clicking the one with the '?' sign above their head.
Interact with the one with (?) to open the trade window.
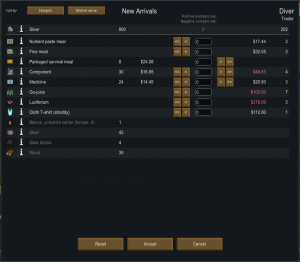
First interaction with others.


Power

Since we already start with knowledge of Electricity, access to power is available so long as there's abundance in materials required, steel and components.
- Fueled generator requires wood and refueling on regular basis (make sure to roof).
- Solar panel produces energy with sunlight.
- Wind turbine provides energy so long as there`s wind blowing. Requires adequate clear space to run properly. No trees, walls, mountains, etc in their way. They can go over solar panels and fields though, so you can tightly pack three solar panels under a wind turbine if you chose.
- Geothermal generator, available later in game generates through steam and must be placed Both require batteries to ensure 100% uptime.
- Batteries store energy when there`s shortage (make sure to roof). Batteries run malfunction danger due to short circuits unless isolated by a power switch.
All these devices must be connected through power conduits to the electronics you wish to run.
Personal Quarters
Barracks can give your colonists a heavy mood debuff. A barracks by default gives a -5 mood difference when compared with personal bedrooms of the same quality. They also get the Disturbed Sleep debuff very easily, which stacks up to 4 times to give a -6 penalty. Thus, if you have a good colony up and running, and taken care of everything else, you should think about giving your colonist their own bedroom.
Even an awful bedroom is better than all but the most deluxe barracks, and also makes it harder for you colonists' sleep to be interrupted. For starters, even a basic room with a bed will do. Upgrading it should be a later task done after you've got a proper colony up and running.
Cleaning

In time, dirt is going to build up based on the frequency a room is accessed. This will cause your colonists a mood debuff. Hospital rooms that became dirty by the time a surgery takes place, will likely result in fail operations.
To clean an area, toggle the environmental display at the bottom right of the screen, wherever your cursor points to will generate a radius display. Negative values in red indicate presence of dirt and makes it easy to point specific locations for your colonist to be assigned the task. A window will inform the nature and origin of the dirt plus stack values when piled up.
Intermediate Early Stage
This means that by now you have:
- Food stored to at least feed your colonist during winter when crops do not grow.
- Each colonist have their own room.
- You built a kitchen with dinning room (tables and chairs).
- You got to a point where life threat is external rather internal.
Basic Defense
For a more in-depth guide see Defense tactics.
Always consider your defenses BEFORE you need them. Nothing is instant in Rimworld, so trying to scramble something last minute will be difficult, if you aren't dead already from lack of preparation.
Simple Wall
In the easiest difficulties games, such as Peaceful, raids will be mostly single enemies attacking your colony. To the point that they do not become a considerable threat. For instance, predators attacks are more dangerous than raiders because the first have the "surprise" element while incoming rival factions come to invade with "announcement" (you get a red envelope message to the right of the screen), so you have some minimal time to prepare yourself, at least positioning.
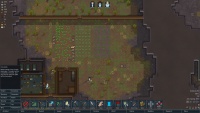
What needs to be understood about Defenses is that enemies will not bust open your doors but infiltrate from wall openings. So its easy to trick the hostile AI pawns by laying Deadfall traps where areas walls are not built (either because it wasn't worth it or you just can't rise them over water).

It's easier to build walls by filling in the gaps between mountain and old ruins. Walls will be of better use to protect your plantations from herbivorous animals and any other locations where your pawns tend to walk around the limits of your colony to avoid said predator attacks.
Make sure you clear your Home zone (the blue one) so that pawns do not go beyond the wall by selecting Architect > Zone/Area > Clear allowed area > Home.
Training your fighters
While engaging hostile targets grants combat skills much faster, you may still want to practice defense and combat skills a bit with something else.
Hopefully you didn't had the need to survive winter by hunting only due to lack of berries or crops. Assuming you already manage to somehow settle, by now you should be with your first three starter characters and maybe some more who joined you along the course of time, still most likely your colony will be rather a militia than an army.
If you didn't realize yet, characters can progress their skills except for those who are incapable of at certain categories. It's best if those who can Hunt, can be trained to reach at least level 10, same for melee fighters as well. What counts towards their learning is "practice", which means to let your pawns to shoot many times or swing their weapons many times. For shooters, the smaller the target, the harder to hit. Which is wise and convenient, since your colony is still small, untrained and maybe you leave someone good in Doctoring behind to tend the wounded later, it would be too dangerous to risk your men against large animals that could leave your people with permanent health problems.
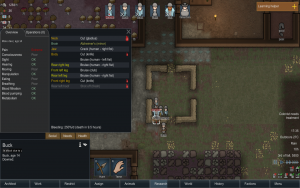
Friendly fire safety tactic vs mad animal, once downed melees can practice some swinging.
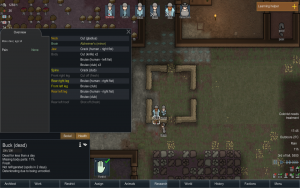
Mad animal finished off by melee fighters only.


Friendly fire safety tactic, as taught at the "learning helper" on the top right of the screen is a good start, basically your ranged characters will be shooting over the shoulders of their melee friends who will be guarding them when hostiles reach their position. But of course, melee characters don't need to wait until enraged animals get close. After shooters have downed a target, instead of making the shooters to keep firing, just order the melee to finish them, and practice more swinging. Remember to tell the shooters to stop firing.
Don't waste your practiced target (unforbid their corpses), and deliver them to your butcher to take as much as possible meat and fur from them.
Shooting skill leveling
You can make your characters improve their shooting ability by making them practice at rocks or walls as if they were dummies. Draft your shooter to a location that doesn't have frequent passage of others, or is close enough to the target that the shooter will fire over passersby, and fire at rocks or walls by clicking "B", a red circle with your weapon icon will select the chosen target to fire at.
This grants Shooting XP gain at the same rate as shooting non-hostile animals, but requires constant attention while hunting doesn't. For faster XP gain, choose a fast-firing weapon such as your starter pistol.
Constructed walls can be shot at, this gives the benefit of allowing constructors to repair the walls for construction XP gain.

Hunting
You may need meat for food or fur for apparel. Consider you current situation and pick a target accordingly. Don't go against a Thrumbo with just 3 poorly equipped dudes. Of course, the smaller the target the lesser the gain, but it's still best to play it safe.
When you select animals to be hunted, the game will assign one pawn to go after it and considering your character may be unskilled, it's best if more than one can go hunt for the needed items. So instead of just assigning targets to hunt, use the alternative method of drafting multiple characters and then right click, the red cross equals the hunt task. This also allows you to use melee weapons, which have a much better chance at hitting and killing smaller animals (though more of a death wish against large ones).
Once you have hunted your prey, you will need a butcher table to process the corpse into edible meat and leather as well. Make sure to get the prey back home, as leaving it there too long may cause it to deteriorate and start rotting (at which point it's wasted), or be eaten by opportunistic predators.
On the other hand, predators like bears for example, feed on deer and since the body mass is large, its often left without getting completely eaten, you can pick the leftovers for yourself without risking manhunter revenge.

Meat can be cooked into fine meals in conjunction with plant-based foods. They are slightly more nourishing than simple meal and provide +5 mood which is good for lifting colonists' spirits, even well into the mid-game.
Leather provides better protection than cloth and almost the same as synthread, making it a decent replacement for your synthread starter clothes, which can only be obtained through trading.
Apparel

Either Tutorial or Crash-landed scenarios start with characters wearing Synthread gear which is resistant enough to last a year long before deteriorating, so it's not a high priority. For a pawn assigned to Tailor work swiftly, it's convenient if both the fabrics storage is somewhat close and with a next room designated to store finished wear. Characters react faster to available clothing if the product is listed in the items column instead of just laying by the bench.
Fire Handling
Fire can cause severe damage to your colony, specially if built mainly of wood, it can quickly spread through your base. Be watchful when Dry thunderstorms or flashstorms start to hit the ground. Rainy thunderstorms are less dangerous as the fires quickly get put out by the rain.
- One way to prevent a major catastrophe is by cutting the grass surrounding your structures. Note that this will take some time and you will have to redo it. You can also install stone floors if you want to prevent plants growth.
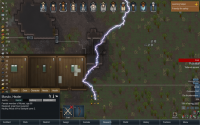
- Lightning strikes will continue as long as the storm last, and the first fires may hit far from home but not all of them, and since they will be hitting several spots. Regardless of how far they may be, it's still best to take care of them all as fire tends to expand very fast and by the time you realize, it may be very close already and so expense that it may be harder to deal with than when it started small. Contain the fire, by fighting the other fire extensions and aim to close towards the center rather than just putting it out from one side. As you combat this hazard, always keep watch at the rest of the map, it could very well be that another area was lit and its more threatening than your current spot. Rain may or not come afterwards, if it does, it will handle the rest for you but don't relay on luck, keep taking care of fire anyways. While fire fighting assigned colonist will try to do their tasks, the AI isn't wise enough to handle it and you will have to draft your pawns and manually assign their place. Do not wait until they wake up, interrupt their sleep or it will be too late.
Grass cutting to hold spree.
Dry thunderstorm.
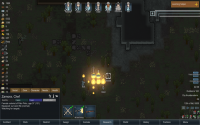
Fire control.
3 different spots on map.
Rain putting off fire.


Mining
Mining can be ignored at the very beginning of the game. However its still wise to pause the game at the start to take a careful look around the map by checking the borders of each mountain. Metals like Gold, Silver, Steel and Plasteel will turn very useful as well as Jade. While you need just wood to build most of your beginning improvisations, these materials are valuable enough to let you buy items that cannot be crafted by players and are only available from traders such as Medicine. You won't have much currency at first so these materials can come very handy. Compacted machinery provide components when mined out.
Click on the the ores and then press on Mine.

Compacted steel

Compacted machinery

Compacted plasteel

Gold ore

Silver ore

Jade


Temperature control
| This article is a stub. You can help RimWorld Wiki by expanding it. Reason: Please add a reason . |
Performing an operation
Normally you won't need to operate on someone that early in-game, but in case you do, you should always get prepared.
You will need a healthy high-skill surgeon, a clean room for your surgeons to operate, and decent-quality medicine. Herbal medicine won't do for any kind of surgery except if your surgeon has received mid-late game bionic enhancement.
Stonecutting
To cut stone blocks, you need a stonecutter's table and a craftsman. Each chunk provides 20 blocks, enough for 4 walls.
Stone blocks are fireproof, thus it becomes a favorite material to build external walls. It's safer too to consider any colonist with the pyromaniac trait, and prioritize to build it's most frequented locations with stone rather wood to reduce fire spread within the colony. For example, if you assigned your pyromaniac as chef, then make the kitchen from stone and wherever he/she goes on a binge, then it won't be such a threat.
Building stone structures is a key part of upgrading your base to becoming more durable. It is not essential to survival however, and is best done mid-game. Stone also has its shortcomings; stone structures take ages to build, and stone furniture is less comfortable. Unless you really need your beds or other furniture to be fireproof, build them out of wood instead.
Depending on your situation you may or not need stone blocks, however cutting stones can prove worthwhile if you start this practice from early days as later in game, you may need craftsman to make components, a material needed in abundance to build your spaceship and only character with crafting skill 10 or above can do so, and cutting stones can improve your craftsmen's crafting skill (albeit slowly). Having more than one person able to work at the component assembly bench 24/7 will considerably halve the time needed to complete the enterprise.
Quality Furniture
See also: Quality

While finished furniture provide their intended purpose, colonists take into consideration its beauty, which affects their mood. Once your characters achieve a high construction skill level, consider building better quality samples of the same item and replacing them based on their beauty superiority. Used furniture can be deconstructed to salvage materials or even sold through trade. Colonists rest faster in better beds.
Decoration
Feature that targets aesthetically the mood of your colonists. Some can be more demanding and may specify their desire in their needs tab. There are three different categories which improve based on the material used:
- Furniture: Plant pots, can be placed anywhere and requires a gardener to fill the pot, who may enter rooms without care if occupants are sleeping, interrupting their rest.
- Flooring: can be laid on any ground except water. Gives movement bonus and most are non-flammable (except wood floors and carpets). Requires a considerable amount of material, except when smoothing rough stone areas. Player can gain access to carpets after researching carpet making and harvesting cotton which demands plantation wait. There's also stone flooring by using bricks cut at the stonecutter's table meaning a prior step and hauling pick ups.
- Sculptures crafted at a sculptor's table. The artist's crafting skill will determine the resulting outcome of beauty, not always providing a positive effect, the used material will also factor in. Since sculptures attract viewers, they are convenient when installed on public spaces rather than bedrooms.
Other Guides
- Intermediate Midgame Guide - continuing expansion of your base
- Progression
- Quickstart Guides • Basics • Intermediate Midgame Guide • Advanced Endgame Guide • Ending the game
- Scenarios
- Lost Tribe Guide • Rich Explorer Guide • Naked Brutality Guide • The Mechanitor Guide

- Survival
- Extreme Heat Guide • Extreme Cold Guide • Extreme Desert Guide • Ice Sheet Guide • Sea Ice Guide • Events Guide
- Combat
- Defense tactics • Offense tactics • Weapon Guide
- Construction
- Colony Building Guide • Defense structures
- Production
- Food production • Money making guide
- Other
- Skill Training • Permadeath save conversion guide •
Ideology Min-Maxing